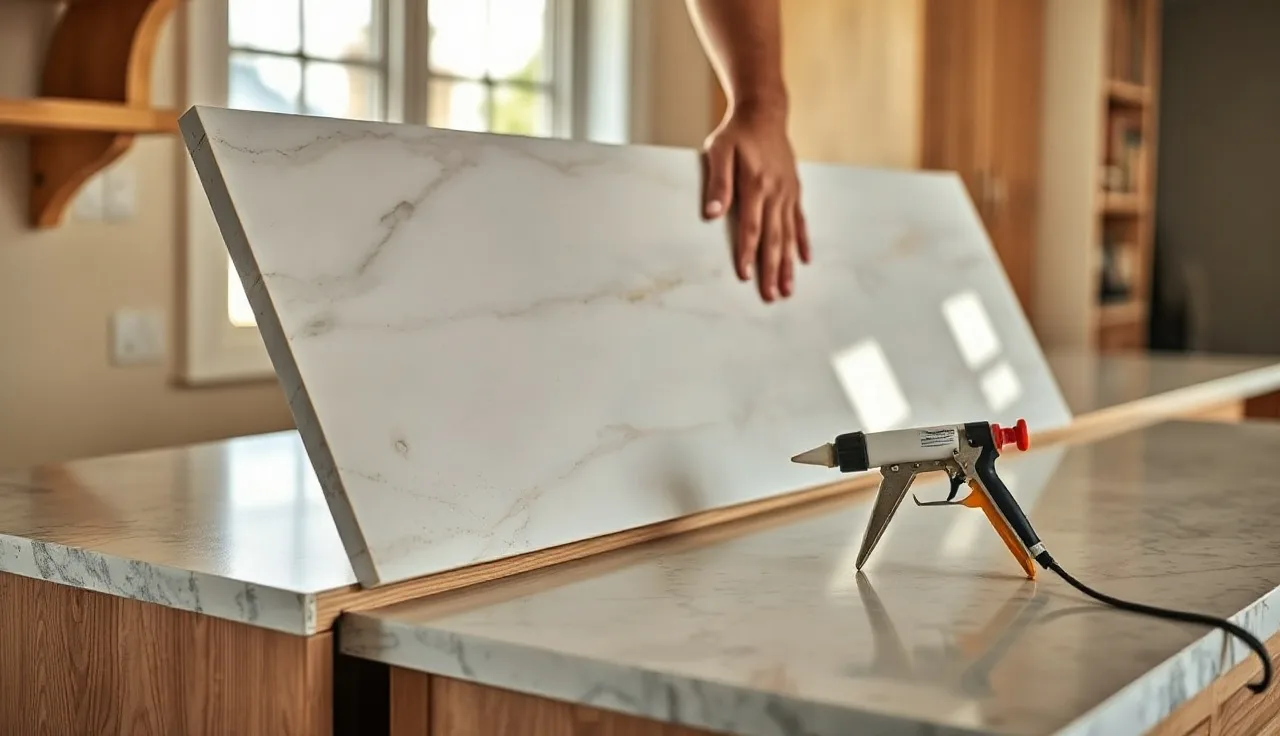
TL;DR
- Most countertops attach with a bead of 100% silicone run along the cabinet rails, sometimes backed up by clips or screws.
- Stone slabs rely almost entirely on silicone, because drilling into cabinets can crack the slab.
- Laminate uses corner-block screws.
- Butcher block needs figure-8 clips so the wood can move.
- Budget 30 to 90 minutes of work plus 24 hours of cure before you load the joint.
What holds a countertop down, and why does the method matter?
A countertop is almost never bolted rigidly to a cabinet. That surprises people. The reason is movement. Wood swells and shrinks with humidity, stone is rigid but cabinets never are, and a hard mechanical lock between the two eventually cracks the slab or tears out the cabinet face. So the standard fix is a flexible adhesive, usually silicone, that lets the assembly breathe.
Three things decide the method: the countertop material, the cabinet substrate, and whether the top overhangs the cabinet more than about 6 inches. Get any one wrong and you get a cracked slab, a top that slides under load, or a joint that yawns open in two years.
For fabricators, the method also drives turnaround. A silicone-only install on stone runs about 20 minutes on site. A mechanical clip system on laminate can take twice that if the boxes need shimming. Neither wins every job. Pick the one that fits.
What tools and materials do you need before you start?
Get everything onto the cabinet before the countertop arrives. Once a 200-pound granite slab is sitting there, you do not want to be hunting for a tube of silicone with your knees shaking.
A silicone-based install needs 100% silicone caulk (not "siliconized latex," which skins over before you can set the slab), a caulk gun, isopropyl alcohol to clean the rails, painter's tape to catch squeeze-out, and a rubber mallet to nudge the slab home.
A laminate or butcher block install with fasteners adds a drill, mounting clips (figure-8 fasteners or metal Z-clips), #8 or #10 wood screws, and a router or jigsaw if you are scribing to a crooked wall. Some laminate jobs also want contact cement or construction adhesive at the backsplash.
Stone gets two or three suction-cup handles rated for at least 150 lbs each. You will thank yourself. Moving a slab without them is how people herniate disks and chip corners. OSHA lists manual handling of heavy loads as a leading cause of musculoskeletal injury and recommends mechanical aids and two-person lifts. [8]
Shims. Always have shims. Cabinets in real houses are almost never level over a 10-foot run. A 1/8-inch dip in the middle means your slab rocks, and a rocking slab cracks at the low point. [1]
How do you attach a stone countertop (granite, quartz, or marble)?
Every stone top attaches the same basic way. Granite, marble, engineered quartz like Cambria, quartzite: silicone on the cabinet rails, full stop. No screws through the slab. No clips clamped to the stone edge (those are for undermount sinks, not for attachment).
Step 1: Level the cabinets. Lay a 4-foot level across the tops in every direction. Shim the low spots until the variation across the whole run is under 1/8 inch. Skip this and any future crack lands on the installer, so if the customer refuses the shimming time, put it in writing before the slab goes down.
Step 2: Dry fit. Set the slab with no adhesive. Check the reveal at the walls, the front overhang, and the sink cutout. Make every adjustment now.
Step 3: Clean the rails with isopropyl alcohol and let them dry. A greasy rail means the silicone fails at the bond line inside a year.
Step 4: Run a 3/8-inch bead of 100% neutral-cure silicone across the top of every rail the slab will touch. Keep it about 1 inch back from the front edge so squeeze-out stays hidden.
Step 5: Set the slab with the suction handles. Lower it straight down. Sliding it forward from the back wall smears the bead into a useless streak. Have a second person guide the back edge.
Step 6: Leave it alone for 24 hours. Most silicones hit handling strength in about an hour, but full cure is 24 hours per the manufacturer data sheets. [2] A cast-iron pot at hour two is not a test. It is stress on an uncured joint.
Seams between two slabs get color-matched epoxy, not silicone. Silicone flexes, so a silicone seam would open under thermal cycling. Epoxy is rigid and bridges the two pieces into one. Doing a DIY stone install with a seam? Epoxy there too.
Overhangs past 10 to 12 inches need corbels or brackets. The Natural Stone Institute rule of thumb is that unsupported overhang should not exceed one-third of the slab depth. [1] A typical 26-inch-deep countertop can cantilever about 8 to 9 inches before it needs help.
How do you attach a laminate countertop?
Laminate is lighter than stone and fastens mechanically, which is how most installers do it: build-up strips, corner blocks, and screws driven up from inside the cabinet.
The particleboard substrate in a postform top is about 3/4 inch thick and takes a screw from below without complaint. Cabinet makers usually pre-notch the corner blocks for exactly this. You drive a screw up through the corner block into the underside of the top, and that pulls the top down onto the box. Use a screw no longer than the substrate is thick or you will punch through the surface and ruin the laminate. A 1-1/4 inch screw is safe for a 3/4-inch substrate over a 1/4-inch corner-block gap.
Laminate countertops with a separate backsplash strip want a bead of silicone between the backsplash and the deck before you press the backsplash to the wall. That keeps water out of the particleboard. Wet particleboard swells, and swollen particleboard pops its edge banding. This is the single most common laminate failure.
A postform top with a built-in cove backsplash gets caulked where the cove meets the wall, with matching-color caulk or clear silicone. Never leave that seam open.
Formica countertops install exactly the same way. Formica makes the laminate sheet, not the substrate, so the method follows the substrate, not the brand. Worth knowing on material selection: particleboard cores are regulated for formaldehyde emissions under EPA's TSCA Title VI. [6]
How do you attach a butcher block countertop, and why is it different?
Butcher block is wood, and wood moves. A solid maple or walnut top can expand and shrink as much as 1/4 inch across its width over a seasonal humidity swing across most of the continental U.S. [3] Screw that top down rigidly and the cabinet wins, the wood splits, and you own a ruined countertop.
The right method for butcher block countertops is figure-8 fasteners (also called desktop fasteners or tabletop clips). They are small metal clips shaped like the number 8, seated in a shallow mortise routed into the top edge of the cabinet side panel. One loop screws into the cabinet, the other into the underside of the top. The clip rotates a little as the wood moves, so the top slides instead of stressing.
Spacing: a clip every 18 to 24 inches along each run, alternating front and back rails. Do not glue the block to the cabinet. Seriously. Gluing solid wood to a fixed substrate is a reliable way to get checking (surface cracks) within a year.
The one exception is an end-grain insert under 18 inches wide, where the total movement is small enough that it may not matter. When in doubt, use clips.
A "laminate butcher block" (a wood-look laminate over a particleboard core, sold at big-box stores) does not move like solid wood. Attach it with standard corner-block screws, the same as any laminate. The wood pattern is decoration. The core is particleboard, so treat it like a laminate top.
Installing a solid block with a sink? Seal the area around the cutout with food-safe mineral oil or a penetrating oil finish before installation, and hit the underside especially. Once the sink is in, you cannot reach the underside to refinish it, and bare wood under a sink gets wet and rots. The USDA Forest Products Laboratory documents that unsealed wood absorbs moisture and degrades. [7]
Shop owners quoting butcher block: clip installation adds roughly 20 to 30 minutes per run over a plain screw-down, and figure-8 fasteners run about $8 to $12 for a pack of 20. Factor it in. Tools like SlabWise let you build labor line items into quotes so small time costs stop vanishing into overhead.
How do you attach a countertop to cabinets without screws?
You can do a permanent, functional install with silicone alone and zero screws. This is standard practice for stone and works fine for lighter materials too, as long as the silicone goes down clean.
The catch is lateral force. A silicone-only bond resists side loads less well than clips plus adhesive. If someone perches on the counter edge over and over (people do), a silicone-only laminate top can eventually shift. Stone is different. The weight of the slab itself resists movement, and a 200-pound granite top is not going anywhere on a cured bead.
For an adhesive-only install on laminate or wood, construction adhesive like Loctite PL Premium or Liquid Nails Heavy Duty holds, but you lose any chance of removing the top later without wrecking it. Loctite's own technical data notes that cured PL Premium bonds are hard to separate without damage. [10] Silicone is semi-removable with a thin pry bar and patience. Construction adhesive is not. If there is any chance you will reuse the cabinet boxes, use silicone.
No-screw installs also suit rental renovations, where the landlord does not want the boxes modified. Silicone works. Just clean the rails.
How do you handle overhangs, seams, and edge support?
Overhangs are where DIY installs blow up most often. A standard kitchen countertop overhangs the cabinet face about 1 to 1.5 inches. A seating bar overhang runs 12 to 15 inches per NKBA planning guidelines. [9] The physics change completely at that scale.
For stone, the Natural Stone Institute recommends holding unsupported overhang to roughly 10 to 12 inches, depending on slab thickness and material density, and adding corbels or continuous brackets beyond that. Space corbels no more than 24 inches apart, anchor them firmly to the cabinet or wall, and rate them for the load. Unsupported overhang is a documented cause of slab cracking. [1]
Seams need continuous support underneath. Never float a seam over an open span between cabinet boxes. There has to be a rail, a support board, or a stretcher directly under the joint. Without it, the two sides deflect at different rates and the stone cracks right at the epoxy line, usually the first time someone sets a heavy pot in the wrong spot.
Seam work during install goes like this: dry-fit, mark registration lines on the cabinet top, mix a two-part color-matched epoxy to the manufacturer ratio, set both pieces, and pull the joint flat and tight with seam-setter clamps. Clamps stay on until the epoxy gels, usually 20 to 40 minutes for a fast-set formula. Wipe squeeze-out before it hardens. Cured epoxy on polished stone needs a razor blade to lift cleanly.
How do you attach a countertop to a kitchen island?
Islands are trickier than perimeter runs for one reason. You can reach the cabinet underside from more angles, which helps, but there is usually no back wall to brace against, so the top can shift sideways if it gets bumped.
Stone on an island: run silicone on all four rails, then add a few drops of construction adhesive at the center of each rail alongside the perimeter bead. The construction adhesive sets stiff and resists lateral shift, while the silicone handles the perimeter. Common fabricator move, and it works.
Butcher block on an island: use figure-8 clips on all four rails, more than the two long sides. Wood movement on an island runs in every direction, so the clips have to accommodate it everywhere.
A waterfall edge (where the slab wraps down the side) gets a mitered joint bonded with epoxy where the vertical piece meets the top, plus silicone against the cabinet panel. Cut that miter dead-on and give the joint full epoxy coverage, because that corner eats side-impact from everyone walking past.
Anchor the island cabinet to the floor before you set the top. An unanchored island under a 150-pound stone slab is a tipping hazard, and codes based on the International Residential Code generally require islands and cabinets to be secured to the floor or wall. [4]
How do you remove and reinstall a countertop?
Pulling a silicone-set stone top is doable, but slow. Run a thin reciprocating blade or an oscillating multi-tool along the silicone joint at the rail. Go slow. The goal is to cut the bead without gouging the cabinet or the slab underside. Once the bead is cut, lift the slab straight up with suction handles. Do not pry from the edge. That chips corners.
If the slab was also bonded with construction adhesive, expect to damage the rails. You may have to plane or sand them flat before setting a new top.
Laminate tops on corner screws come off easy: back out the screws, lift. Tops glued with construction adhesive tend to take the top layer of the cabinet box with them.
Reinstalling the same stone slab works if it is in one piece and the cabinets are in the same layout. Scrape all old silicone off the rails and the slab underside (a single-edge razor and mineral spirits do it), let everything dry, then run a fresh silicone install as if it were new.
For countertop installation on a full replacement, the sequence is the same whether the old top was stone or laminate: remove old top, level cabinets, dry-fit, adhesive, set.
What does countertop attachment cost, and where does the money go?
If a fabricator handles the full install, labor to set a stone countertop runs roughly $200 to $600 for a typical kitchen, per contractor cost aggregators, though regional rates swing hard. [5] That covers template coordination, hauling the slab in, shimming, setting, and caulking. It does not cover the slab.
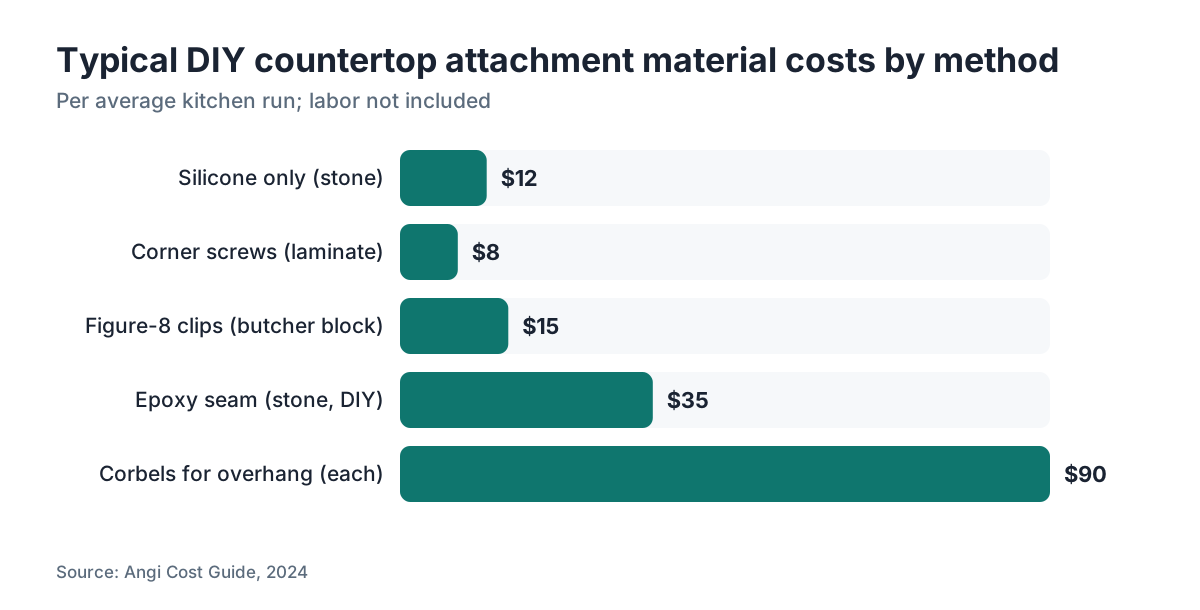
DIY material costs for attachment are low:
| Method | Materials cost (typical kitchen) | Skill required |
|---|---|---|
| Silicone only (stone) | $8 to $15 (two tubes) | Low |
| Corner screws (laminate) | $5 to $10 | Low |
| Figure-8 clips (butcher block) | $10 to $20 | Low to medium |
| Epoxy seam (stone, DIY) | $20 to $50 | High |
| Corbels for overhang | $30 to $150 per corbel | Medium |
The real money risk in a DIY stone install is not the silicone. It is dropping or cracking the slab while you move it. One broken granite slab runs $400 to $1,200 to replace, before you count the delay. Rent the suction handles ($30 to $50 a day at most tool-rental shops) and get a second set of hands.
Fabricators on quoting software like SlabWise can bake installation labor, materials, and overhang surcharges into the quote template so none of it slips through.
Common mistakes that cause countertop failures
Skipping the level check. This is the number one cause of stone cracks after install. A slab that rocks even slightly cracks at the low point after a few months of thermal cycling and normal load.
Using the wrong silicone. "Siliconized latex" and "paintable silicone" are not 100% silicone. They have lower elongation at break, so they split when the joint flexes. Get 100% silicone. Neutral-cure formulas skip the acetic-acid vinegar smell and sit better against porous stone and wood.
Gluing butcher block down solid. Covered already, worth repeating: rigid attachment of solid wood to a fixed substrate cracks it. Use clips.
Floating a seam over an open span. Also covered. Put a support rail directly under every stone seam.
Not cleaning the bond surface. Silicone grabs a clean rail far better than a dusty or oily one. Obvious, and skipped constantly on rushed jobs.
Over-tightening screws in laminate. Particleboard strips out fast. Snug is enough. If the screw spins free, the hole is already stripped. Fill it with a toothpick and wood glue, let it cure, re-drive.
Leaving the backsplash seam open. Water finds that gap. Every time. Caulk it.
Frequently asked questions
Can I attach a countertop with just silicone and no screws or clips?
Yes, and for stone it is the standard method. Silicone alone on a heavy slab holds fine, because the slab's own weight resists lateral movement. For lighter materials like laminate, silicone alone works for most residential kitchens, but mechanical clips add insurance against shifting over time. Use 100% silicone, not siliconized latex, which is too stiff to flex with the joint.
How long does silicone take to cure on a countertop install?
Most 100% silicone caulks reach handling strength in 30 to 60 minutes but are not fully cured for 24 hours. Keep heavy loads, pots, and appliances off the top for at least 24 hours after setting. Cure slows in cold or dry air. In a cold garage in winter, give it 48 hours before you trust the joint.
How do you attach a butcher block countertop to cabinets?
Use figure-8 fasteners (desktop clips) routed into the top edge of the cabinet side panels, one every 18 to 24 inches. One loop screws into the cabinet, the other into the underside of the block. The clip rotates slightly to allow seasonal wood movement. Never glue solid butcher block rigidly to the cabinet. The wood expands and shrinks with humidity and will crack if it is locked in place.
Do granite countertops need to be glued down?
Silicone adhesive on the cabinet rails is the standard method, and it is effectively a glue. You do not screw through granite. The bead goes on the rail tops, the slab drops onto it, and after 24 hours of cure the assembly is firmly bonded. The slab's weight plus the cured silicone holds everything in place under normal use loads.
What kind of silicone should I use to attach a countertop?
100% neutral-cure silicone. Look for that exact label. Skip siliconized latex caulk (not flexible enough) and acetoxy-cure silicones (they smell strongly of vinegar and can react with some stone). GE Advanced, Momentive RTV, and Dowsil 795 are common pro picks. Clear works for most installs. Color-matched options exist if the cabinet rail might show.
How much overhang can a countertop have without support?
For stone, the Natural Stone Institute recommends holding unsupported overhang to roughly 10 to 12 inches maximum, depending on slab thickness and material density. Beyond that, add corbels or continuous brackets. A standard seating overhang of 12 to 15 inches almost always needs support. Laminate and butcher block are lighter, but the cabinet box itself limits practical unsupported overhang.
How do you attach a countertop to an island without a wall?
Silicone on all four cabinet rails is the baseline. Many installers add two or three small dots of construction adhesive at the center of the rails alongside the perimeter bead. The adhesive sets rigid and resists lateral movement from impact. Anchor the island cabinet to the floor first. An unanchored island with a heavy stone top is a tipping hazard.
Can you reuse a granite countertop after removing it?
Yes, if it comes off in one piece. Cut the silicone bead with an oscillating multi-tool blade, lift straight up with suction handles, scrape the old silicone off the underside and the rails, and reinstall with fresh silicone. The slab needs to be in good shape with no flexural cracks. A slab bonded with construction adhesive is much harder to remove and often damages the rails.
What is the difference between a laminate butcher block countertop and a solid butcher block?
A laminate butcher block has a wood-look laminate surface over a particleboard core. It does not move seasonally the way real wood does, so you can attach it with standard corner screws like any laminate top. Solid butcher block is real edge-grain or end-grain wood and must go on figure-8 clips to allow seasonal movement. Mixing up the two methods causes real failures.
Do I need to use epoxy to attach stone countertop seams?
Yes, at the seam itself. Use a two-part color-matched epoxy, not silicone. Silicone flexes, so a silicone seam would open slightly with thermal cycling. Epoxy bonds the two pieces rigidly into one structural unit. You still use silicone between the slab and the cabinet rails. Epoxy is only for the slab-to-slab joint. Seam-setter clamps hold it flat while the epoxy gels, usually 20 to 40 minutes.
How do I attach a countertop to cabinets that are not perfectly level?
Shim the low spots before setting the top. Use composite plastic shims or folded cardboard for small gaps, wood shims for larger ones. Aim for less than 1/8-inch variation across the whole run. Once the shims are in and the top sits without rocking, apply silicone and set the slab. Never rely on the silicone bead to fill a large gap. It is an adhesive, not a filler.
How do you attach an undermount sink to a stone countertop?
Undermount sinks attach to the underside of the stone with epoxy or silicone plus mechanical clips, not to the cabinet. The standard method uses 5-minute epoxy in small dabs around the sink rim, pressed to the stone, then undermount clips that tighten from below with a machine screw to pull the rim up into the epoxy while it cures. The clips stay in place permanently after the epoxy sets.
What screws should I use to attach a laminate countertop?
Drive screws up through the corner blocks inside the cabinet box into the underside of the substrate. Use #8 or #10 coarse-thread screws, 1 to 1-1/4 inches long, so they do not go all the way through the 3/4-inch particleboard. Snug, not cranked tight. Particleboard strips easily, and an over-tightened screw is worse than no screw at all.
Is it safe to cut on a butcher block countertop right after installation?
Wait at least 24 hours so the silicone or clips settle. The bigger concern is the finish. A block sealed with food-grade mineral oil is ready as a cutting surface once the oil has cured per the manufacturer instructions, typically 24 to 72 hours after the final coat. A polyurethane-finished top is not safe for cutting directly on the surface at all.
Sources
- Natural Stone Institute, Technical Bulletins: Unsupported stone countertop overhangs should not exceed roughly one-third of slab depth; corbels required beyond 10-12 inches for most stone types
- Dow (Dowsil), Silicone Sealant Product Data Sheets: 100% silicone sealants typically reach handling strength in 30-60 minutes and full cure in 24 hours under standard conditions
- USDA Forest Service, Wood Handbook: Wood as an Engineering Material (Gen. Tech. Rep. FPL-GTR-282): Solid wood expands and contracts significantly with seasonal humidity changes; properly documented for hardwoods used in butcher block countertops
- International Residential Code (IRC), Section R301, International Code Council: Kitchen islands must be structurally secured; local building codes based on the IRC generally require cabinets and islands to be anchored to floor or wall
- HomeAdvisor (Angi), Countertop Installation Cost Guide: Labor to set a stone countertop runs roughly $200 to $600 for a typical kitchen, not including the slab material cost
- EPA, Formaldehyde Emissions from Composite Wood Products (TSCA Title VI): Particleboard substrates used in laminate countertops are regulated for formaldehyde emissions under TSCA Title VI; relevant to material selection in countertop installation
- USDA Forest Products Laboratory, Finishing of Wood (FPL-GTR-190): Penetrating oil finishes on wood countertops protect against moisture; unsealed wood under sinks is documented to absorb water and degrade
- Occupational Safety and Health Administration (OSHA), Materials Handling and Storage: Manual handling of heavy stone slabs (often 150-300 lbs) is a documented cause of musculoskeletal injury; proper equipment and two-person lifts recommended
- National Kitchen and Bath Association (NKBA), Kitchen Planning Guidelines: Standard countertop overhang is 1 to 1.5 inches over cabinet face; seating overhangs of 12 to 15 inches recommended for bar-height and counter-height seating
- Loctite (Henkel), PL Premium Construction Adhesive Technical Data Sheet: Construction adhesives used in countertop installation achieve strong bonds to wood substrates but are difficult to remove without damage once cured
Last updated 2026-07-09