TL;DR
- Installing countertops on cabinets means leveling the cabinet bases, shimming high or low spots, dry-fitting the slab, running silicone or adhesive, setting the top, and sealing the material.
- Stone slabs need two people minimum and a pro for anything over 50 pounds.
- Labor alone runs $10 to $30 per square foot, on top of material cost.
What does installing a countertop on cabinets actually involve?
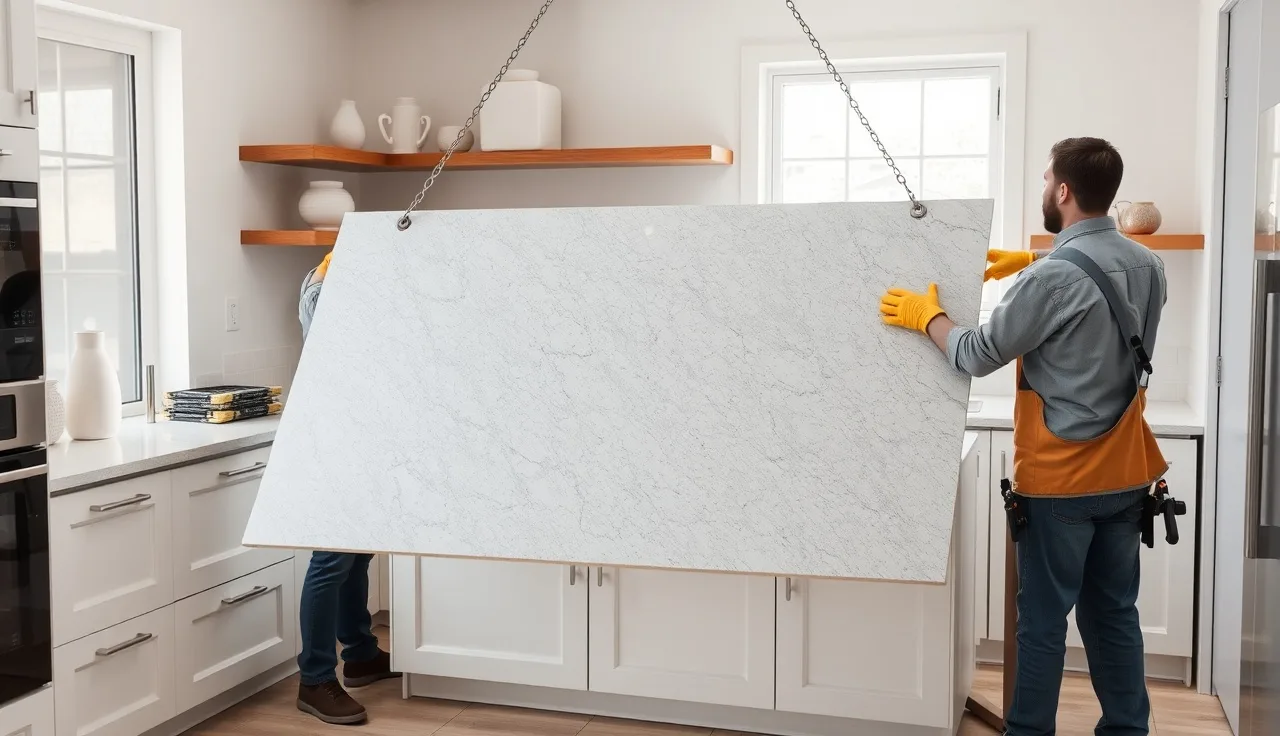
Most people picture two workers sliding a slab into place and calling it done. The real job has more steps, and the steps before the slab ever touches the cabinets decide whether the counter still looks right in five years.
The work breaks into five stages: cabinet prep, measuring and templating, fabrication (for stone and solid surface), dry-fit, and final set. Every stage has a way to go wrong. A cabinet that sits 1/4 inch out of level gives you a visible gap at the wall or a top that rocks. A template that is 1/8 inch off gives you a seam that will not close. Silicone laid on a dusty cabinet frame never cures right, and the top can drift out of position.
Material changes everything. Laminate countertops and butcher block countertops are light enough for a careful homeowner to install start to finish. Natural stone, engineered quartz, and marble countertops are heavy. Granite runs 18 to 20 pounds per square foot at 3 cm thickness [1], so a single 96-inch run can top 250 pounds. Those go to a pro.
Here is what surprises people: cabinets are almost never level out of the box. Shimming is normal, not a sign something went wrong. Budget 30 to 60 minutes for cabinet prep before you touch the countertop material.
How do you prepare cabinets before setting countertops?
Cabinet prep is where most DIY installs quietly fail. You need three things before anything else: a 4-foot level, a tape measure, and a pencil. Check every run front to back and side to side. Mark the high spots and the low spots.
High spots on the cabinet frame itself get sanded or planed down. Low spots get shimmed. Use composite shims in wet areas, never wood, because wood compresses and rots. The target is 1/8 inch across any 10-foot run, and tighter is always better.
Pull any cabinet doors that are in the way. Check that upper cabinet screws are not poking below the rail line where the countertop will sit. Vacuum the cabinet tops completely. Grit under a slab becomes a high spot, and under enough weight a high spot cracks stone.
In older homes, check whether the wall is plumb. Walls bow. A countertop set tight against a bowed wall will rock. You may need to scribe the backsplash edge or leave a gap and caulk it. A gap up to 1/4 inch at the wall is normal and disappears under caulk or backsplash tile. A gap wider than that means the template was wrong or the wall is badly out of plumb.
Replacing an existing top? Remove the old material first and inspect the cabinet tops for water damage, especially around the sink cutout. Swollen or soft particleboard has to be replaced before anything new goes on. Setting a heavy stone slab on rotted substrate is how you crack a slab and blow a day.
How much does countertop installation on cabinets cost?
Labor for countertop installation runs roughly $10 to $30 per square foot, depending on material, region, and complexity [2]. That is on top of the material. A 40-square-foot kitchen in a mid-cost metro lands around $400 to $1,200 in labor alone. Add a waterfall edge, multiple cutouts, or a curved island and you push to the top of that range or past it.
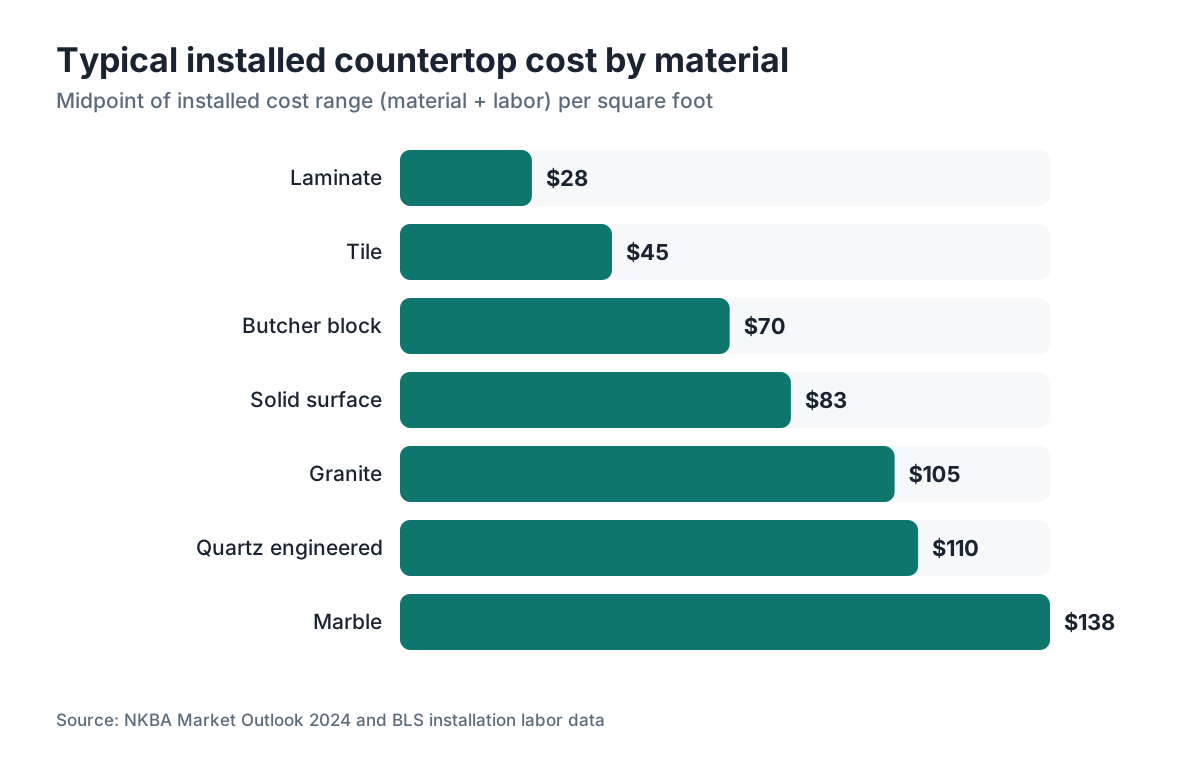
Material cost is the bigger swing:
| Material | Installed cost per sq ft (range) | DIY-friendly? |
|---|---|---|
| Laminate (post-form) | $15 to $40 | Yes |
| Butcher block | $40 to $100 | Yes, with care |
| Tile | $25 to $65 | Yes |
| Solid surface (Corian-type) | $45 to $120 | No |
| Quartz engineered | $70 to $150 | No |
| Granite | $60 to $150 | No |
| Marble | $75 to $200+ | No |
Those ranges come from a mix of national retail data and regional installer quotes. Your market may run 20 to 30 percent higher or lower. Urban California and New York sit at the high end. The rural Midwest sits low. Kitchen countertops as a category run around $3,000 to $5,000 total installed for a typical kitchen, per home improvement industry survey data [3].
Hidden costs catch people off guard. Demolition of the old top often runs $100 to $300. Disconnecting and reconnecting the sink plumbing adds $150 to $400. If the template shows the cabinets need releveling, that is extra time at shop or carpenter rates. Ask for an itemized quote, not a single lump number.
What is the right way to measure cabinets for new countertops?
Professional stone shops do not trust a tape measure alone. They template with digital tools, either laser scanners or physical templating systems, to capture the exact shape of the cabinet run: wall angles, inside corners, every irregularity [4]. For laminate and butcher block, a careful homeowner with a tape can get close, but a 1/16-inch error compounds fast across a long run.
Measure depth front to back in at least three spots per run. Cabinets are usually 24 inches deep, and the top overhangs the front by 1 to 1.5 inches, so total countertop depth lands at 25 to 25.5 inches for a standard install. Confirm that fits your appliances.
For length, measure wall to wall at countertop height, not at the floor. Walls are not always parallel. If a 10-foot run is 1/4 inch narrower at one end, the template has to account for it or you get a gap on one side.
Inside corners are the trap. A true 90-degree inside corner is rare in older construction. Use an angle finder or a framing square and write down any deviation. Stone fabricators cut to the actual angle. With laminate post-form you are stuck with what the manufacturer offers, so a corner well off 90 degrees means a gap you will caulk.
Mark every cutout on your template: sink, cooktop, outlets, USB ports. Measure from a fixed reference like the wall, not from the nearest cabinet edge, because cabinet edges are not always square to the wall.
How do you attach a countertop to cabinets, and what holds it in place?
The method depends on the material.
For stone (granite, quartz, marble, quartzite), gravity does most of the work. Slabs weigh enough that they do not need mechanical fasteners to stay put. Most fabricators run a bead of 100 percent silicone around the top of the cabinet frame and at any support points, then set the slab. The silicone is not structural. It seals the joint, keeps the top from shifting, and stops moisture from wicking underneath. It is not glue in the full sense. Need to remove a stone top later? A utility knife or thin pry tool breaks the silicone bead and the slab lifts free.
For laminate, the standard is screws driven up through the cabinet corner blocks or mounting strips into the countertop substrate. Use 1-1/4 inch or 1-1/2 inch drywall or cabinet screws, driven from underneath so they never break the surface. Do not overdrive them. Post-form laminate rides on particleboard, and particleboard strips easily.
For butcher block, construction adhesive or silicone plus screws through the corner blocks holds well. Wood moves with humidity, so skip rigid fasteners that fight seasonal movement. Run the long axis of the boards front to back so movement happens in the depth, not the length.
For solid surface like Corian countertops, the manufacturer usually specifies silicone or their own adhesive with a movement allowance, because solid surface also moves with temperature. Read the product spec sheet.
Seams between two stone pieces get joined with color-matched epoxy or polyester adhesive by the fabricator. That is not a field repair you want to improvise.
Can a homeowner install stone countertops on cabinets themselves?
For most people, honestly: no. Not safely.
A 3 cm granite slab at 18 to 20 pounds per square foot puts a standard 8-foot run near 200 pounds [1]. Moving that from a truck into the kitchen and setting it precisely takes at least two strong people, suction cup handles ($50 to $200 a pair to buy or rent), and a clear path. One slip and you have a cracked slab, a broken cabinet, or someone in the ER.
Weight is only half of it. Stone needs a professional diamond-blade wet saw for any cut. Freehand cuts chip the edge almost every time. The sink cutout is the danger zone. Amateur sink cutouts are one of the most common sources of cracks in new slabs.
The one stone option that is genuinely DIY-able is modular or prefabricated stone. It comes in standard sizes, usually 2-foot by 4-foot or 2-foot by 8-foot sections, at 2 cm thickness instead of 3 cm, so it weighs a lot less. Home improvement retailers stock it. The tradeoff is fewer edge options, more seams, and less variety in the material.
Laminate post-form, tile, and butcher block are a different story. A competent DIYer can handle those with standard tools. Laminate countertops are light, cut with a circular saw or jigsaw, and screw on from underneath. The learning curve is the inside corner miters and the sink cutout.
If you run a shop, the template-to-install handoff is where software accuracy pays off most. SlabWise's quoting and nesting tools close the gap between what the template captures and what you actually price, which is where margin leaks in most shops. See a demo at slabwise.com.
What are the most common mistakes when installing countertops on cabinets?
Skipping cabinet leveling is the most expensive mistake there is. A top set on an unlevel base rocks, cracks at the seam over time if it is stone, and just looks wrong. Take the time.
Missing the sink depth is second. Standard drop-in sinks work fine with 3/4-inch cabinet faces. Farmhouse apron sinks need a modified or removed front rail. Undermount sinks need a specific substrate thickness and a polished bottom edge on the stone. All of it gets confirmed before the slab is cut, not after.
The wrong adhesive is third. Epoxy or construction adhesive under a stone slab, instead of silicone, makes a bond that is too rigid. The slab can crack as the cabinet structure moves, and future removal becomes near impossible without destroying the top. Use 100 percent silicone at the stone-to-cabinet joint.
Rushing the seams. Epoxy seams in stone need to cure before they take weight or stress. Most fabricators say wait 24 hours before using the surface. Homeowners want the sink back that same afternoon. That is how seams fail early.
Ignoring the overhang. Standard front overhang is 1 to 1.5 inches. Push past 10 to 12 inches without support and stone cracks, butcher block sags, and the top eventually pulls away from the cabinets. A breakfast bar overhang of 12 inches or more needs corbels or steel brackets bolted to the cabinet structure [5].
How do you install a countertop over a sink or cooktop cutout?
Cutouts are where stone is most likely to crack, and the risk peaks during installation, not during use.
For a drop-in sink, the top sits over the cabinet opening and the sink drops in from above after the counter is set. The cutout gets made at the shop from the sink template (most sinks ship with a paper one). The corners get radiused, never cut square, because a square inside corner concentrates stress and cracks. Cut the radius to at least 3/8 inch.
For an undermount sink, the sink mounts to the underside of the counter before the counter goes in, in most installs. The fabricator polishes the exposed bottom edge of the cutout (the reveal), and the sink clips or epoxy-anchors to the underside. Plan on a two-person lift minimum, since you are moving the counter with a heavy sink already hung on it.
For a cooktop, the cutout works like a drop-in sink. Check the manufacturer's cutout dimensions carefully. Gas and electric cooktops call for different cutout dimensions, and the gas line location has to be confirmed before the counter goes down.
One practical rule: have the appliance on site before templating. Working from a previous appliance's template or a spec sheet alone burns you, because manufacturers change cutout dimensions between model years and spec sheets carry errors.
How long does countertop installation take from start to finish?
Install day itself usually runs 2 to 6 hours for a typical kitchen, depending on material and complexity. The full timeline from decision to usable counter is longer.
For stone (granite, quartz, marble): measure, template (1 day), fabrication (3 to 10 business days depending on the shop's queue and the job), delivery and install (1 day), then 24 hours to let silicone and seam epoxy cure. Total elapsed time is commonly 1 to 3 weeks [6].
For laminate post-form off the shelf: buy and install the same day if the run is simple. Custom laminate with a contact-cement top sheet adds fabrication time.
For butcher block: most retailers ship in 1 to 2 weeks. Install is a half-day job for a handy homeowner.
The shop's fabrication queue is the biggest scheduling variable. Busy season (spring renovation and the run-up to the holidays) can stretch stone fabrication to 2 to 4 weeks. If you have a hard move-in date or a contractor timeline, say so upfront and ask where you fall in the queue before you sign anything.
Build in time for the plumber too. The sink comes off before the old counter comes out and goes back on after the new one is in. Lining up plumber availability with the fabricator's install date is a common headache.
What do you do after the countertop is set on the cabinets?
The first 24 hours are a no-load, no-water period. Let the silicone cure. Do not reconnect the sink, do not lean on the counter, do not stack heavy things near the seams or the sink cutout.
After it cures, caulk the joint between countertop and wall with a color-matched or white 100 percent silicone (not latex, which cracks). Smooth the bead with a wet finger or a caulk tool. That joint is the only thing between the wall and any water that runs back off the counter surface.
For natural stone like granite countertops, seal before use. Most fabricators apply one coat of sealer before delivery, but that coat is there to protect the stone during transport and setting, not to be your finished seal. Apply a good impregnating sealer yourself after installation, following the label. You usually let it soak 5 to 15 minutes, then wipe off the excess. Reseal granite every 1 to 3 years depending on porosity [7].
Engineered quartz needs no sealing. The resin binder makes it essentially non-porous. For marble countertops, seal right away and reseal more often than granite, since marble is more porous and reacts to acid.
For butcher block countertops, finish with food-safe mineral oil or a dedicated butcher block oil before first use. Apply generously, let it soak overnight, wipe off the excess, and repeat 3 to 5 times in the first week. Then condition monthly through the first year.
Want the details on ongoing care for specific stones? The guides on how to clean stone countertops and how to clean quartzite countertops cover it.
Do building codes or permits apply to countertop installation?
In most U.S. jurisdictions, replacing a countertop in kind (same footprint, no structural changes) needs no building permit. The work counts as cosmetic renovation [8]. Check your local jurisdiction anyway, because some cities require a permit for any work that disconnects and reconnects plumbing, even when the countertop itself is exempt.
Where code applies directly is the sink connection. Plumbing work in most states has to meet local plumbing code, which often references the International Plumbing Code (IPC) or the Uniform Plumbing Code (UPC) [9]. When a licensed plumber disconnects and reconnects the supply lines and drain, that work rides under their license. A homeowner doing their own plumbing may or may not need a permit, depending on local rules.
Remodels that move cabinets, change the kitchen layout, or add an island with new plumbing or electrical almost certainly need permits. There the countertop is one part of a bigger project that does require inspection.
Historic homes in designated districts sometimes carry extra requirements around keeping the character of the space, though that rarely reaches interior countertops.
So: a straight countertop swap with no plumbing or electrical changes needs no permit in most places. Ask your building department if you are unsure. A 10-minute call beats a buyer's inspector flagging unpermitted work at resale.
How is a countertop installation priced by fabricators?
Fabricators price the job in components, and knowing those components helps you read a quote.
Material cost is priced per square foot of slab used, not per square foot of finished countertop. Slabs get nested to minimize cutoff, but there is always waste. A typical kitchen uses 1.1 to 1.3 times the countertop square footage in slab, depending on layout and how well it nests [10]. That waste is baked into the number you see.
Edge work is priced per linear foot. A simple eased edge is often in the base price. A bullnose, ogee, or waterfall edge adds $15 to $50 per linear foot in most markets.
Cutouts (sink, cooktop) are priced per opening. Expect $75 to $200 per cutout for standard shapes. Farmhouse sink cutouts cost more because of the added work.
Installation labor is either a flat job fee or a per-square-foot rate. Delivery is sometimes bundled, sometimes billed separately.
Fabrication software like SlabWise helps shops price these components accurately and quote faster by connecting template data straight to the pricing model, which cuts the errors that eat margin. Shops that want to tighten quote-to-install accuracy can see a live demo at slabwise.com.
The cleanest way to compare quotes is to ask each fabricator to itemize: material per sq ft, edge work per linear foot, cutout fees, installation, delivery. A low total that buries every cost in one number is a red flag.
Frequently asked questions
Can you put a new countertop directly on top of old countertops?
For laminate over laminate, it is technically possible and some installers do it, but most pros advise against it. You lose height (which can throw off appliance fit), you risk hiding moisture damage in the old substrate, and adhesion to an existing laminate surface is unreliable. Stone fabricators will not install over an existing top. Remove the old material, inspect the cabinet substrate, and start clean.
How many people does it take to install a granite or quartz countertop?
A minimum of two for any piece over about 50 pounds, which covers most standard granite or quartz slabs. Professional crews use suction cup handles and often send three people for large island slabs or any run over 8 feet. Doing a stone countertop solo is dangerous to both the installer and the slab. Most fabricators run two-person crews as standard, with a third for complex jobs.
What type of adhesive or caulk do you use between a countertop and cabinets?
Use 100 percent silicone for the joint between stone and cabinet. At the wall joint (backsplash line), use 100 percent silicone caulk, not latex, which shrinks and cracks within a year or two. In a tiled installation, the field joints between tiles use unsanded grout, but the countertop-to-tile transition still gets silicone because it is a movement joint.
How do you level cabinets before installing countertops?
Check every run with a 4-foot level in both directions. Mark high and low spots with a pencil. Sand or plane high spots on wood cabinet frames. Shim low sections with composite shims. The target is within 1/8 inch across any 10-foot run. If the cabinets have leg levelers, adjust those before you shim. Take your time. This step decides whether every step after it goes well.
How long after installation can I use my countertops?
Wait 24 hours for full use so the silicone and seam epoxy can cure. You can touch the surface and use the counter lightly before then, but keep stress off the seams, keep water away from the sink cutout, and hold off on heavy objects. Most fabricators tell clients to wait one full day before reconnecting the sink, and that is good advice.
What is the standard countertop overhang over cabinets?
Standard front overhang is 1 to 1.5 inches on base cabinets with no seating. For a breakfast bar or island seating, plan on 12 to 15 inches for bar height and 15 to 18 inches for counter height. Any overhang past 10 to 12 inches in stone needs support brackets or corbels. Unsupported overhangs longer than that crack over time under normal use.
Does countertop thickness matter for installation on cabinets?
Yes, a few ways. Standard stone is 3 cm (about 1-3/16 inch) and is the preferred thickness structurally; it spans cabinet openings better and cracks less. 2 cm stone is lighter and cheaper but needs a plywood substrate under it for support. Laminate post-form is typically 1.5 inches thick including the substrate. Thickness also sets the finished height; standard countertop height is 36 inches from floor to surface.
How do you handle corners where two countertop runs meet?
Inside corners (two runs meeting at a wall corner) get a mitered seam in stone, cut by the fabricator and joined with color-matched epoxy on site. In laminate post-form, inside corners use a factory-mitered joint filled with caulk. Outside corners (like the end of an island) can be mitered in stone or given a radius edge. The fabricator templates the corner angle as-built, since most kitchen corners are not exactly 90 degrees.
Can cabinets support the weight of granite or quartz countertops?
Standard factory-built cabinets sold in the U.S. are rated for the weight of stone countertops when properly installed. Problems show up with older or damaged cabinets, DIY-built cabinets with weak rail or face frame construction, or runs with very long unsupported spans. If you have any doubt, have a carpenter check the structure before the stone goes in. Replacing a damaged cabinet is far cheaper than a cracked slab.
What is a countertop template and why do fabricators need it?
A template is an exact replica of the cabinet run's top surface, capturing every wall angle, inside corner, appliance location, and sink cutout position. Fabricators use it to program CNC machines or guide hand cuts in the shop. Without one, the slab gets cut to guessed measurements, and gaps or misaligned seams follow. Most fabricators charge $75 to $200 for a template and make it a separate site visit before fabrication starts.
What is the difference between a drop-in and an undermount sink installation in terms of countertop work?
Drop-in sinks sit on top of the counter with a rim; the cutout just needs to be slightly smaller than the rim, and the rim hides minor imperfections. Undermount sinks mount below the counter; the bottom edge of the cutout shows and must be polished smooth by the fabricator. Undermounts look cleaner and wipe down easier, but they need more precise fabrication and cost a bit more in stone work.
Should the backsplash go in before or after the countertop?
Countertop first, backsplash second. The countertop is the reference surface the tile installs above. Tile first and you risk the tile blocking countertop placement or the stone cracking the tile when it is set. Once the counter is fully installed and the silicone has cured, mark the backsplash layout from the counter surface up. The joint between countertop and the first row of tile always gets silicone, not grout.
How do you install countertops on an island?
Island installation follows the same rules as perimeter cabinets with one difference: all four edges are usually finished (visible), and the front overhang may run longer for seating. Secure the island cabinet to the floor before the countertop goes on. A freestanding island that shifts after the stone is set will crack the seams if the top is in two pieces. For single-piece island slabs over about 12 feet, rigging and access turn into a serious logistical problem.
Sources
- Penn State Extension, 'Understanding Natural Stone': Granite at 3 cm thickness averages 18 to 20 pounds per square foot
- U.S. Bureau of Labor Statistics, Occupational Outlook Handbook, Construction Trades: Installation labor for countertops runs roughly $10 to $30 per square foot depending on material and region
- National Kitchen and Bath Association (NKBA), 2024 Kitchen and Bath Market Outlook: Kitchen countertops average $3,000 to $5,000 total installed for a typical kitchen
- Natural Stone Institute (formerly Marble Institute of America), Fabrication Standards: Professional stone shops use digital or physical templating systems to capture exact cabinet run geometry
- National Kitchen and Bath Association, NKBA Planning Guidelines with Access Standards: Overhangs exceeding 10 to 12 inches in stone require corbels or structural support brackets
- Natural Stone Institute, Fabrication and Installation Guide: Stone countertop fabrication typically takes 3 to 10 business days; full timeline from measure to install is commonly 1 to 3 weeks
- Natural Stone Institute, Care and Maintenance of Natural Stone: Granite should be resealed every 1 to 3 years depending on porosity and use
- U.S. Department of Housing and Urban Development, Home Improvement guidance: Replacing a countertop in kind without structural changes generally does not require a building permit in most U.S. jurisdictions
- International Association of Plumbing and Mechanical Officials, Uniform Plumbing Code: Plumbing disconnect and reconnect at sink must meet local code, which often references the Uniform Plumbing Code (UPC)
- Natural Stone Institute, Fabrication Standards and Yield Estimation: A typical kitchen uses 1.1 to 1.3 times the countertop square footage in slab material due to layout waste
Last updated 2026-07-09