TL;DR
- A countertop crew carries angle grinders, wet polishers, suction cup lifters, laser levels, jigsaws, seam setters, caulk guns, and a full measuring and safety kit.
- Stone crews add diamond-blade saws and pigmented epoxy.
- Laminate and solid-surface crews swap in routers and belt sanders.
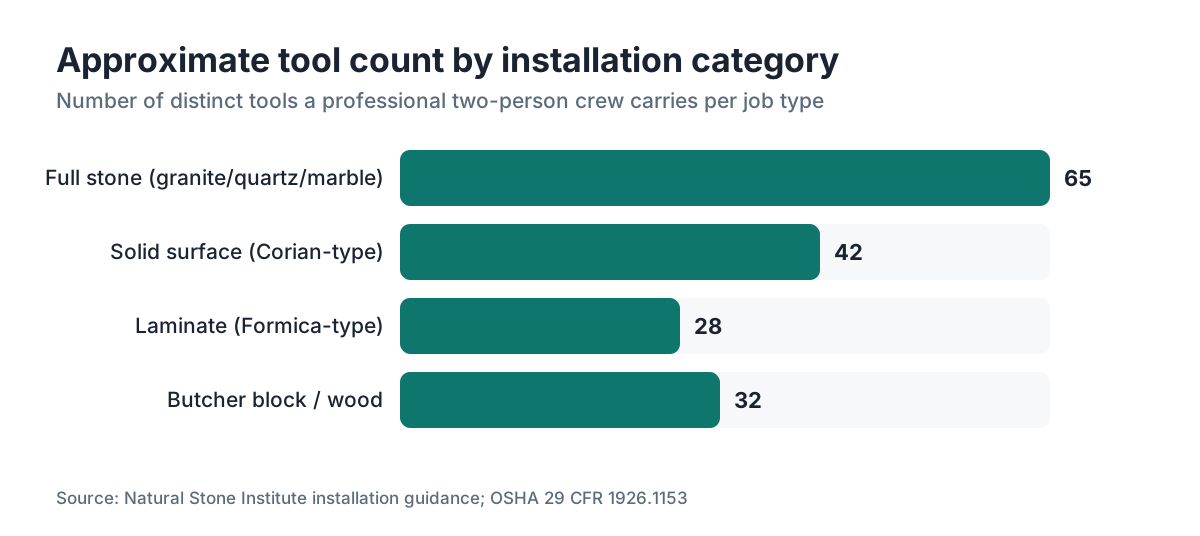
- A well-stocked stone truck holds 55 to 75 distinct tools and $15,000 to $35,000 of gear.
Why does the tool list vary so much from one crew to another?
Material drives everything. A crew setting prefab laminate needs a jigsaw, a belt sander, a scribing tool, and a router for the sink cutout. That fits in a truck bed. A crew installing 3 cm granite or quartzite needs all of that plus a wet saw, diamond polishing pads, a seam setter, suction cups rated for a few hundred pounds, and shims that won't compress under stone.
The money gap is real. A basic laminate crew might have $2,000 to $4,000 in tools. A full stone crew often carries $15,000 to $40,000 in specialized gear, not counting the vehicle.
Experience shapes the list too. A two-person residential crew trims wherever it can. A shop running commercial jobs with long continuous stone runs carries doubles of everything, because a grinder that dies mid-job on a hotel floor wrecks the schedule.
Site conditions add the rest. Tight corners, second-floor kitchens, boats, and RVs push crews toward lighter cordless tools they'd otherwise run corded. Outdoor kitchens change the sealant and anchoring needs. None of this is exotic. It just means the list below is a real-world core kit, not a universal checklist that fits every job.
What measuring and layout tools does a stone crew bring?
The job is won or lost before a single cut, so measuring gear leads the truck. Crews carry tape measures (usually 25 ft, often two as a cross-check), a 4-foot level, a 6-foot straightedge, and a laser level for longer runs. A laser lets two people confirm a wall is plumb and a cabinet run is flat without holding a bubble level at arm's length across an 8-foot span.
Scribing tools earn their keep on stone because walls are never straight. A compass or scribing gauge transfers the wall's real profile onto the slab so the back edge can be ground to fit tight. On laminate, that same scribe line guides a belt sander pass.
Some crews carry a digital angle finder for corner returns. Older hands did this with a bevel gauge and a protractor. Either works. The digital version just spits out a number you feed straight to the saw setup.
For templating verification, a crew brings a printout of the shop's digital template and lays it against the actual cabinet positions. Shops using digital templating tied to their countertop fabrication software usually pre-mark the critical dimensions on that printout so the install crew has a fast field reference.
What cutting tools do crews use for stone versus laminate?
Stone: The angle grinder is the workhorse. A 4.5-inch or 5-inch grinder with a continuous-rim diamond blade handles edge cleanup, small cutbacks, and sink cutout starts. Most stone crews run two grinders, one with a cutting disc and one with a grinding or polishing cup wheel, so they aren't swapping attachments all day.
Longer straight cuts and miter returns call for a track saw with a diamond blade, or a circular saw with a diamond blade riding a guide rail. Wet cutting wins here. Water keeps the blade cool, knocks down dust, and stretches blade life. Some crews run a portable wet saw right in the kitchen. Others make the major cuts back at the shop and bring pieces pre-sized.
Sink cutouts in stone go one of two ways. The old-school method drills a plunge hole with a core bit, then cuts with a jigsaw fitted with a diamond-grit blade. The cleaner method uses a plunge router with a carbide or diamond-tipped bit and a template collar. Both work. The router leaves a smoother edge that needs less polishing.
Laminate and solid surface: A jigsaw handles sink cutouts. A router with a flush-trim bit cleans edges and cuts seams. A circular saw with a fine-tooth blade does the straight runs. Solid surface (Corian-style material) often gets a score-and-snap on thin pieces, or a router pass on thicker sections. See the details on laminate countertops and Corian countertops if you're comparing material-specific needs.
Butcher block is its own category. Crews use a circular saw or track saw for the main cut, a jigsaw or router for cutouts, and an orbital sander to blend seams. Wood needs a finish coat on site (oil or polyurethane), so a crew doing butcher block countertops also carries applicator cloths and finish product.
What lifting and handling tools do installers use for heavy stone slabs?
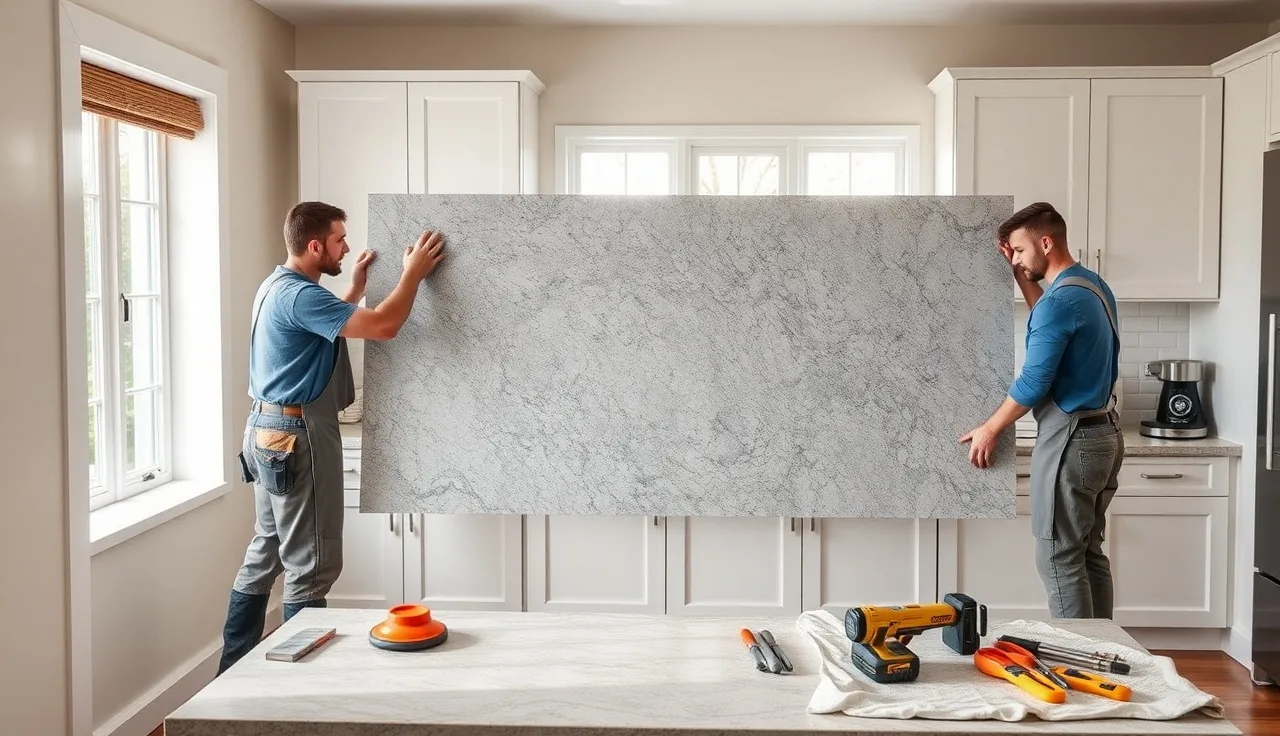
This is where stone gets physical and where backs get blown out if the crew cuts corners. A 3 cm granite slab at 96 by 26 inches weighs roughly 200 to 240 pounds depending on density. Two people can carry that through a doorway. They shouldn't do it bare-handed.
Suction cup lifters are standard. A good pair of vacuum cups rated at 150 to 200 lbs each gives a two-person crew a safe grip on a large slab. Some crews run a four-cup bar lifter that spreads the load across four points, which helps on big island tops. The cups need smooth, non-porous surfaces, so they grab polished stone better than leathered or brushed finishes, where texture breaks the seal.
For multi-story or awkward-access jobs, some crews rent a panel carrier or material cart. A few larger outfits own a slab dolly or A-frame cart for moving full slabs from truck to door. Those show up mostly on commercial work but help on any second-floor kitchen.
Rubber shims and leveling wedges go under the slab to bring it flat before the adhesive sets. Plastic horseshoe shims are cheap and everywhere. Rubber or composite wedges cost more but resist compressing over time under the weight of stone.
What adhesives, sealants, and epoxies does a crew carry?
Silicone is the primary adhesive for bonding stone to cabinets. Neutral-cure silicone is the safe choice, not acetoxy, which can react with some stones. Crews carry several colors because the bead at the back wall or around the sink has to blend with the stone. Application is by standard caulk gun, though some installers prefer a battery-powered gun for steady bead pressure over a long run.
Two-part epoxy handles stone seams. The installer mixes pigmented epoxy tinted to match the stone, coats both faces of the seam, then pulls them together with a seam setter. Getting the color and fill right is a skill. A sloppy seam shows forever. Color-matched kits come from suppliers like Tenax, Akemi, or Integra, and a well-stocked crew carries a dozen or more pigment tubes plus a UV lamp if they run UV-cure products [1].
For laminate countertops, contact cement bonds laminate to substrate. Brush or roll it on both surfaces, let it tack, then press. Mistakes after contact are hard to undo without a heat gun and patience.
Backer rod and caulk go around the sink, at the wall-to-counter joint, and at any seam that will see water. Crews stock a range of caulk colors, since backsplash material and grout color change kitchen to kitchen.
Penetrating stone sealer sometimes goes on as a final on-site step, though many shops seal at the bench before delivery. Either way, someone's carrying a spray bottle or applicator pad and a sealer product.
What polishing and finishing tools do stone crews carry on the truck?
Every edge cut or field-ground area has to be polished back to match the factory finish. A variable-speed angle grinder or a dedicated wet polisher with a water feed does that work. The crew carries diamond resin pads from coarse (50 grit or lower) up through fine (1500 to 3000 grit), sometimes with a final buff pad. A full run from 50 to 3000 grit can take 10 to 15 minutes per edge foot, so pad quality and technique matter.
A rubber backer pad holds the polishing pads on the grinder, and crews carry spares because backers crack under heat. A squirt bottle of water, or the polisher's integrated feed, keeps the pad cool and the slurry moving.
For granite countertops and marble countertops, the polishing sequence is non-negotiable. Skip a grit and the surface shows swirl marks in raking light. For Cambria countertops and other engineered stones, edge polishing is often simpler because the material runs uniform, but the pad sequence is the same.
A felt wheel with a compound like 5X or Tenax Nanotech Final handles the high-gloss final pass on some materials. Not every crew bothers. Some trust the resin pads to finish the job. It comes down to preference and what the customer expects to see.
What seam-setting tools do installers need?
A seam setter (also called a seam phantom or seam clamp) holds two pieces of stone dead flush while the epoxy cures. Without one, the seam edges ride up or drop, leaving a ridge that catches a fingernail and looks bad. Most seam setters clamp to the underside of the slab and use a threaded adjustment to pull both pieces to the same height.
Some crews also set suction cups near the seam as a quick check while the clamps hold. Others lay a steel straightedge across the seam to feel for any vertical offset before the epoxy hardens.
Epoxy mixing nozzles and the two-part epoxy gun are part of this kit. The nozzles are single-use. A crew doing four seams in a day burns four nozzles, and new crews forget to pack spares.
A razor blade and a card scraper (or a fine-grit sandpaper block) clean the excess epoxy once it cures. Getting that epoxy flush without scratching the stone is the last finish step before the customer sees the seam. Rush it and you leave a cured ridge that jumps out under a window's light.
What safety gear does the crew keep on the truck?
Stone dust is the real hazard. Crystalline silica in granite, quartzite, and engineered stone is a genuine respiratory threat. OSHA's construction silica standard (29 CFR 1926.1153) sets the permissible exposure limit at 50 micrograms per cubic meter as an 8-hour time-weighted average [2]. Wet cutting is the primary engineering control, because water suppresses particles before they turn respirable. When wet cutting isn't possible, the crew reaches for a NIOSH-approved P100 half-mask respirator [6].
Table 1 of that silica standard lists a hand-held grinder as a task that requires either a water delivery system or a vacuum with a NIOSH-compliant dust collector, and calls for respirators for extended use. A dust mask alone doesn't cut it [2].
Safety glasses or a face shield go on any time a grinder runs. Flying stone chips are fast and sharp. Hearing protection (plugs or earmuffs rated to at least 25 NRR) goes in during grinding. Grinders commonly hit 95 to 105 dB, and OSHA's noise standard (29 CFR 1910.95) requires protection above a 90 dB 8-hour average [3].
Knee pads, cut-resistant gloves, and steel-toed boots are personal calls but common on experienced crews. Stone edges cut through work gloves. A basic first aid kit lives in the truck on any professional crew.
A wet-dry shop vac with a HEPA filter handles cleanup during and after grinding. Running that vacuum at the grinder's point of contact, sometimes with a shroud, cuts airborne silica sharply [5].
What tools are specific to undermount sink installation?
Undermount sinks eat a lot of focused crew time because the result is visible, permanent, and unforgiving. The base kit is a sink template (cardboard or a plastic jig), a jigsaw or plunge router, and a drum sander or grinding pad to smooth the cut edge inside the opening.
Sink clips or brackets and the glue that holds them need a drill with a small bit, a dab of epoxy or silicone, and a steady hand. Most undermount clips thread into small plastic inserts glued to the underside of the slab. A cordless 18V drill driver sets them.
Leveling compound or silicone around the sink rim makes the waterproof bond between sink and stone. A caulk gun and a color-matched silicone do it. Some installers run a second bead on the inside top edge of the rim for extra hold.
For kitchen countertops with farmhouse or apron sinks, notching the cabinet face frame calls for a multi-tool or oscillating tool, which is one more reason crews carry one. That same tool trims small wall interferences and helps with scribing.
What does a full stone installation crew's tool list actually look like?
Here's a realistic breakdown of what a two-person stone crew brings to a typical residential kitchen. Brands and exact counts vary by shop, but the categories hold steady.
| Category | Tools | Approx. count |
|---|---|---|
| Measuring & layout | Tape measures, 4-ft level, laser level, scribing compass, angle finder, chalk line | 6-8 items |
| Cutting | Angle grinders (x2), circular saw with diamond blade, jigsaw, track/guide rail, core drill bits | 6-9 items |
| Lifting & handling | Suction cup lifters (set of 2-4), rubber shims, horseshoe shims, pry bar | 4-6 items |
| Polishing | Variable-speed wet polisher, diamond pad set (6-10 grits), rubber backer pads, squirt bottle | 10-14 items |
| Seaming | Seam setter clamps, two-part epoxy gun, mixing nozzles, pigment kit, razor blades, card scraper | 8-12 items |
| Adhesive & sealant | Caulk guns (x2), silicone tubes (multiple colors), backer rod, sealer applicator | 5-8 items |
| Power & fastening | Cordless drill/driver, oscillating multi-tool, drill bits, driver bits | 5-7 items |
| Safety | Respirators (P100), safety glasses, hearing protection, HEPA shop vac, first aid kit | 5-7 items |
| Cleanup | Shop rags, bucket, squeegee, stiff brush, drop cloths | 4-6 items |
Total distinct items: roughly 55 to 75 on a well-stocked truck. New crews sit at the low end. Veteran crews sit high, because they've been burned by not having the right backup tool at the wrong moment.
Fabrication software like SlabWise helps the shop tell the crew which slab pieces and cuts are going out on each job, so they know before they load the truck whether they're dealing with mitered edges, waterfall ends, or other features that need extra tools.
How do tool needs differ for laminate versus stone installation?
Laminate is lighter on lifting gear and heavier on woodworking tools. The substrate (usually particleboard or MDF) cuts with a circular saw or jigsaw, and the laminate face cuts with a router or a scoring tool. A trim router with a flush-trim bit brings the laminate edge down to the substrate edge. An edge bander or iron-on strips finish the exposed substrate edges.
Contact cement goes on with a foam roller, a brush, or a spray gun. Pressing the laminate to the substrate takes a J-roller (a hard rubber roller) to get full contact without air bubbles.
For scribing at the wall, laminate crews use a belt sander or a file. Neither shows up much in a stone kit. On the flip side, laminate crews skip the seam epoxy, polishing pads, suction cup lifters, and wet saw entirely.
Solid surface, including Corian and its cousins, sits in between. It cuts and routes like wood but needs color-matched seam adhesive and a flat join like stone. The upside is weight: it's far lighter than stone, so the lifting side of the kit stays simple. The Corian countertops page has more on why solid-surface seams go effectively invisible when done right, which owes more to the adhesive system than the tools.
For comparisons across material types, kitchen countertops covers the full landscape.
What tools do crews use after installation for cleanup and sealing?
Post-install cleanup is underrated. Stone dust, epoxy residue, silicone smears, and adhesive squeeze-out all have to come off the surface and surrounding cabinets before the customer walks in. A razor blade held nearly flat (not at a steep angle that scratches) lifts cured epoxy. A plastic scraper handles silicone. Acetone on a rag clears adhesive residue from polished stone, but it isn't safe on everything. Keep it off solid surface, sealed soapstone, and any stone with an applied finish.
For on-site sealing, the crew uses a penetrating stone sealer and a clean cloth or a dedicated applicator pad. Let it penetrate (usually 5 to 10 minutes, per the label), then buff off the excess. Most granite and quartzite benefit from sealing; marble is more debated [8]. To understand the maintenance that follows, how to clean stone countertops and how to clean quartzite countertops are good starting points.
Drop cloths and floor protection go down before any work starts. Foam pipe insulation, split lengthwise, protects cabinet edges where the slab slides past during placement. Masking tape guards finished surfaces near caulk lines. None of it is glamorous. The installs that look professional are the ones where the crew was as careful about protection as it was about cutting.
How much does a professional stone installation truck's tool kit cost to assemble?
This is genuinely hard to price, because it turns on brand choices and whether you buy new or used. The honest range for a complete stone kit, bought new, is roughly $15,000 to $35,000 [4]. A laminate-only kit runs $2,500 to $6,000. Mixed-material shops buying for versatility land in between.
The biggest single cost is usually the wet polisher and full diamond pad set. A Makita or Metabo variable-speed wet polisher runs $300 to $500. A full set of diamond pads (50 through 3000 grit, plus a buff pad) from a reputable supplier runs $200 to $500 per set. They wear out, so treat this as recurring.
Angle grinders are cheaper, $80 to $200 each for a quality tool, but you need at least two set up for different tasks, and blades and cups add up fast. A track saw setup with guide rails and a diamond blade runs $400 to $900.
Seam setters run $200 to $600 for a set of four clamps. A suction cup lifter set is $150 to $400 depending on capacity.
Shops watching tool costs should track which tools break or wear out fastest. Grinder backer pads and polishing pads are the highest-frequency consumables. Budget those separately from capital equipment.
The vehicle is the largest single investment but not strictly a tool. A two-person crew in a cargo van or a pickup with a cap and slab rack can handle most residential stone jobs without a dedicated delivery truck.
Frequently asked questions
Do countertop installers bring their own tools or use the shop's?
Almost always their own, or the shop's tools loaded into the crew's truck. Installation is treated as a separate trade from fabrication. The shop produces the pieces; the install crew places them. Some shops run company trucks with a standardized tool kit assigned to each crew. Independent subcontract installers typically own their full kit. Either way, the crew arriving at your home supplies everything they need.
What power source do installation crews use on-site?
A mix of corded and cordless. Corded grinders and wet polishers plug into the home's outlets, usually through a heavy-duty extension cord. Cordless drills and oscillating tools run on 18V or 20V battery platforms. Most crews carry a power strip and a 50-foot 12-gauge extension cord. Some also carry a small portable generator for jobs where outlet access is limited.
How long does a typical stone countertop installation take?
A standard kitchen with one seam and an undermount sink usually takes 2 to 4 hours for a two-person crew. Larger kitchens with multiple seams, complex cutouts for cooktops or multiple sinks, or island overhangs can run 5 to 8 hours. Difficult access or second-floor installs add time. The actual placement of stone is fast; the cutting, fitting, and seam work take the most time.
Is wet cutting required, or can crews cut stone dry?
Wet cutting is strongly preferred and required under OSHA's silica standard (29 CFR 1926.1153) unless an engineering control like a dust collection shroud is in place instead. Dry cutting without dust control creates airborne crystalline silica well above the permissible exposure limit. Professional crews use water at the blade, a vacuum shroud, or both. Dry cutting on-site without either is a compliance violation and a real health hazard.
What do installers use to level countertops that aren't flat?
Rubber or plastic shims placed on top of the cabinet carcass before the slab goes down. The installer checks with a level, adjusts shims, and checks again before the silicone sets. On out-of-level cabinets, shims at different heights under different sections bring the surface to level. Once the silicone cures, the shims stay permanently. The slab doesn't need to be perfectly level top-to-bottom; the substrate it sits on does.
Can a crew cut a granite slab on-site, or does that happen at the shop?
Both happen. Major cuts (primary dimensions, seam cuts) are almost always done at the shop on a bridge saw or CNC, where precision is higher and wet cutting is fully controlled. On-site cuts cover final fits at walls, sink cutouts, and small adjustments. Crews carry angle grinders and sometimes a track saw for that. Cutting a full slab on-site from scratch is unusual and usually a sign something went wrong with templating.
What tool do installers use to match epoxy color to the stone?
A pigmented two-part epoxy kit. Installers mix base resin with hardener, then add dry pigment or color paste to match the stone visually. Most professional suppliers (Tenax, Akemi, Integra) sell kits with a range of pigment colors meant to be blended. The installer applies a small test mix to a scrap of the same stone, cures it, and checks the color match before filling the real seam.
What tools do crews use for an outdoor kitchen countertop install?
The same core stone tools apply, plus extra weatherproofing supplies. Outdoor installs need a marine-grade silicone rather than standard interior silicone. If the countertop sits on a concrete or masonry base (not wood cabinets), the crew might carry masonry anchors, a hammer drill, and epoxy anchoring compound instead of standard cabinet-mount hardware. Drainage matters too; some outdoor tops get a slight pitch built in, which requires more careful shimming.
How do crews handle a cooktop cutout differently from a sink cutout?
The process is similar but the tolerance is tighter, because cooktop cutouts often carry a narrow reveal requirement. Crews use a template (often from the cooktop manufacturer) to mark the cut, drill a plunge hole, and cut with a jigsaw and diamond blade or a router with a template collar. The cooktop drops in from above on its own mounting clips. No silicone bonds it to the stone, since cooktops need to come out for service.
What is a seam phantom or seam setter and why does every stone crew need one?
A seam setter (sometimes called a seam phantom) is a clamp system that attaches to the underside of two adjacent stone pieces and uses a threaded rod or cam to hold both exactly flush while seam epoxy cures. Without one, the slight weight difference between two slab pieces can leave one edge higher than the other, creating a ridge. A smooth seam is only possible when both faces stay at identical heights during cure.
Do installers seal the stone at installation, or is that the homeowner's job?
It varies by shop. Many fabrication shops seal the stone before delivery; some include a post-install seal in the job. A few leave sealing entirely to the homeowner with a product recommendation. Ask specifically before the install. If you see the crew apply sealer at the end, that's a good sign. If they skip it, applying a penetrating sealer yourself within the first week is a smart move for most porous stones.
What tools do crews use to protect cabinets during installation?
Foam pipe insulation split lengthwise and taped to cabinet edges cushions the slab as it slides into position. Drop cloths or moving blankets protect cabinet faces and floors from dropped tools or dust. Blue painter's tape guards finished surfaces near caulk lines. Most crews also carry rubber-tipped furniture sliders for moving the slab horizontally across the cabinet top without scratching the cabinet or chipping the stone edge.
Can an installation crew fix a crack or chip discovered during installation?
Minor edge chips get repaired on-site with color-matched epoxy or a touch of clear cyanoacrylate (super glue), then polished. A crack running through the slab is a harder conversation. If the crack appeared during transport or before install, the shop should replace the piece. If it appeared during installation from installer error, that's a warranty and liability discussion. Crews carry epoxy repair kits for minor field issues but cannot structurally repair a through-crack.
Sources
- Tenax USA, Stone Epoxy and Seam Products: Color-matched two-part epoxy kits for stone seaming are supplied by companies including Tenax, with pigment systems for field color matching.
- OSHA, Respirable Crystalline Silica Standard for Construction (29 CFR 1926.1153): OSHA's silica standard sets the PEL at 50 micrograms per cubic meter as an 8-hour TWA and Table 1 requires water delivery or vacuum shroud systems when using hand-held grinders on stone.
- OSHA, Occupational Noise Exposure Standard (29 CFR 1910.95): OSHA requires hearing protection for workers exposed to noise levels above 90 dB for an 8-hour time-weighted average.
- Natural Stone Institute, Stone Installation Training and Standards: Professional stone installation tool kits range substantially in cost based on the scope of work and material types served; the Natural Stone Institute provides installation training referencing standard tool requirements.
- OSHA, Crystalline Silica Rule and Hierarchy of Controls: Wet cutting is identified as the primary engineering control for silica dust suppression during stone cutting operations.
- NIOSH / CDC, Occupational Exposure to Respirable Crystalline Silica: NIOSH recommends P100 respirators as minimum respiratory protection when engineering controls alone cannot achieve silica exposure below the exposure limit.
- Natural Stone Institute, Dimensional Stone Design Manual: Seam setting tools and two-part epoxy systems are listed as standard installation equipment in dimensional stone installation guidance.
- Natural Stone Institute, Technical Guidance on Stone Sealing: Penetrating sealers are recommended for granite and quartzite surfaces to reduce water and oil absorption; application is covered as part of standard installation practice.
- EPA, Lead Renovation, Repair and Painting Program: Renovation work including countertop installation in pre-1978 homes may implicate lead dust rules; relevant for crews doing cabinet and countertop work in older kitchens.
- OSHA, Hand and Power Tools Safety Guidance: OSHA guidance on angle grinder and power tool safety specifies guarding, PPE, and inspection requirements relevant to stone installation crews.
Last updated 2026-07-11