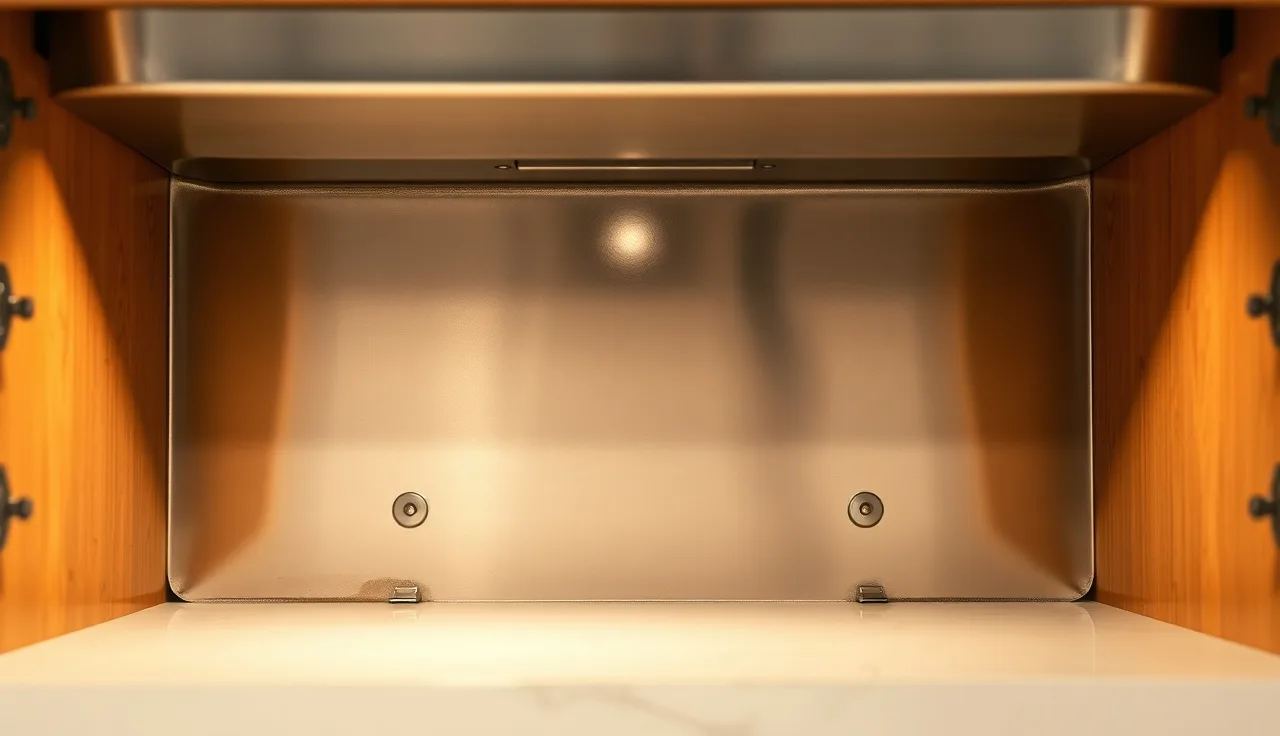
TL;DR
- Undermount sinks drop when the epoxy bond fails, the clips lose tension, the substrate under the stone gets wet and weakens, or the installer rushed the cure.
- Stone weight rarely causes it.
- Bad prep and skimpy fastening almost always do.
- Repairs run $150 to $600, more if the countertop has to come off.
Why do undermount sinks drop in the first place?
An undermount sink has no rim sitting on top of the counter to hold it up. Every pound of the sink, plus the water in it, plus the force of hands leaning on the basin, hangs from two things: an adhesive bond between the sink rim and the underside of the stone, and a set of clips or brackets that pull the sink tight against that stone.
When either system quits, the sink drops. It usually starts as a hairline gap at the front where the rim meets the stone. Ignore it and water works into that gap, the substrate gets wet, and the whole thing speeds up. A cast-iron undermount sink can weigh 50 to 100 lbs empty [1]. Stainless is lighter, usually 15 to 30 lbs, but it still loads a bond that only holds up if somebody did it right the first time.
Undermount sink failures are almost never a stone problem. They are an installation problem that shows up months or years after the crew drove away.
What are the most common causes of undermount sink failure?
Epoxy applied over a dirty surface. This is the number-one cause. Stone has to be clean, dry, and free of dust, oil, and leftover water before epoxy goes down. Fabricators racing between jobs sometimes skip the acetone wipe, or lay epoxy over stone that is still damp from a water-jet cut. The bond looks perfect on day one and starts peeling inside a year.
Wrong epoxy product. Not every adhesive survives the wet, chemical-soaked world under a kitchen sink. Two-part epoxies made for stone are the standard. Construction adhesive from a tube, silicone by itself, or single-part construction glue are not substitutes. Running silicone around the perimeter as a sealant after the epoxy cures is fine. Using silicone as the structural bond is not.
Too few clips, or clips nobody tightened. Clips are not decoration. They clamp the sink against the epoxy while it cures and keep carrying load afterward. A 30-inch sink typically needs five to eight clips depending on shape, weight, and clip type. Skipping clips on the long front and back runs, where the lever arm is longest, is a common shortcut.
Substrate failure. Most stone tops sit on a substrate, often 3/4-inch plywood or cement backer board, that gives the clips something to anchor into. Get that plywood wet enough times and it delaminates and loses grip. Particleboard, common in older or budget cabinets, swells hard when wet and can fail outright. Now the clips are pulling against mush.
Not enough cure time before use. Two-part structural epoxies for stone typically reach full cure in 24 to 72 hours depending on product and temperature [2]. Turning the water back on and stacking dishes a few hours after install stresses a bond that has not finished forming.
Thermal cycling in some layouts. Less common, but real for kitchens with a sink right under a window or against a big thermal mass. Years of expansion and contraction can fatigue an epoxy joint, especially if the original bond was already marginal.
Does the type of countertop material affect how likely a sink is to drop?
Yes, in a few real ways.
Granite, quartzite, and other dense stones are heavy and stiff. That stiffness actually helps. The stone does not flex, so the epoxy joint does not cycle through stress over and over. The weight works against you only if the cabinet under it is too weak to carry the slab, which then dumps load onto the sink opening and the clips.
Quartz (engineered stone) acts like granite structurally. Cambria, Silestone, and the rest are dense and rigid. No special retention worry beyond the standard clip-and-epoxy routine.
Marble is structurally fine but more porous than granite, so moisture around the cutout matters more. A failed seal on marble can wick water into the stone itself on top of soaking the substrate.
Butcher block is a different animal. Wood moves with humidity. A sink cutout in a wood top is a built-in weak spot: exposed end grain, constant water in normal use, and the wood swelling and shrinking against any adhesive bond. Plenty of fabricators and manufacturers advise against undermount sinks in butcher block for exactly this reason [3]. If you have one and it works, the seal around that rim has to be babied.
Laminate does not get undermount sinks in any serious install. The particleboard core cannot carry the weight, and the laminate face cannot form a structural bond with a sink rim.
For a wider look at how different materials hold up around sinks, the kitchen countertops guide covers the material-by-material tradeoffs. For wood specifically, see the butcher block countertops guide.
How does poor clip installation cause a sink to fall?
Undermount clips come in a few designs: the classic two-part bolt-and-saddle that presses on the rim, side-mount versions that anchor into the cabinet wall, and all-thread rod systems for heavy sinks. They all work by tension. The clip pulls the sink rim up against the underside of the stone.
Under-tighten a clip and it gives almost no clamping force during the cure window, so the epoxy sets with the sink hanging a little loose. The bond is weak from hour one. Over-tightening is rarer but real: a clip that digs into a thin porcelain or fireclay rim can crack it or start a stress point that spreads slowly.
Spacing matters because the rim between two clips is basically a beam in bending. The longer the unsupported span, the more the rim deflects under load and peels away from the epoxy line. On a 33-inch sink with a deep front-to-back dimension, the straight runs need clips no more than six to eight inches apart. Some rush jobs use four clips total on a big sink and call it done. Four is not enough.
What the clip anchors into matters just as much. A standard clip bolt passes up through the substrate deck. If that deck is rotting, the bolt is pulling through wet, crumbling plywood. Fastener holding strength in plywood drops sharply once moisture content climbs past the fiber saturation point, around 28 to 30 percent [4].
For the whole install sequence, the countertop installation overview walks through it.
Can water damage under the sink cause the countertop to fail?
Yes, and it gets overlooked constantly. The space right under a kitchen sink is one of the wettest spots in the whole cabinet run. Drain connections weep. Supply lines drip at the fittings. Handwashing throws water against the cabinet bottom. A garbage disposal that backs up can dump a gallon straight onto the substrate.
Most people never look under the sink until something has already failed in plain sight. By the time the plywood shows visible delamination, the fastener grip is long gone.
Here is the part nobody thinks about: a lot of cabinet-deck plywood is not rated for wet exposure. Interior-grade plywood (Exposure 1) handles normal humidity swings but breaks down under repeated liquid contact. Exterior or marine-grade plywood is the right call for a sink base, and it almost never shows up in production cabinetry.
Repairing a dropped sink? Press on the substrate with a screwdriver first. If it is soft or crumbling, fix the deck before you touch the sink. Reinstalling into a bad substrate is a six-month solution at best.
How long should undermount sink epoxy last before it starts to fail?
A clean install with two-part stone epoxy, correct clip count, and full cure time should last the life of the countertop, often 20-plus years with no trouble. The failures shops actually see trace back to one of the install mistakes above, not to glue getting old under normal conditions.
That said, nobody has long-term controlled data on this exact joint. The closest reference is structural adhesive durability in construction generally, where two-part epoxy bonds in dry-to-moderate conditions are rated for 20-plus years [5]. Wet, chemical-heavy environments (drain chemicals, cleaning products, standing water) cut any adhesive's service life. Keeping the silicone perimeter seal intact is the one maintenance job that protects the structural epoxy from that soup.
A sink that drops in the first two years is almost certainly a workmanship failure, not glue dying of old age.
What does it cost to fix a dropped undermount sink?
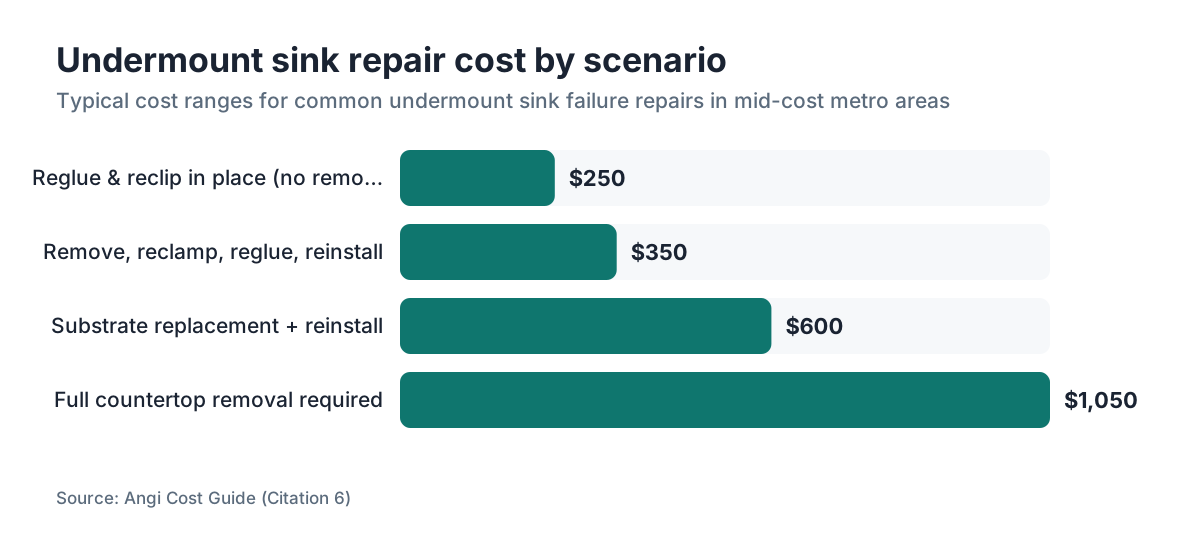
Cost swings on one question: does the countertop have to come off?
| Repair Scenario | Typical Cost Range | Notes |
|---|---|---|
| Reglue and reclip in place (no removal) | $150 - $350 | Only works if the gap is small and the substrate is intact |
| Remove sink, reclamp, reglue, reinstall | $250 - $450 | Plumber may need to disconnect/reconnect: add $100-200 |
| Substrate replacement + reinstall | $400 - $800 | Cabinet deck replacement adds material and labor |
| Full countertop removal required | $600 - $1,500+ | Rare, but needed if the stone cracked or the original install was badly wrong |
These ranges reflect typical skilled-labor rates in mid-cost metro areas; prices vary a lot by region and shop [6]. Plumbing disconnect and reconnect is usually billed separately because most jurisdictions want a licensed plumber for it.
If the drop already soaked the cabinet box, add cabinet repair or replacement on top. That is the whole argument for catching a small gap early: a $200 fix in March turns into a $1,200 fix in November after a summer of water working into the deck.
Can you reattach an undermount sink yourself, or do you need a professional?
Honest answer: it depends on how it dropped and how comfortable you are working upside down with mixed chemicals.
If the drop is minor, the gap is under 1/8 inch, the substrate is solid, and only the clips loosened or failed, retightening or swapping clips is a fair DIY repair. Clip sets sell at most home improvement stores for $15 to $40 [7].
If the epoxy bond failed, you are in tougher territory. Getting old epoxy off both the stone and the sink rim without wrecking either surface takes patience and the right tools: a carbide scraper, acetone, and time. Applying new two-part epoxy in the right conditions, then holding the sink in place while it cures, needs a helper or a clever temporary support. A careful homeowner can pull it off. It does not forgive rushing.
If the substrate is soft or the stone cracked at the cutout, call a fabricator. Those repairs need real judgment about whether the fix will hold or whether you are throwing money at a system that is already gone.
Shops that track installs by job (which sink went on which substrate, with which clip layout) tend to have far fewer undermount callbacks. Software like SlabWise lets a shop attach install notes and substrate specs to each job record, which is exactly what you want when a customer calls two years later and the original installer has to reconstruct what happened.
How should an undermount sink be installed to avoid dropping?
Here is what a correct install looks like, step by step.
First, the cabinet deck has to be sound. Solid plywood, no soft spots, well supported by the box. Any doubt, sister a piece of 3/4-inch exterior-grade plywood to the existing deck before you go further.
Second, dry-fit the sink in the cutout and check the clip hardware before any adhesive touches anything. Count the clips. For a 30-to-33-inch kitchen sink you want six minimum, eight is better. Put clips at each corner and at regular spacing on all four sides, no span over eight inches.
Third, wipe both the underside of the stone along the rim line and the top edge of the sink rim with acetone, and let it fully flash off. This step is not optional.
Fourth, run a continuous bead of two-part structural stone epoxy on the sink rim. Match the epoxy to the stone: some dark epoxies telegraph through translucent marbles.
Fifth, set the sink, bring all clips to finger-tight, then snug them down evenly the way you torque lug nuts. Alternate across the sink, not around in sequence. You want even clamping all the way around.
Sixth, let it cure the full manufacturer time before running water or loading the basin. For most two-part stone epoxies that is 24 hours minimum, 48 ideally [2].
Seventh, after cure, run a bead of neutral-cure silicone around the perimeter from the top to seal the joint. That silicone is the sacrificial seal you will maintain. The epoxy underneath is the structural bond.
For natural stone, knowing how your specific material handles moisture helps too. The how to clean stone countertops guide covers sealing and maintenance by stone type.
Does granite weight make sink failure more likely than with lighter materials?
Granite is heavy, roughly 18 to 22 lbs per square foot at standard 3cm thickness [8]. A typical kitchen granite top runs 60 to 120 lbs or more. But the cabinet carries the granite. The sink mounting system carries only the sink.
So granite weight by itself does not make the sink more likely to drop. What granite does demand is a precise cutout, because stone does not flex. A cutout even slightly off means the rim does not touch the stone underside evenly all the way around, so the epoxy only bonds where the two surfaces actually meet.
Engineered stone like Cambria behaves the same way here. For more on how granite performs in kitchens, including around cutouts, the granite countertops guide has the material-level detail, and the Cambria countertops guide covers that brand specifically.
Marble cutouts carry a bit more moisture-management concern because marble is more porous. The marble countertops guide covers that.
The fabricator's CNC accuracy at the cutout matters more than the slab's weight class.
What are the warning signs that a sink is about to drop before it actually falls?
Failure is usually gradual, which buys you time if you know what to watch for.
A hairline gap at the front of the rim, where it meets the underside of the stone, is the first tell. It reads as a thin dark line, worst at the forward-facing section where gravity pulls hardest. Shine a flashlight from below to confirm.
Water pooling on the counter right around the rim instead of draining cleanly over the edge is the second sign. The rim has dropped just enough to build a little dam.
A musty or mildew smell from inside the sink cabinet, past what is normal for that space, means water has been getting into the substrate.
Clicking or tapping when you press hard on the front of the basin means the sink moves under load. It should not move at all.
Open the cabinet, shine a light up at the underside of the counter, and you can sometimes see the gap directly, or spot staining where water has tracked through the joint.
Any of these means act now, not next month. Repair cost roughly doubles for every six months you wait once water starts getting in.
Are there installation standards or building codes that cover undermount sink fastening?
No single national code section spells out undermount clip counts or epoxy type. The Uniform Plumbing Code (UPC) and the International Plumbing Code (IPC) govern drain and supply connections but say nothing about how the sink fixture itself gets mechanically fastened [9][10].
The real standards come from two places. Stone industry trade groups, mainly the Marble Institute of America (now part of the Natural Stone Institute), publish installation guidelines on adhesive type, surface prep, and support for stone countertop installs [11]. Those are not legally binding codes, but they set the professional standard of care a fabricator gets judged against in a warranty fight.
Manufacturer install instructions for a specific sink carry contractual weight: follow them and the product still fails, and the warranty is easier to invoke. Trouble is, most sink warranties exclude failures caused by improper installation, and improper installation is exactly what causes most undermount drops.
For a shop, tracking the install method on each job pays off when a warranty claim lands. SlabWise lets fabricators attach install specs to job records so the paper trail exists when a customer calls with a callback two years out.
Some jurisdictions require a licensed plumber for any work that touches supply or drain lines, which basically means plumber involvement on any sink reinstall. Check local rules before doing this yourself.
Frequently asked questions
How long after installation can a sink start to drop?
Most failures show up in the first one to three years. If the epoxy bond was weak from day one, you may see a gap within six months. If the substrate is slowly getting wet and losing strength, failure can take two to five years to show. A properly installed sink on a solid substrate with the right epoxy should not drop during the countertop's service life.
Will homeowner's insurance cover a dropped undermount sink?
Almost certainly not for the sink repair itself. Homeowner's insurance covers sudden accidental damage, not wear-and-tear or installation defects. If a dropped sink caused water damage to the cabinet, flooring, or structure below, that secondary damage might be covered depending on the policy and how fast you reported it. Read your policy's water damage exclusions closely; many exclude damage from slow leaks.
Can a cracked stone countertop at the sink cutout be repaired without full replacement?
Sometimes. A crack running from the cutout to the edge of the stone is serious and may need slab replacement. A small crack at a corner of the cutout can often be stabilized with color-matched epoxy filler and is not structurally dangerous as long as it does not extend far. Have a fabricator look at it in person; photos cannot show crack depth or direction.
Is epoxy or silicone better for holding an undermount sink?
Epoxy is the structural bond; silicone is the perimeter seal. They are not interchangeable. Two-part stone epoxy has the tensile and shear strength to hold a sink rim against stone. Silicone is flexible and water-resistant but lacks the load strength to serve as the primary fastener. A correct install uses both: epoxy for holding, silicone from the top after cure for waterproofing the joint.
How many clips does an undermount sink actually need?
At least six clips for a standard 30-to-33-inch kitchen sink, with eight being better. Put clips at every corner and space them no more than eight inches apart on straight runs. Fewer clips raise the bending stress on the rim between supports and cut clamping force on the epoxy during cure. Heavy cast-iron sinks at 50 to 100 lbs want at least eight clips regardless of width.
Why do undermount sinks drop more often in rental properties?
Two reasons. Rentals often got lower-budget original installs with fewer clips and faster cure times. And the under-sink area rarely gets inspected by tenants, so slow leaks from supply lines or drains run unnoticed longer, degrading the substrate before anyone catches it. A quick under-sink check at every turnover, looking for soft plywood and moisture staining, catches most of these before the sink drops.
Can an undermount sink be installed in a Corian or solid-surface countertop safely?
Yes, and solid-surface materials like Corian suit undermount sinks well because the sink bonds directly to the underside with the same solid-surface adhesive used for seams, making a joint that is nearly invisible and genuinely strong. The bowl can also be built into the top as an integrated unit. Clip requirements differ from stone, so follow the manufacturer's solid-surface mounting instructions. See the Corian countertops guide for more.
Does the sink material (cast iron vs. stainless vs. fireclay) affect how likely it is to drop?
Weight is the main variable. Cast-iron sinks at 50 to 100 lbs put more sustained load on the clips and epoxy than stainless at 15 to 30 lbs. Fireclay sinks are also heavy, usually 40 to 80 lbs. Heavier sinks need more clips, better substrate, and no shortcuts on cure time. The sink material itself matters less to adhesive compatibility than surface cleanliness and prep do.
What is the right way to support a sink while the epoxy cures?
The clips provide the primary clamping force during cure, which is why they have to be snugged down properly before the epoxy sets. Some installers also wedge temporary support boards from below, across the cabinet interior, to take weight off the clips while the epoxy cures, especially for heavy cast-iron sinks. Remove any temporary supports only after the full cure time the epoxy manufacturer specifies, not before.
How do I tell if my cabinet substrate is too weak to hold an undermount sink?
Open the cabinet and press firmly on the plywood deck with a flat-blade screwdriver. Solid plywood resists; you cannot push it in. Degraded plywood gives slightly, and really bad plywood lets the point sink in with moderate pressure. Look for white or gray discoloration (water staining), delamination at the edges, and swelling. Find any of these and replace the substrate before any sink reinstallation.
Is a dropped undermount sink covered by the fabricator's warranty?
Most fabricators offer a one-to-two-year workmanship warranty covering installation failures, including sink drops tied to their work. Whether a specific failure qualifies depends on whether the substrate was sound at install, whether the homeowner ran water before cure finished, and whether later plumbing work disturbed the install. Get the warranty in writing before the job and keep records of who did the plumbing reconnection.
Can I use construction adhesive like Liquid Nails instead of stone epoxy for an undermount sink?
No. Construction adhesives are not formulated for the bond between non-porous stone and a sink rim, and they lack the shear strength for the sustained load of a kitchen sink. Some products form an initial bond that looks fine, then fail within months under load and moisture. Use a two-part epoxy specifically labeled for stone or countertop fabrication.
How does undermount sink installation differ for quartz vs. granite countertops?
The process is essentially the same. Both need clean, dry surfaces, two-part stone epoxy, the right clip count, and full cure before use. Cutout tolerances matter for both: quartz and granite are rigid and will not conform to a slightly miscut opening. One difference is that some quartz manufacturers void their warranty if certain adhesives or solvents are used, so check the specific brand's install requirements first.
Sources
- National Kitchen and Bath Association (NKBA), Kitchen & Bath Planning Guidelines: Cast-iron undermount sinks typically weigh 50 to 100 lbs; stainless undermount sinks typically weigh 15 to 30 lbs.
- Adhesive and Sealant Council, Structural Adhesive Performance Guidelines: Two-part structural epoxy adhesives typically reach full cure in 24 to 72 hours depending on formulation and ambient temperature.
- Woodwork Institute, guidance on wood moisture and sink installations: Undermount sinks in wood substrates including butcher block are generally not recommended because end-grain moisture exposure degrades the wood and adhesive bond over time.
- USDA Forest Products Laboratory, Wood Handbook (Mechanical Fasteners chapter): Fastener holding strength in plywood decreases significantly as wood moisture content rises above fiber saturation point, approximately 28 to 30 percent moisture content.
- ASTM International, ASTM C881 Standard Specification for Epoxy-Resin-Base Bonding Systems for Concrete: Two-part epoxy bonding systems used in structural applications are designed for 20-plus year service life in dry-to-moderate exposure environments.
- Angi, Countertop Repair Cost Guide: Undermount sink repair costs range from approximately $150 to $800 or more depending on scope of work, substrate condition, and whether plumbing disconnection is required.
- The Home Depot, undermount sink clip kit product listings: Undermount sink clip sets are typically priced between $15 and $40 at major home improvement retailers.
- Natural Stone Institute, Dimension Stone Design Manual: Granite at standard 3cm thickness weighs approximately 18 to 22 lbs per square foot.
- International Association of Plumbing and Mechanical Officials (IAPMO), Uniform Plumbing Code: The Uniform Plumbing Code governs drain and supply connections but does not specify mechanical fastening requirements for undermount sink fixtures.
- International Code Council (ICC), International Plumbing Code: The International Plumbing Code covers fixture installation and drain connections but does not specify countertop sink clip counts or adhesive types.
- Natural Stone Institute, Countertop Installation Standards and Guidelines: The Natural Stone Institute publishes installation guidelines covering adhesive type, surface preparation, and mechanical support requirements for stone countertop sink installations, representing the professional standard of care.
Last updated 2026-07-10