TL;DR
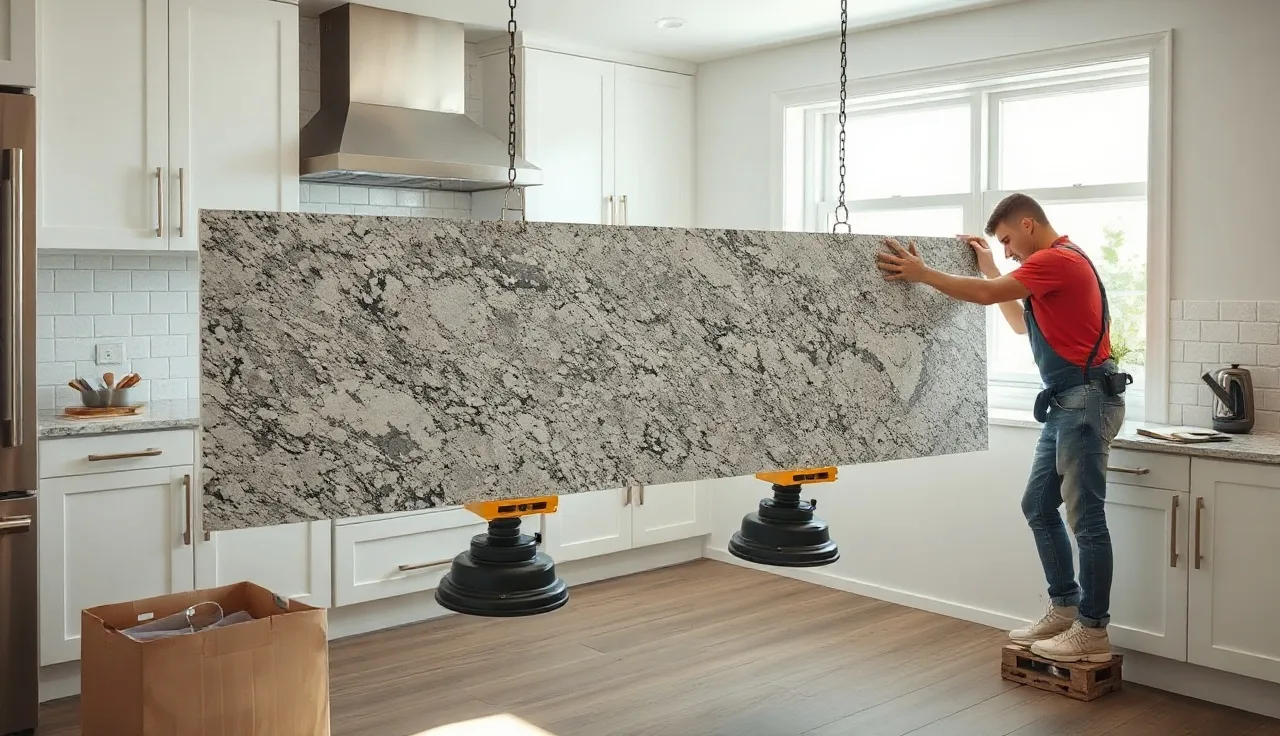
- Setting granite means leveling cabinets, applying silicone adhesive in blobs, lowering the slabs, shimming them flat, and caulking the wall joints.
- A standard kitchen takes two to four people and four to eight hours.
- Professional installation runs $250 to $1,600 depending on slab size, cutouts, and region.
- DIY works on small vanity tops but gets risky on full slabs weighing 18 to 20 pounds per square foot.
What does 'setting' granite countertops actually mean?
Setting is the last stage of a countertop job. The fabricated slabs go from the shop floor onto your cabinets and stay there. It is a different job from fabrication (cutting, edging, polishing) and templating (measuring). Setting covers cabinet inspection, adhesive application, seam joining, sink cutout support, and the final caulking at the walls.
Granite is heavy. A 1.25-inch (3 cm) slab weighs roughly 18 to 20 pounds per square foot [1]. A modest L-shaped kitchen with 40 square feet of countertop moves 700 to 800 pounds of stone. That weight is why technique matters far more for granite than for laminate countertops or Corian countertops, where one person can often handle the whole thing.
Good installers treat setting as a skilled trade. The sequence is specific. The tolerances are tight (most shops hold seams to 1/16 inch or better). And the mistakes are expensive, because a slab cracked mid-install is not a warranty claim. It is a new slab order.
What tools and materials do you need before you start?
Gather everything before the slabs arrive. Stopping mid-install to hunt for a missing shim burns the working time of your adhesive, and silicone does not wait.
Tools you need:
- 4-foot level at minimum (6-foot is better for long runs)
- Tape measure and pencil
- Drill with screwdriver bits
- Circular saw or oscillating tool for last-minute cabinet trim
- Rubber mallet
- Suction cup lifters rated for stone (at least two, ideally four)
- Ratchet straps or toggle clamps for seams
- Caulk gun
- Denatured alcohol and clean rags
Materials you need:
- 100% silicone adhesive, neutral-cure, not acetoxy [2]
- Two-part epoxy colored to match the stone (for seams)
- Plastic shims
- Seam setter or seam clamps
- Painter's tape
- Foam backer rod for wall gaps larger than 3/8 inch
- Silicone caulk in a color matching the stone or grout
One field mistake shows up again and again: acetoxy-cure silicone, the kind that reeks of vinegar. The acetic acid it releases can discolor lighter granites over time [2]. Neutral-cure costs a little more and smells milder. Use it.
How do you prepare cabinets before setting granite?
Cabinet prep decides whether the install goes smoothly or turns into a fight. Granite does not flex. Cabinets do. If the cabinets are not level and flat within about 1/8 inch across the run, the slab bridges the low spots and cracks under a point load, or it rocks and the seam opens over time. ASTM C1721, the standard guide for dimension stone countertops, treats substrate preparation as the base requirement for a sound install [9].
Check level in both directions across every cabinet top. Mark the high and low spots with a pencil. Shim the low spots with plastic shims or a plywood layer. Plane or sand the high spots. This step is slow on older kitchens where settling has warped things, and it is not optional.
Confirm that every upper cabinet and appliance is in before the stone goes down. Setting granite before a range hood or over-fridge cabinet is in place is a mistake installers make exactly once. You cannot maneuver appliances past a set slab.
For a replacement, pull the sink, faucet, and hardware off the old top. Disconnect the plumbing. Cut the old wall caulk with a utility knife. Clean the cabinet tops of adhesive residue with denatured alcohol.
For a new install, confirm the cabinet tops can carry the weight. Standard frameless and face-frame cabinets usually can. If you have open-frame cabinets with no top shelf, add a 3/4-inch plywood substrate across the run. That plywood also gives you more surface area for adhesive, which matters on overhangs.
How much overhang can granite have without support?
The Natural Stone Institute puts the practical limit at 12 inches: overhangs past that need corbels or brackets [3]. Most fabricators follow the same rule, though a few push to 14 inches on thicker 3 cm material. At 2 cm (3/4 inch), the unsupported limit drops to around 6 inches.
For an island with bar stools, a 12-inch overhang is typical. A 15 to 18-inch overhang for seated dining needs corbels or steel brackets anchored to the cabinet structure. Those brackets go in before the stone arrives, flush to the cabinet front.
Here is the rule of thumb installers actually use: the overhang should not pass one-third of the total slab depth without support. A 26-inch-deep slab overhangs about 8 to 9 inches comfortably. A 30-inch slab gives you more. These are field rules, not engineering calculations, and for anything unusual you want your fabricator to weigh in before brackets go in.
Where a slab cantilevers hard (appliance garages, raised bars), some fabricators epoxy a steel rod or rebar into a routed channel on the underside. That trick is more common in commercial work, but residential installers pull it out on tricky layouts.
How do you actually set and adhere the slab?
Cabinets are level, materials are staged. Here is the sequence the pros run.
Dry fit first. Lower the slab onto the cabinets with no adhesive. Check the fit at the walls, confirm the overhang is even, and verify the seams line up across multiple pieces. Mark the position on the cabinet top in pencil so you know exactly where it goes back.
Lift the slab back off. Apply five to seven blobs of 100% silicone across the cabinet tops, each about the size of a golf ball. No continuous bead. The blobs compress under the slab weight and give you a little adjustment time. A continuous bead traps air and fights your leveling moves.
Set the slab. With two or more people on suction cups, lower it back onto the blobs, lined up to your pencil marks. Work slow. You cannot rush a 400-pound piece.
Check level and adjust. Lay your level across the slab in several directions. Tap gently with a rubber mallet through a wood block, never straight on the stone, to shift it. If a corner sits low, lift with a suction cup and slide a shim under before re-setting.
Do not move the slab after 20 minutes. Most neutral-cure silicones skin over in 20 to 30 minutes at room temperature [2]. Shift it after that and you break the bond without anything looking wrong.
For seams: run colored two-part epoxy on both edges, bring them together, and pull them tight with seam setters or ratchet clamps. Wipe the squeeze-out immediately with a razor blade before it cures. Full cure on most granite epoxies is 60 to 90 minutes. Do not stress the seam until then.
If you run a shop and quote these jobs, SlabWise builds line-item quotes that carry installation labor, cutout fees, and edge profiles in one place, so the number the homeowner sees reflects the full cost of everything described here.
How do you handle sink cutouts and cooktop openings during installation?
A sink cutout pulls a big piece of stone out of the slab, so the area around it is weaker than it looks. During the set, that cutout has to be supported from below until the slab is fully placed and the adhesive has cured.
Installers usually rest a scrap of plywood or a few 2x4 blocks inside the sink cabinet, height-matched to touch the underside of the stone. That stops the slab from flexing down into the void while it settles.
Once the silicone cures (24 hours minimum, 48 for heavy undermount sinks), pull the temporary support and drop in the sink.
For undermount sinks, the norm is mounting clips plus 100% silicone, not fasteners alone. The Natural Stone Institute's installation guidance describes undermount support as a combination of clips and silicone rather than mechanical anchoring by itself [3]. The sink rim seats against polished granite and the joint gets sealed with a color-matched silicone bead.
Cooktop cutouts work the same way, but the slab usually sits on more cabinet around the opening, so the structural risk is lower. Still, make sure your silicone reaches the areas next to the cutout, heavier there than in the field of the slab.
How do you finish seams so they are invisible?
A great seam nearly disappears. A bad one is the only thing you see. The gap between the two comes down to slab flatness, epoxy color, and surface prep.
Color is the big one. Most suppliers sell small stone epoxy kits, and most fabricators mix a custom color per job by blending tints into the base resin. Shoot a photo of the slab under the kitchen's own lighting before you mix. What reads beige under shop fluorescents reads cream under warm LED pendants.
Surface prep: both edges clean and dry before the epoxy touches them. Any moisture, oil, or dust kills the bond. Wipe with denatured alcohol, let it dry five minutes, then apply [10].
After cure, flatten the seam with a razor blade held at a shallow angle. Some fabricators follow with 400-grit wet-dry paper on a block to blend the texture. A polished seam should sit flush within 0.005 inches so a fingernail catches nothing [10].
Granite pattern complicates placement. A bookmatched slab with strong veining needs the seam set where the veins can be matched. A busy, random crystal structure forgives more. Your fabricator should have marked the seam on the template and confirmed it with you before cutting. If they didn't, ask before install day.
How do you caulk and finish the backsplash edge?
The joint between granite and a wall or tile backsplash is always caulk, never grout. Grout is rigid. Granite and walls move at different rates as the house settles and temperatures swing. A grout joint cracks within a year in most kitchens. Caulk flexes and absorbs the movement.
Use 100% silicone or siliconized latex caulk in a color that matches the countertop or the grout you plan to use. Run a steady line with the gun, then tool it smooth with a wet fingertip or a caulk tool. Wipe the excess before it skins.
If the gap between wall and granite runs wider than 3/8 inch (common in older homes with out-of-plumb walls), pack it with foam backer rod first, then caulk over that. Caulk alone across a wide gap shrinks and sinks.
Granite tile backsplashes follow the same rule. The joint where the counter meets the wall tile is a movement joint, full stop. Grout everything above it. Caulk that bottom row.
Does granite need to be sealed after installation?
Most granite needs sealing, but not all of it. Dense stones like Absolute Black or Ubatuba have very low porosity and can pass a water test without sealer. Open-grained stones like Giallo Ornamental and many whites soak up water and stain fast if left bare.
The field test is simple. Put a tablespoon of water on the surface. If it beads for 15 minutes or more without darkening the stone, the granite is dense enough that it does not need sealing right away. If the stone darkens in under 4 minutes, seal it before it goes into service [4].
For most residential kitchens, a penetrating impregnating sealer on install day is plenty. Spray it, let it sit 3 to 5 minutes, wipe dry, repeat once. Twenty minutes, done. The Natural Stone Institute recommends resealing high-use surfaces annually, though some premium sealers claim 10 to 15 year life [3].
For care after the stone is set, the guides on how to clean stone countertops and granite countertops cover daily maintenance and stain removal.
How much does professional granite installation cost?
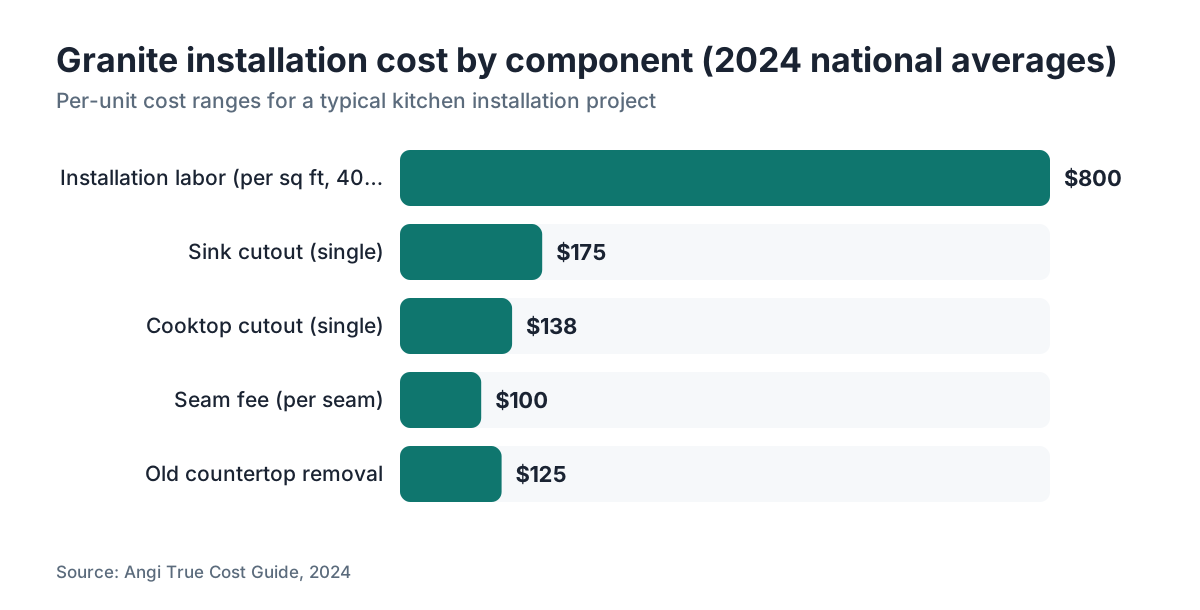
Installation cost sits apart from the slab cost and the fabrication cost. Most fabricators bundle all three, so the line items blur together. Here is roughly how the setting portion breaks down in 2024, based on national pricing survey data [5].
| Cost component | Typical range |
|---|---|
| Basic installation labor (per sq ft) | $10 to $30 |
| Sink cutout | $100 to $250 |
| Cooktop cutout | $75 to $200 |
| Seam (per seam) | $50 to $150 |
| Removal of old countertop | $50 to $200 |
| Permit (rare for countertops) | varies |
A typical 40-square-foot kitchen with one sink cutout and one seam runs $600 to $1,600 for installation alone, before slab or edge profile costs. Complex layouts with multiple cutouts, radius corners, or bad access push toward the high end.
Region swings the number. Installers in San Francisco or New York charge materially more than crews in the rural Midwest. The per-square-foot figures above are national averages; your local quote may run 20 to 40 percent higher or lower.
For the full cost picture, kitchen countertops covers material selection, which usually dwarfs installation on premium stone.
One tell for homeowners collecting bids: the cheapest install often skips steps. No dry fit, no temporary sink support, acetoxy silicone instead of neutral-cure. Ask what adhesive the installer uses. That single question tells you a lot.
Can you DIY granite countertop installation?
Honest answer? On a small bathroom vanity with a prefab top, yes, a careful DIYer can pull it off. On a full kitchen with multiple pieces, a sink cutout, and 600 pounds of stone, probably not safely.
The risks are real. Granite cracks if it sets on an uneven surface. A slab you crack during your own install is covered by nobody's warranty. A replacement kitchen piece runs $500 to $3,000, plus re-fabrication time.
The ergonomics are the other problem. Suction cup lifters rated for 250 to 400 pounds per cup need two to four people moving in sync. OSHA flags manual stone handling as a high-risk task and calls for team lifts on loads over 50 pounds [7]. A dropped slab hurts people and wrecks floors.
If saving money is the goal, do the cabinet prep and leveling yourself (the most time-consuming non-skilled part) and hire the crew just for setting day. That split is common and shaves labor cost without taking on the dangerous part.
For comparison, butcher block countertops and Formica countertops are far more realistic DIY jobs. Granite sits at the hard end of the spectrum.
What are the most common mistakes during granite installation?
These are the mistakes that generate callbacks and, at their worst, cracked slabs.
Skipping the dry fit. Every experienced installer dry fits. It surfaces fit problems at walls, seam issues, and overhang gaps before adhesive goes down. Skip it to save 30 minutes and you buy back hours in callbacks.
Setting on unlevel cabinets. This is the number one cause of cracked granite. The slab bridges a low spot, someone leans on the bridge, the stone fractures. It almost always fails at the weakest point: the seam or the cutout.
Using the wrong silicone. Acetoxy-cure can yellow or stain lighter stones. Neutral-cure is the right call for stone [2].
Not supporting the sink cutout. The blocking goes in the sink cabinet before the slab comes down. Every time.
Rushing the epoxy. Wiping seam epoxy after it starts to skin smears it into a mess that takes hours to clean. Tape first, wipe immediately after applying, and let it cure fully before you tool it.
Moving the slab after the silicone skins. Once the adhesive starts to set, shifting the slab introduces stress in the bond that shows up as movement later. Nail the placement in the first 15 minutes.
Grouting the wall joint. The wall joint is always caulk. Grout it and you have booked yourself a callback in about 12 months.
How long does granite installation take, and what should install day look like?
A standard kitchen takes a crew of two or three about four to six hours from truck to cleanup. Bigger kitchens with complex layouts, multiple cutouts, or tough access (narrow doorways, stairs) can run eight hours or more.
Here is a realistic timeline for a 40-square-foot kitchen with two pieces and one sink cutout:
- Cabinet inspection and final leveling: 30 to 60 minutes
- Unloading and staging slabs: 30 minutes
- Dry fit and adjustments: 30 to 45 minutes
- Adhesive application and final set: 30 minutes
- Seam work and clamping: 30 to 45 minutes
- Sink cutout support, verify plumbing clearance: 15 minutes
- Caulking at walls: 20 to 30 minutes
- Cleanup and client walkthrough: 15 minutes
Total: roughly 3.5 to 5 hours of crew work. Then the adhesive needs 24 hours before the sink goes in and normal use begins. Silicone reaches full cure in 24 to 72 hours depending on temperature and humidity [2].
For shops tracking install productivity and job profit, SlabWise helps correlate quoted labor hours to actual crew time across jobs. That gap is where most fabrication shops leave money on the table.
For comparison, marble countertops and Cambria countertops follow essentially the same sequence. The differences are weight (Cambria quartz runs slightly lighter) and sealing (marble needs it; engineered quartz usually does not).
Frequently asked questions
Can granite countertops be installed directly on cabinet frames without a plywood substrate?
Yes, for standard frameless or face-frame cabinets with a solid top rail, plywood is not required. The silicone bonds to the cabinet top and the stone spans between support points. If your cabinets have open tops or weak top rails, add a 3/4-inch plywood layer first. Always confirm the surface is level within 1/8 inch before you skip the substrate.
How long after installation can I use my granite countertops?
Light use like setting objects on the surface is safe within a few hours, once the epoxy seam has cured. Hold off on the undermount sink or running water until the silicone has cured at least 24 hours. Full silicone cure takes 24 to 72 hours. Most installers say wait 24 hours before installing the sink and 48 hours before normal daily use.
Do I need a permit to install granite countertops?
In almost all U.S. jurisdictions, no. Replacing countertops is a like-for-like cosmetic renovation with no structural or plumbing work, so it does not trigger a building permit. If the project moves or adds plumbing supply or drain lines, a plumbing permit may apply. Call your local building department if you are unsure. That call is faster than assuming.
Why is my granite countertop cracking after installation?
Cracks after installation almost always trace to one of three causes: cabinets that were not level (so the slab bridges a low spot and fractures under load), a seam stressed before the epoxy fully cured, or thermal shock from pouring boiling water on cold stone. Point loading from sitting or standing near a seam or cutout is another common cause.
What is the best adhesive for setting granite countertops?
Neutral-cure 100% silicone is the industry standard for bonding granite to cabinets. It stays flexible after curing, so it handles minor cabinet movement without stressing the stone. For seams, use a two-part colored epoxy, not silicone, because epoxy cures hard and polishes flush. Never use acetoxy-cure silicone on granite; the acetic acid it off-gasses can discolor lighter stones.
Can one person install granite countertops?
Not safely for full kitchen slabs. A 3 cm slab for a standard 8-foot run can weigh 250 to 350 pounds. Moving and placing it needs at least two people, and three or four is better for large pieces. Suction cups help but do not solve the coordination problem. On small bathroom vanity pieces under 50 pounds, one careful person can manage with proper suction tools and a helper standing by.
How do I stop a granite seam from being visible?
Seam visibility comes down to four things: placement, epoxy color match, edge prep, and surface flatness. Place seams where the stone pattern is less directional. Mix epoxy to match the stone under your kitchen lighting. Make sure both edges are clean and flat before applying. After cure, scrape flush with a razor blade and blend with fine wet-dry sandpaper if needed.
Should granite overhang the cabinets on all sides?
Standard practice is a 1.5-inch overhang at the front toward the room and no overhang at the back against the wall or backsplash. Side overhangs vary by design. For islands, front and side overhangs are typically 1.5 inches, with seating overhangs going up to 12 inches unsupported. Past 12 inches, corbels or brackets are required to prevent cracking or tip-over.
What is a seam setter and do I need one?
A seam setter is a clamping tool that spans a granite seam and pulls the two pieces flush and tight while epoxy cures. They sell as pairs and clip to the top surface using suction or adhesive pads. You can substitute ratchet straps wrapped carefully around the sections, but seam setters give more precise alignment. For any seam job, some form of controlled clamping is necessary.
How do installers handle granite countertops around corners and inside angles?
Inside corners (L-shapes) are set as two separate pieces that meet at the corner with an epoxy seam. The seam usually runs so one piece spans the full length of one leg and the other butts into it. Outside corners on overhangs get a bullnose, mitered, or eased edge done during fabrication, not install. True mitered corners require precision cutting and are quoted separately.
How do I choose between hiring a fabricator for installation versus a separate installer?
Use your fabricator for installation whenever you can. They cut the stone, so they know where the seams are, what the slab weighs, and how the pieces fit. A separate installer working with someone else's fabrication opens an accountability gap: if something cracks, the fabricator blames the installer and vice versa. One company for fabrication and installation gives you a clean warranty chain.
Can granite countertops be removed and reinstalled?
Sometimes. If the original installer used silicone blobs rather than a continuous bead, the slab may pry up without cracking. A thin putty knife worked along the edge, followed by a 12-inch drywall knife, can break the silicone bond. Success depends heavily on how much adhesive was used and how accessible the edges are. Thin 2 cm slabs almost never survive removal intact.
Sources
- Natural Stone Institute, Dimension Stone Design Manual: Granite slab (3 cm) weighs approximately 18 to 20 pounds per square foot
- Dow, DOWSIL 795 Silicone Building Sealant Technical Data Sheet: Neutral-cure silicone skins in 20 to 30 minutes at room temperature and reaches full cure in 24 to 72 hours; acetoxy-cure releases acetic acid during cure
- Natural Stone Institute, Dimension Stone Design Manual: Corbel or bracket support recommended for granite overhangs beyond 12 inches; undermount sink attachment using a combination of clips and 100% silicone; annual resealing recommended for high-use surfaces
- Natural Stone Institute, Sealing Natural Stone Guidance: Stone that darkens (absorbs water) in under 4 minutes on the water drop test should be sealed before use; 15-minute bead-up indicates adequate density
- Angi (HomeAdvisor), True Cost Guide: Granite Countertop Installation 2024: Granite installation labor ranges from $10 to $30 per square foot; sink cutouts $100 to $250; seam fees $50 to $150 per seam in 2024 national survey data
- U.S. Geological Survey, National Minerals Information Center (Dimension Stone): Granite is classified as a dimension stone; USGS tracks production and pricing data for domestic granite quarrying operations
- Occupational Safety and Health Administration (OSHA), Materials Handling guidance: OSHA identifies stone handling as a high-risk manual materials handling task requiring team lifts for heavy loads
- National Kitchen and Bath Association (NKBA), Kitchen and Bath Planning Guidelines: NKBA guidelines specify standard countertop overhang of 1 to 1.5 inches at the front; extended overhangs for seating require structural support
- ASTM International, ASTM C1721 Standard Guide for Dimension Stone Countertops: ASTM C1721 covers installation requirements for dimension stone countertops including substrate preparation, adhesive selection, and seam tolerances
- International Masonry Institute, Stone Installation Guidelines: Epoxy seam fillers for stone countertops require clean, dry surfaces and full cure time before load application; surface should be flush within 0.005 inches after finishing
Last updated 2026-07-09