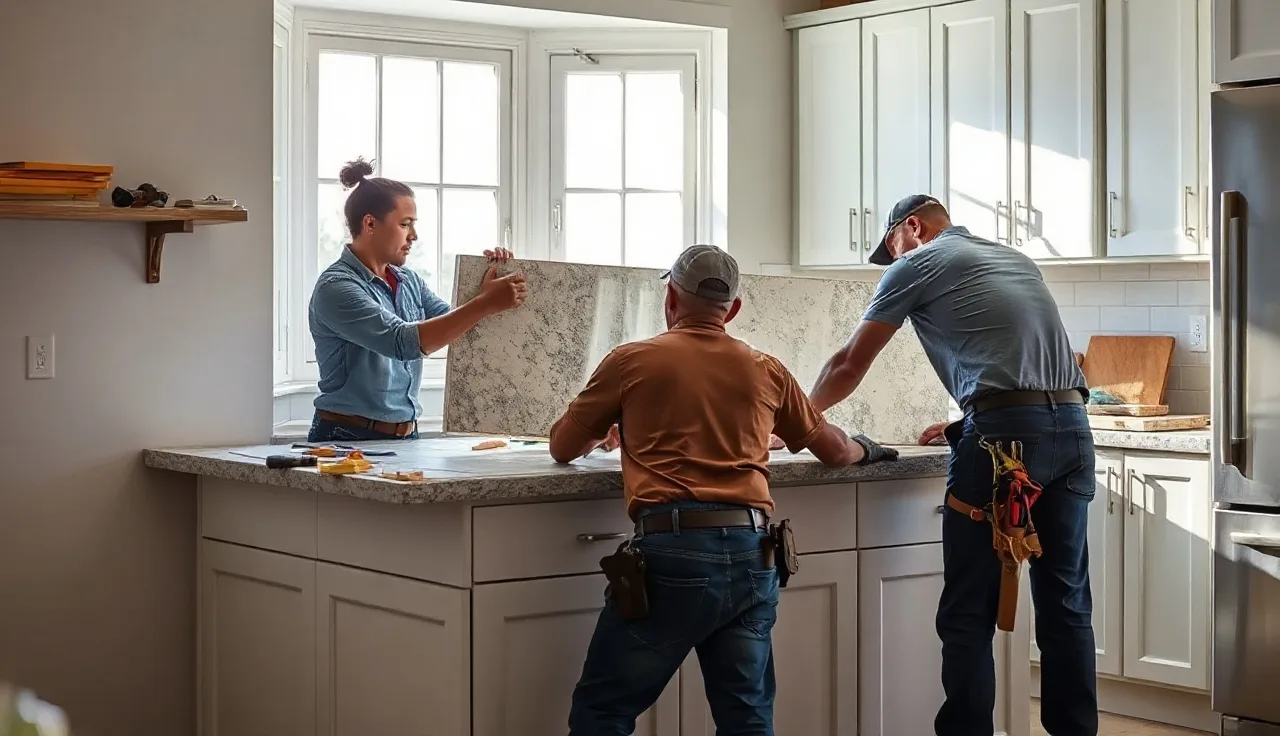
TL;DR
- Installing a countertop on base cabinets takes 2 to 6 hours for most kitchens.
- You need the cabinets level, the countertop cut to fit, and a bead of silicone or construction adhesive to hold it down.
- Stone slabs require a professional for template and cut; laminate and butcher block are realistic DIY.
- Typical installed cost runs $40 to $200 per square foot depending on material.
What tools and materials do you need before you start?
Get everything on the bench before you touch the countertop. Missing one item mid-install is how mistakes happen.
Tools you'll need: a tape measure, a 4-foot or 6-foot level, a pencil, a jigsaw or circular saw (for laminate and butcher block), a drill and bit set, a tube gun (caulk gun), a putty knife or scraper, clamps, and safety glasses. For stone countertops, add suction cup handles so you can move the slab without dropping it.
Materials: 100% silicone adhesive or a polyurethane construction adhesive rated for countertops, shims (plastic or wood composite hold up better than cedar in humid kitchens), sandpaper (80- and 120-grit), denatured alcohol or acetone for cleaning mating surfaces, and backer rod if you have gaps larger than 3/8 inch to fill before caulking.
For stone specifically, you'll also want color-matched epoxy or seam setter compound if pieces are joining. Fabricators typically supply this and set it themselves, but if you're managing a repair, two-part epoxy rated for stone is the standard.
One thing worth buying and not skipping: a moisture meter. Run it along the top of your cabinet boxes before the countertop goes on. Wet wood swells, and a countertop installed over swollen cabinet tops will rack out of level inside a year.
How do you prepare base cabinets for countertop installation?
Cabinet prep is where the whole job lives or dies. A countertop can't fix cabinets that aren't ready.
Start by checking that every cabinet box is plumb and square. Use a long level (4-foot minimum) laid across the tops of all the cabinet boxes in a run. Mark high and low spots with a pencil. High spots get sanded or shimmed down from above; low spots get shimmed up. The goal is a plane within 1/8 inch across the full run. Many installers tighten that to 1/16 inch for stone, because any flex in a granite or quartz slab concentrates stress at seams and can crack the material. [1]
Make sure cabinets are fastened to the wall studs, more than drywall. Pull on a corner cabinet and feel for any movement. If a box rocks, find the studs with a stud finder and drive 3-inch screws through the hanging rail into the framing. HUD's residential guidance is blunt about this: cabinet boxes need to reach the framing, not sit on drywall alone. [8] Adjacent cabinet boxes should also be screwed to each other at the face frame, usually two screws per joint, so the whole run moves as one unit.
Remove the cabinet doors and drawer fronts on any runs where the countertop will land. You don't want a door swinging open and knocking a slab edge off a shim during the install.
Clean the top edges of all cabinet boxes. Old adhesive, dried paint, or debris will create high spots. A putty knife and a quick pass of 80-grit sandpaper is usually enough. Then wipe down with denatured alcohol and let it dry completely before moving on.
How do you measure and template a countertop correctly?
Measure twice, cut once is a cliché because it's true. A wrong cut on a stone slab costs hundreds of dollars.
For laminate and butcher block that you'll cut yourself: measure the depth front-to-back (standard is 25.5 inches for a 24-inch-deep base cabinet, which gives a 1.5-inch overhang at the front) and the length left-to-right. Note every wall angle. Most walls are not perfectly square, and a corner that looks like 90 degrees is frequently 89 or 91. A digital angle finder runs about $20 and pays for itself immediately.
For stone countertops, a professional templater comes out and either measures by hand with a story stick and template stock or uses laser or digital arm templating equipment. Digital templating has become the industry standard in most markets because it feeds directly into CNC saw software, cutting out transcription errors. [2] If your fabricator still does hand templates, that's fine, but ask to be present when it's done so you can flag anything that looks wrong before the slab gets cut.
When measuring for a sink cutout, get the sink's template from the manufacturer. Most undermount sinks ship with a paper template. Use that template, not a freehand measurement. The dimensions matter because the clips that hold an undermount sink to the underside of the countertop have almost no horizontal adjustment.
For a cooktop cutout, pull the appliance spec sheet (most are on the manufacturer's website as a PDF) and use the cutout dimensions listed there, not the overall appliance dimensions. The cutout is always smaller than the cooktop footprint.
How do you install laminate countertops on base cabinets step by step?
Laminate is the most DIY-friendly countertop material. You can buy it in stock sizes at home improvement stores or order cut-to-size.
Step 1: Set the countertop in place dry (no adhesive) and check the fit against the wall. Use a compass or scribe tool to trace the wall profile onto the countertop backsplash. Grind or sand the backsplash edge to follow that line. This is called scribing, and it fills the gap between an uneven wall and the countertop edge.
Step 2: Make your cutouts before setting the countertop permanently. Clamp the piece to sawhorses, mark the cutout with a pencil, drill a starter hole inside each corner of the cutout line, and cut with a jigsaw using a fine-tooth blade. Cut from the underside if possible to reduce chip-out on the visible laminate face.
Step 3: Dry-fit the piece one more time. Once it's right, apply a bead of silicone adhesive along the top edge of the cabinet frames. Use a continuous bead for the first 2 inches in from the front and back edges; a zigzag pattern works for the middle. Don't glob it on. You want contact, not squeeze-out that makes removal a nightmare later.
Step 4: Set the countertop into the adhesive. Some installers also run a screw up through a corner block (a small wood block glued inside the cabinet corner) into the underside of the countertop. This is a belt-and-suspenders approach. For laminate it's a good idea; just predrill and use a screw length that leaves at least 5/8 inch of countertop above the screw tip.
Step 5: Caulk the joint between the countertop backsplash and the wall with color-matched or clear silicone. Smooth it with a wet finger. Let it cure 24 hours before heavy use. [3]
How do you install stone countertops (granite, quartz, marble) on cabinets?
Stone installation is not a typical DIY project. A 30-square-foot granite slab can weigh 400 to 500 pounds, and a drop or a twist can crack it. But understanding the process helps you supervise the job properly.
The fabricator brings the cut and finished pieces on installation day, usually with a two- or three-person crew. They bring their own adhesive, color-matched epoxy for seams, and suction handles.
Here's what a professional stone install looks like:
The crew sets each piece dry first, checking fit and wall scribe. They use plastic shims to hold the slab at the correct height and overhang (typically 1.5 inches at the front, flush or 1/4-inch reveal at the wall). Shims stay in permanently under stone.
For seams, both mating edges get cleaned with acetone, then a color-matched two-part epoxy is mixed and applied. Seam setters (mechanical clamps) pull the two edges into alignment while the epoxy cures. This takes 20 to 60 minutes depending on the epoxy formula. [4] Once cured, excess epoxy is scraped flush with a razor blade and the seam is polished.
The slab then gets a bead of 100% silicone on the cabinet frame, lowered into place, and checked for overhang consistency with a tape measure along the full front edge. Minor adjustments happen now.
Sink and cooktop cutouts are done in the shop before delivery in most cases, though some fabricators do field cuts for unusual situations.
If you're using laminate countertops or butcher block countertops for a section of your kitchen and stone for the perimeter, set the stone first. It's harder to adjust.
After install, caulk goes in at the wall joint, around any sink or cooktop cutout, and at any inside corner. No rigid grout at these joints. Grout cracks as the house moves; silicone flexes. [5]
How do you level a countertop that sits on unlevel cabinets?
This is one of the most common field problems, and it has a simple fix.
For low spots, plastic composite shims go between the top of the cabinet box and the underside of the countertop. Stack them until the surface reads level across a 4-foot level. Composite shims (often sold as composite roofing shims) don't compress over time the way wood does. Cut them flush after the countertop is set.
For high spots, you have two options: plane or sand down the top of the cabinet frame (quick, works well for small variations), or cut the countertop so it bridges over the high spot and sits on the surrounding areas. The second option is rarely necessary if the cabinet tops were properly shimmed during cabinet installation.
If the run has a significant variation, more than 1/4 inch across 8 feet, that's a cabinet installation problem that should be fixed before the countertop goes on. A countertop that spans a big dip will be unsupported in the middle, and heavy objects set there will stress the material. Granite and quartz are strong in compression but weak in tension; unsupported spans invite cracks. [1]
If you're inheriting someone else's cabinet job and can't easily re-level the boxes, a self-leveling epoxy poured over the cabinet tops can create a flat plane. This is an advanced fix but it works.
How do you attach a countertop to cabinets without screws?
Most countertops don't get screwed down. Silicone adhesive is the standard, and it's plenty.
A continuous bead of 100% silicone (GE, DAP, or equivalent) along the top edge of the cabinet frame creates a bond strong enough that the countertop won't shift under normal kitchen use. The silicone also acts as a gasket, keeping water from draining into the cabinet boxes if liquid spills near the edge.
For heavy stone, silicone alone is standard practice. The slab's own weight holds it in place. A 30-square-foot kitchen countertop in 3cm granite weighs around 400 to 500 pounds; it's not moving from a bead of silicone and gravity. [4]
For lighter materials like laminate, adding a mechanical connection through corner blocks (as described in the laminate section above) gives extra peace of mind, but it's optional.
The one time screws are necessary is when the countertop has a built-in backsplash or a special profile that lifts the front edge and puts a prying force on the joint. Some laminate post-form countertops fall into this category. The manufacturer's instructions will specify.
If you need to remove a countertop later, silicone is much friendlier than construction adhesive. A utility knife run along the silicone bead, combined with a pry bar, usually gets a laminate top off without destroying the cabinet. Stone comes off with suction cups and patience.
What is the cost to install cabinets and countertops together?
Here's the honest answer: costs vary enormously by region, material, and whether you're doing any of the work yourself.
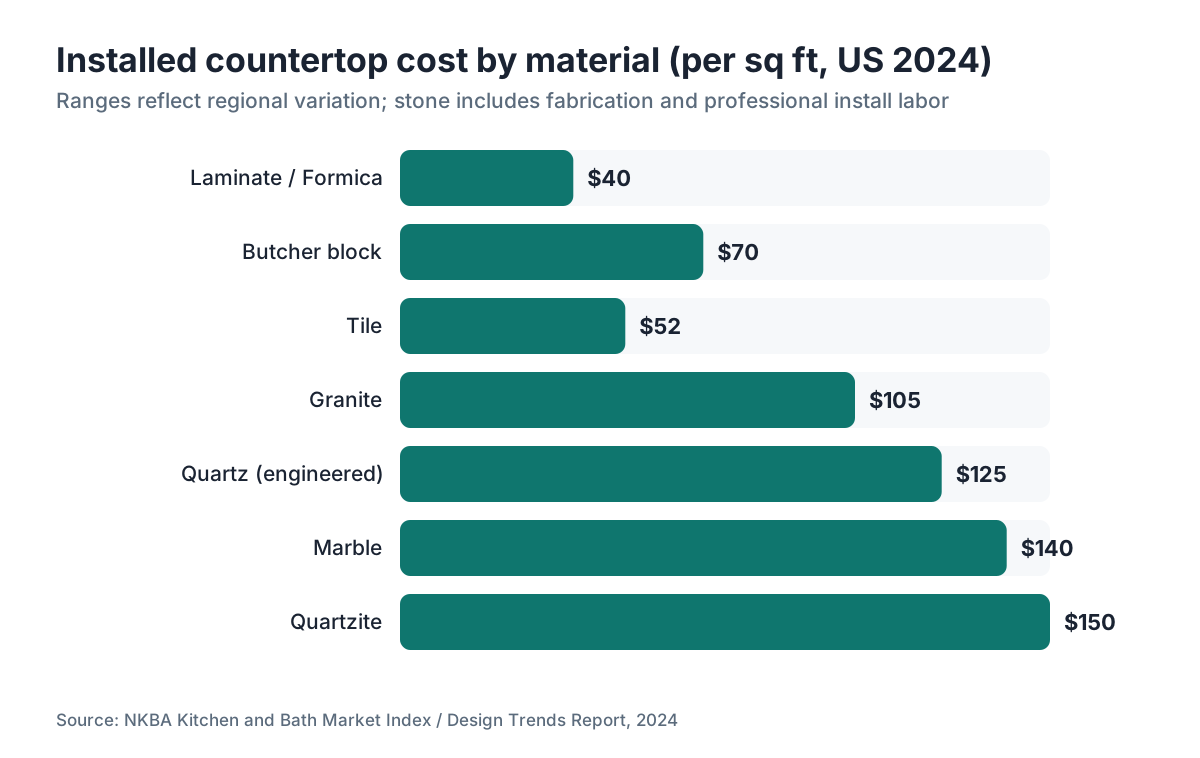
For countertops alone, installed cost typically runs:
| Material | Installed cost per sq ft (US, 2024) |
|---|---|
| Laminate / Formica | $20 to $60 |
| Butcher block | $40 to $100 |
| Tile | $25 to $80 |
| Quartz (engineered) | $70 to $180 |
| Granite | $60 to $150 |
| Marble | $80 to $200 |
| Quartzite | $80 to $220 |
Those ranges come from aggregated contractor survey data; the National Kitchen and Bath Association reports average countertop spend in a full kitchen remodel at roughly $2,200 to $4,500 for a mid-range project and over $8,000 at the high end. [6]
For cabinets, the range is much wider. Stock cabinets from a home improvement store run $100 to $300 per linear foot installed. Semi-custom runs $200 to $700 per linear foot. Full custom can exceed $1,500 per linear foot. [11]
If you're pricing both together, a typical 10x10 kitchen (a standard benchmark the industry uses, representing 20 linear feet of cabinet) with stock or semi-custom cabinets and mid-range quartz countertops will run $12,000 to $30,000 fully installed, depending on market. Higher-cost metro areas can push that well above $30,000. [6]
DIY savings are real for laminate and butcher block. You can buy a pre-cut laminate countertop at a home improvement store for $100 to $400 and install it yourself in a day. The same square footage in a pro-installed quartz job might run $1,500 to $3,000. Choose your material based on budget and how long you expect to stay in the home.
Fabricators who use software like SlabWise can generate itemized quotes fast, which makes it easier to compare bids across shops on an apples-to-apples basis.
For more on what drives costs, see our full guide to countertop installation.
How do you cut a countertop for a sink or cooktop?
Sink and cooktop cutouts are where DIY countertop installs most often go wrong. Here's how to do them right.
Get the manufacturer's cutout template. It ships with most sinks and is downloadable for cooktops from the product spec page. Print it at 100% scale (not 'fit to page') or cut it from the paper insert in the box.
For laminate: tape the template in position on the countertop, trace it, then drill 1/2-inch starter holes just inside each corner of the cutout line. Insert a jigsaw with a fine-tooth blade (10 TPI or higher) and cut. Support the cutout piece from below as you finish the last few inches so it doesn't drop and chip the surrounding surface. Some installers drive a temporary screw into the center of the cutout piece so they can hold it as they finish the cut.
For stone: this is a shop cut, done on a CNC waterjet or bridge saw with a diamond blade. Don't try to field-cut stone with a jigsaw. If a field cut becomes necessary (unusual plumbing configuration discovered after delivery, for example), the fabricator needs to come back with a wet angle grinder and diamond blade, and the results will look like a field cut. Always better to catch these issues during template.
Radius the corners of any sink or cooktop cutout in stone. Sharp 90-degree corners concentrate stress and crack. A 1/4-inch minimum radius is standard. [1]
For undermount sinks, the countertop gets a polished edge around the sink opening (the reveal that shows under the sink rim). This finish is done in the shop.
For granite countertops or marble countertops, the quality of the sink cutout polish is a marker of fabricator quality. Look at it closely before the crew leaves.
What adhesive should you use to secure a countertop to cabinets?
100% silicone is the right call for most situations. It stays flexible after curing, which matters because houses move, cabinets shift seasonally, and a rigid adhesive bond in a flexible joint eventually cracks.
Use a neutral-cure silicone rather than acetoxy-cure (the kind that smells strongly of vinegar). Acetoxy-cure releases acetic acid during curing, which can etch stone or corrode metal cabinet hardware. Neutral-cure costs a bit more but it's the right choice for stone and tile. [9]
For laminate on wood cabinets where you want a stronger mechanical bond, a polyurethane construction adhesive (PL Premium or equivalent) works well. It's harder to break than silicone, which means removal later is more work.
For butcher block, silicone at the front and back edges, with freedom for the wood to move in the middle, is the correct approach. Butcher block expands and contracts across the grain with humidity changes. If you glue the entire underside rigid, the wood will crack or the cabinet will rack. Slotted screw holes in corner blocks allow for this movement. [7]
Never use regular caulk (non-silicone latex) as an adhesive. It's not strong enough and it doesn't stay flexible long-term.
Apply the adhesive bead 1/2 to 3/4 inch in from the edge of the cabinet top, continuous at the front and back, zigzag in the middle. Set the countertop, press down firmly, check alignment, then leave it alone for the adhesive cure time (typically 24 hours for full silicone strength, though it skins over in 30 to 60 minutes).
What can go wrong during countertop installation, and how do you fix it?
A few problems come up more than others.
Gap at the wall: Walls are rarely straight. A small gap (under 1/8 inch) fills with a silicone caulk bead. A larger gap (1/8 to 3/8 inch) gets backer rod stuffed in first, then caulk. [12] Anything over 3/8 inch is a problem with the cabinet install or the countertop scribe and needs to be corrected before caulking, because caulk won't span that gap long-term.
Countertop rocks or isn't flat: Almost always a shim issue. Lift the countertop (get help for stone), add or adjust shims, and reset. For a stone countertop already bonded with silicone, you'll need to cut the silicone bead with a utility knife and break the bond before you can lift it. This is annoying but doable.
Seam is visible or high on one side: Epoxy-set seams that cured before the two sides were flush are very difficult to fix in the field. On stone, a fabricator can return and grind the seam down with a polisher, but you'll see it. Prevention is the answer: clamp the seam setter firmly before the epoxy sets, and check it with a straightedge at the 15-minute mark during cure.
Sink is too low or clips don't reach: The sink clips that hold an undermount sink depend on the countertop being at a specific thickness above the sink rim. If your countertop is thinner than the clips expect, you need longer clips or a different mounting system. Ask your plumber or the sink manufacturer before install day.
Cracked stone after install: A crack that wasn't there before usually means the countertop is bridging an unsupported gap or a shim is creating a point load rather than spreading the support out. Epoxy repairs are possible for minor cracks but visible. The real fix is proper support from the start. [1]
For ongoing care after installation, see our guides on how to clean stone countertops and specific materials like how to clean quartzite countertops.
Should you hire a professional or DIY your countertop installation?
Honest take: it depends entirely on the material and your comfort with tools.
Laminate and butcher block countertops are real DIY options. The materials are forgiving, the tools are basic, and a mistake can be corrected by cutting again. If you're comfortable with a jigsaw and a level, you can do this.
Quartz, granite, quartzite, and marble are not realistic DIY for most people. The slabs are heavy (a single 10-foot run can exceed 300 pounds), the cuts require wet diamond tooling, and a dropped slab or cracked seam is a very expensive mistake. The NKBA estimates that labor for stone countertop installation runs $35 to $85 per hour, and a typical kitchen installation takes a two-person crew 3 to 6 hours. [6] That's $200 to $1,000 in labor, which is reasonable given the risk of a $2,000 slab.
Tile countertops are a middle ground. An experienced DIYer can tile a countertop with decent results. The skill is in the grout lines and edge tiles, and in choosing an unsanded grout for joints under 1/8 inch.
For Corian countertops and other solid surface materials, professional installation is strongly recommended. The seaming technique requires specific tools and training, and visible seams in solid surface are a fabricator error that the manufacturer won't warranty if it's a DIY job.
If you're comparing bids for professional installation, make sure each quote includes template, fabrication, delivery, install, and seaming. Some low quotes strip these out. SlabWise has a good breakdown of what should be in a complete countertop quote if you want a checklist.
See kitchen countertops for a material comparison if you haven't settled on a surface yet.
Frequently asked questions
How long does it take to install a countertop on base cabinets?
A two-person professional crew installs a typical kitchen in 3 to 6 hours. DIY laminate installation on a small kitchen might take one person 4 to 8 hours including prep and dry-fitting. Stone jobs take longer because seams need 20 to 60 minutes of epoxy cure time before the crew can move to the next step. Adhesive needs 24 hours to fully cure before heavy use.
Do you need to glue countertops to cabinets?
Yes, but lightly. A bead of 100% silicone along the top of the cabinet frame is standard. You're not trying to cement the countertop in place permanently; you're keeping it from shifting and sealing the joint against moisture. Stone countertops stay put primarily because of their own weight. Silicone also makes future removal much easier than construction adhesive.
How much overhang should a countertop have over base cabinets?
Standard front overhang is 1.5 inches over a 24-inch-deep base cabinet, giving a total countertop depth of 25.5 inches. Island countertops used for seating typically overhang 12 inches for bar stools or up to 15 to 18 inches for comfortable knee clearance. At the wall side, most countertops sit flush or with a minimal 1/4-inch reveal. Larger overhangs on stone need corbel or bracket support.
What type of silicone should you use for countertop installation?
Use a neutral-cure, 100% silicone. Neutral-cure won't etch stone or corrode metal hardware the way acetoxy-cure (vinegar-smell) silicone can. GE Advanced and DAP 100% Silicone are commonly used by fabricators. For the wall caulk bead at the backsplash joint, a color-matched kitchen and bath silicone caulk is appropriate. Latex caulk is not a substitute.
Can you install a new countertop without removing the old one?
Sometimes. A new laminate or tile countertop can go over an old laminate top if the substrate is flat, solid, and firmly bonded. But this adds height (typically 1.5 to 2 inches), which may conflict with your sink, faucet rough-in, or dishwasher height. Stone fabricators almost never install over an existing top because the surface needs to be stable and the added weight can stress cabinet boxes.
What is the standard countertop height over base cabinets?
Standard finished countertop height is 36 inches from the finished floor. Most base cabinets are 34.5 inches tall, and the countertop adds 1.5 inches (for 3cm stone or 1.5-inch laminate). If your cabinets are slightly off or your floor is uneven, shims under the cabinets during their installation adjust the final height. Custom counter heights for accessibility or tall homeowners are common in renovations.
How do you support a countertop overhang over an island?
Overhangs up to about 6 inches on 3cm stone generally don't need support. Beyond that, corbels or steel support brackets fastened to the cabinet side are required. For stone, the rule of thumb most fabricators follow is: support any overhang that exceeds one-third the countertop's total depth. A 25.5-inch-deep island countertop needs support if the overhang exceeds about 8.5 inches. Brackets should be spaced no more than 24 inches apart.
How do you attach butcher block countertops to cabinets?
Use slotted screw holes in corner blocks, not rigid glue across the full underside. Butcher block expands and contracts with humidity. A screw through a slotted hole allows movement; a rigid bond forces the wood to crack or distort. Apply silicone only at the very front and back edges, not in the middle. This is different from stone and laminate, and it matters.
What is the cheapest countertop material to install yourself?
Laminate (including Formica brand) is the cheapest installed option at $20 to $60 per square foot, and it's the most realistic DIY material. You can buy pre-cut post-form laminate at a home improvement store for a few hundred dollars and install it with basic tools in a day. Butcher block is next, around $40 to $100 per square foot installed, and also DIY-friendly if you follow proper wood movement technique.
Do you need to seal stone countertops after installation?
Most natural stone countertops benefit from sealing before first use. Granite is typically sealed in the shop or on-site at installation. Marble and quartzite are more porous and may need sealing every 1 to 3 years depending on use. Engineered quartz does not need sealing because the resin binders make it non-porous. Ask your fabricator what they applied at install and get the product name so you can reapply correctly.
How do you cut laminate countertop for an inside corner?
For a mitered inside corner (two runs meeting at 90 degrees), most installers use pre-mitered post-form pieces or a miter bolt kit that draws the joint tight from underneath. The miter is cut at 45 degrees, glued with color-matched laminate adhesive, and clamped with miter bolts. Do the miter before any sink cutout. A poorly executed laminate miter is one of the most common visible failure points in a DIY countertop job.
Can you install Cambria or other quartz countertops yourself?
Technically possible, but not advisable. Cambria and similar engineered quartz brands are sold through authorized dealers and fabricators, and Cambria's warranty requires professional installation. The slabs run 400 to 700 pounds for a full kitchen, require diamond tooling for cuts, and need precise seam epoxy color matching. A DIY attempt voids the warranty. The installed cost premium over DIY is real but so is the warranty protection.
How do you remove an old countertop before installing a new one?
Cut the silicone bead at the wall with a utility knife. Then cut the silicone bond between the countertop underside and the cabinet frame with a thin putty knife or oscillating tool. For stone, you'll need suction cups and at least two people. For laminate, a pry bar at the front edge usually breaks the bond. Remove the sink and disconnect plumbing first. Check underneath for any screws through corner blocks before prying.
Sources
- Marble Institute of America (now Natural Stone Institute), Dimension Stone Design Manual: Stone slabs require continuous support within 1/8 inch of flat and should have radiused corners on cutouts to prevent stress cracking
- Natural Stone Institute, Stone World Industry Coverage on Digital Templating: Digital templating feeds directly into CNC saw software, reducing transcription errors compared to hand templates
- ASTM International, ASTM C920 Standard Specification for Elastomeric Joint Sealants: Silicone sealants rated per ASTM C920 maintain flexibility after cure and are appropriate for interior expansion joints
- Natural Stone Institute, Installation Standards for Countertops: Two-part epoxy seam setting for stone countertops requires 20 to 60 minutes cure time depending on formula and temperature
- Tile Council of North America, TCNA Handbook for Ceramic, Glass, and Stone Tile Installation: Inside corners and perimeter joints in tile and stone installations require flexible silicone sealant, not rigid grout, to accommodate structural movement
- National Kitchen and Bath Association (NKBA), Kitchen and Bath Market Index / Design Trends Report: Average countertop spend in a mid-range kitchen remodel is approximately $2,200 to $4,500; professional stone installation labor runs $35 to $85 per hour
- Forest Products Laboratory, USDA, Wood Handbook: Wood as an Engineering Material (General Technical Report FPL-GTR-282): Wood expands and contracts across the grain with changes in moisture content; rigid fastening across the grain can cause cracking or structural distortion
- U.S. Department of Housing and Urban Development, Residential Rehabilitation Inspection Guide: Cabinet boxes should be fastened to wall studs, not drywall only, for structural adequacy in residential kitchens
- GE Sealants, GE Advanced Silicone 2 Kitchen & Bath Product Data: Neutral-cure silicone does not release acetic acid during cure and is safe for use on stone and with metal hardware
- Cambria, Warranty and Care Documentation: Cambria's warranty requires professional installation through an authorized fabricator
- National Association of Home Builders (NAHB), Cost of Constructing a Home: Countertops and cabinets together represent a significant share of kitchen remodel cost; stock cabinet installed cost runs $100 to $300 per linear foot
- ASTM International, ASTM C1193 Standard Guide for Use of Joint Sealants: Backer rod should be used in joints exceeding 3/8 inch depth before applying sealant per standard joint sealing practice
Last updated 2026-07-09