TL;DR
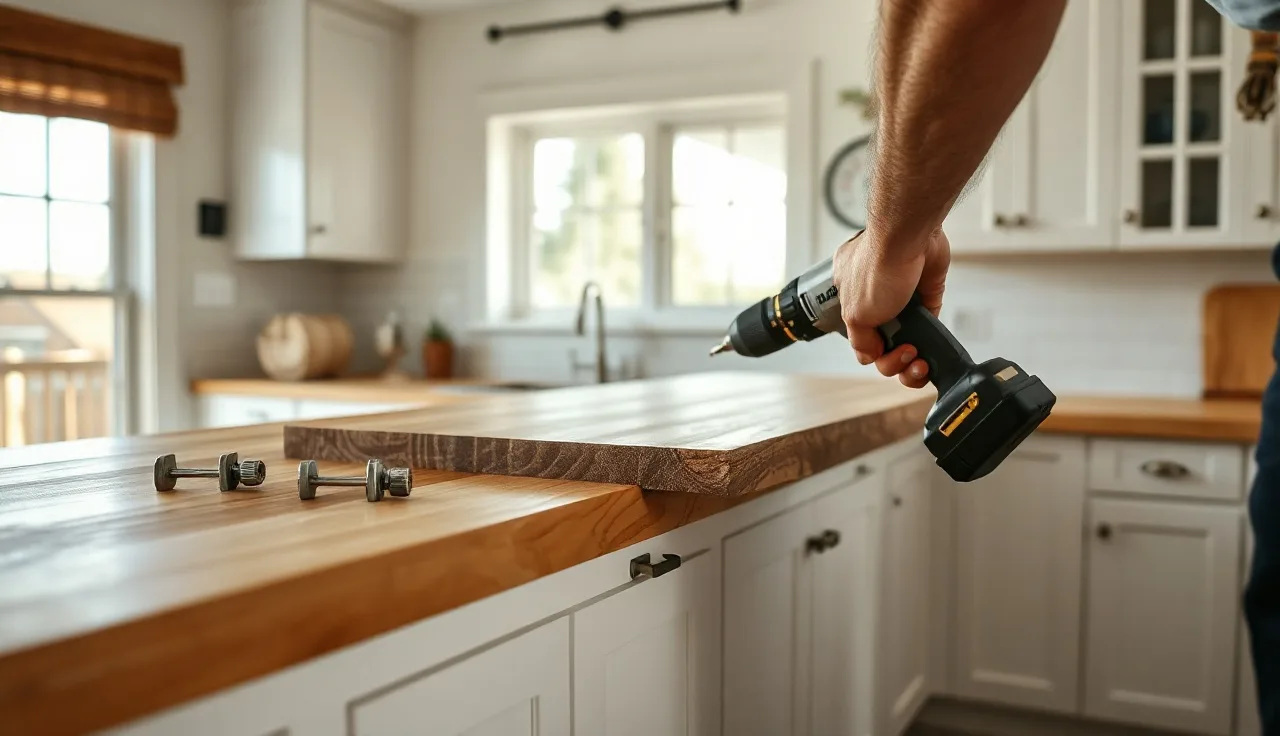
- Butcher block gets attached with movement-allowing clips or elongated screw slots, never screwed down tight to the cabinet.
- Wood expands and shrinks across its grain as humidity swings, so rigid fasteners crack slabs or split cabinet tops.
- Finish all six faces with food-safe oil or penetrating sealant before install, run silicone at the sink, and set a clip every 24 inches along the run.
Why attaching butcher block is different from stone or laminate
Butcher block is wood, and wood moves. That single fact drives every decision about how you fasten it down.
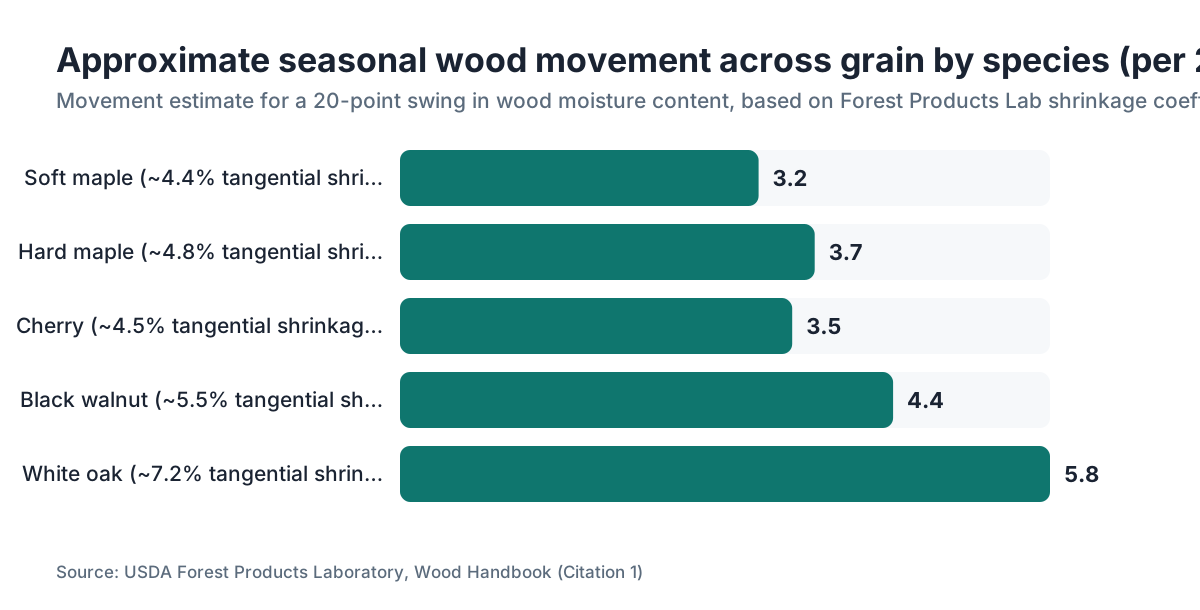
Granite, quartz, and laminate countertops are dimensionally stable once they leave the factory. You can screw them, silicone them, or clip them without worrying that the slab itself will change size. Wood is different. The USDA Forest Products Laboratory, in its Wood Handbook, documents tangential shrinkage across the grain running from about 4.4 percent (soft maple) to more than 7 percent (denser species like white oak) across the full swing from green to oven-dry [1]. Kitchens do not swing that far, but they swing. Humidity between a dry January and a humid August moves the wood real distance. On a standard 25-inch-deep top, that can add up to 3/16 inch or more of movement across the depth, depending on species.
Rigid fasteners fight that movement. The wood wins every time. It cracks the top, splits the substrate, or warps the cabinet frame. Good attachment lets the wood move while still holding the top firmly enough that it does not slide or lift.
This is why countertop installation for butcher block has its own rules, separate from stone work. Stone fabricators branching into wood installs get this wrong the first time more often than they admit.
What tools and hardware do you actually need?
The hardware list is short but specific. Get the movement clips right and most of the job takes care of itself.
Figure-8 clips (also called desktop fasteners). Flat metal clips shaped like a figure-eight. One loop screws into the underside of the countertop edge; the other screws into the top rail of the cabinet. Because the clip pivots slightly, the top can slide sideways as it moves. Buy zinc-plated or stainless. A pack of 50 costs $8 to $15 at most hardware stores.
Elongated slot screws. Some fabricators pre-rout slots into the cabinet top rails and run a screw up through the slot into the underside of the block. The screw sits loose and slides as the wood moves. This works well on frameless cabinets where the rail is wide enough to rout a 1-inch slot.
100 percent silicone sealant. For the sink cutout and any place the top meets a wall, a bead of silicone makes a flexible, waterproof seal. It is not a structural fastener. Do not use construction adhesive here.
Food-safe finish or butcher block sealant. You apply this before final install, not after. More on which finish to pick in a later section.
Tools: a drill with a 7/64-inch or 1/8-inch bit for pilot holes, a #2 square-drive bit, a tape measure, a level, a pencil, and a router or jigsaw if you cut the sink hole on-site. A random-orbit sander (120 grit, then 180 grit) helps if the top showed up unfinished.
How do you prepare cabinets before setting the countertop?
Cabinets have to be level and square before the top goes on. This sounds obvious. It is the step most DIYers skip, and it is the one that comes back to bite them.
Check the cabinet tops with a 48-inch level in both directions. More than 1/8 inch of variation over a 4-foot run causes visible gaps or a rocking top. Shim the low spots with cedar shims now. Do not plan to fix it after the top is down, because you cannot. NKBA planning guidelines call for cabinet installation within plus or minus 1/8 inch over the full run for level and plumb [2].
Check the top rails for square. On face-frame cabinets, measure the diagonal from front-left to back-right, then front-right to back-left. If those differ by more than 3/8 inch, the top will overhang unevenly or fight the wall.
Mark your clip positions on the cabinet rails before the top goes on. One clip every 24 inches along each run, minimum. Add a clip within 6 inches of any inside corner. Pre-drill the pilot holes now, while you still have clear access to the rails.
Got a center stretcher rail? Base cabinets wider than 24 inches usually do. That stretcher is your best fastening point for the middle of the run. Rout elongated slots perpendicular to the grain in the stretcher, or add figure-8 clips there too.
What is the correct technique for attaching butcher block with clips?
Set the block dry first. Two people make this much easier on any run longer than 36 inches. Drop the top in place, check the overhang on every exposed side (1 to 1.5 inches at the front is standard), and confirm the back edge fits the wall or leaves the gap you planned.
Mark the clip locations on the underside of the countertop edge through the holes in each figure-8 clip. Pull the top, set it on sawhorses, and pre-drill shallow pilot holes at those marks. Depth matters. Go deep enough to avoid splitting (about 1/2 inch) but not so deep you break through the top surface. Use a depth stop, or wrap masking tape around the bit at the right depth.
Screw one loop of each clip into the countertop edge. Snug, not gorilla-tight. The clip should sit flush against the side without biting so hard it cannot pivot.
Set the top back in place. Reach underneath, rotate each clip so the free loop drops into the cabinet rail pilot hole, and drive a screw through that loop into the rail. Snug again, with a little play. The clip needs room to rotate a degree or two as the wood moves.
Leave 1/8 inch between the top and any fixed wall or backsplash, and fill that gap with silicone. Scribe the top tight and caulk it with rigid grout or latex, and you have built a rigid restraint. The wood will telegraph its movement into that joint inside one heating season.
Runs that return into a corner (L-shaped or U-shaped kitchens) need extra attention at the inside joint. The two pieces meet with a 1/8-inch gap filled with silicone, not a tight butt joint. Wood movement is additive around an inside corner. Both slabs expand toward the corner, and something has to give.
Can you just screw butcher block down from below?
Yes, but only through elongated slots, never round holes. Fabricators call this the slotted-screw or Z-bracket method, and it is common in factory-built kitchens.
The slot runs perpendicular to the grain. On most tops the grain runs along the length of the run, so the slot runs front-to-back, across the cabinet depth. Set the screw in the middle of the slot when the wood is at average moisture (roughly 8 percent EMC in a heated kitchen, per Forest Products Lab data [1]). That leaves room for the wood to grow toward the wall or the front without the screw hitting the end of the slot.
A 3/4-inch slot handles most residential installs in moderate climates. In very dry country (the desert Southwest) or very humid country (the Gulf Coast), add another 1/4 inch to the slot for the bigger swing.
Do not crank the screw down. It has to slide. A washer under the head spreads the load without binding. Check those screws after the first full summer-to-winter cycle. Sometimes one binds and needs a slight loosening.
Where exactly do you apply silicone, and where do you avoid it?
Silicone goes in three places: around the sink cutout, in the gap between the top and the wall or backsplash, and at any inside-corner joint between two sections. That is the whole list.
At the sink, run a continuous 3/8-inch bead of 100 percent silicone on the top of the sink rim, or on the underside of the top around the cutout, depending on whether it is an undermount or a drop-in. That bead is the seal that keeps water from wicking into the wood at its most vulnerable point. Never skip it. Water intrusion at an unsealed sink cutout is the number one cause of butcher block failure in residential installs.
At the wall, a thin bead of silicone in the 1/8-inch gap allows movement while blocking water, crumbs, and pests.
Where silicone must never go: the bottom face. Coat the underside of butcher block with silicone or any vapor-tight sealant and you trap moisture, and the top cups. The bottom has to breathe. This is a real and common mistake. Yes, oil the underside the same as the top (do this, to equalize moisture uptake on both faces). No, do not then seal it shut with silicone.
Skip construction adhesive anywhere on butcher block. It cures rigid, bonds permanently, and gives the wood nowhere to go. Even 1/8 inch of movement against a rigid bond can cup the top or delaminate the cabinet rail.
What is the right butcher block countertop sealant before installation?
Finishing is not optional. An unfinished butcher block top absorbs water unevenly, stains within weeks, and can swell enough to bind in its own fasteners. Finish before you set it.
You have two families to pick from: penetrating oils and film-forming finishes.
Penetrating oils (mineral oil, tung oil, walnut oil blends, the original Waterlox formulas) soak into the wood fiber and harden in place. They do not sit on top as a distinct layer, so they never peel or flake. Food-safe mineral oil is the cheapest route. Flood it on, wipe off the excess, repeat three to five times until the wood stops drinking. A quart costs $10 to $15. The catch is that mineral oil never fully polymerizes, so a busy kitchen needs it reapplied every few months.
Film-forming finishes (polyurethane, hardwax oils, Rubio Monocoat) cross-link on the surface into a harder shell. Better for heavy use. Check the manufacturer's food-safety data before using near food prep. Most water-based polyurethanes are considered food-safe once fully cured (typically 30 days), though the EPA has not set up a formal food-safe category for wood finishes [3].
Apply the finish before installation, on all six sides: top, bottom, both long edges, both end-grain faces. End grain drinks finish aggressively and often needs two extra coats before it looks right. Let the final coat cure before you set the top: usually 24 to 72 hours for oils, 48 to 96 hours for poly.
On the bottom face specifically, mineral oil or a thin coat of the same top finish is plenty. The goal there is equalized moisture uptake, not a protective shell. Heavy poly on the bottom traps moisture and defeats the point.
Shops running quoting software like SlabWise sometimes track finish materials as line items in project costs, which makes butcher block jobs easier to price when a client wants a premium finish.
Butcher block countertops are one of the few countertop types where what you put on the surface after fabrication matters as much as the install.
How do you handle an undermount sink with butcher block?
Undermount sinks and butcher block work together, but they need more care than an undermount in stone. The cutout is the problem, and the fix is finish.
The cutout edges are end grain or short grain, which means they soak up water. Saturate them. Three to four coats of penetrating finish on the interior of the cutout, letting each coat absorb before the next. Some fabricators finish the cutout with epoxy for maximum water resistance, which takes good ventilation and careful application. EPA VOC content limits for architectural coatings apply to most solvent-based epoxies [4].
The sink rim attaches to the underside with clips and silicone. Run the silicone bead on the top of the sink rim, set the sink from below, and tighten the clips. The silicone has to be 100 percent waterproof. Any paintable silicone blended with latex fails eventually. Let it cure fully (24 hours minimum, 72 hours better) before you run water.
For maintenance, reapply oil or sealant to the cutout edges every 6 to 12 months. That is the highest-wear spot in any kitchen butcher block install, and the first place a neglected top rots.
How much overhang is safe without support?
Standard front overhang at base cabinets is 1 to 1.5 inches, and butcher block carries that with no extra support at all. The question that matters is islands and breakfast bars.
Those are a different story. The Architectural Woodwork Standards, published by the Architectural Woodwork Institute, note that solid wood countertop overhangs past roughly 8 to 10 inches without support can generate enough torque under load to crack the top where the overhang meets the supported section [5]. That is a conservative line. Plenty of 12-inch overhangs perform fine in the field. But at 12 inches or more, add corbels or a structural knee wall and stop guessing.
Corbel spacing follows the load. One adult leaning on a 12-inch overhang puts roughly 150 to 200 pounds of point load at the outer edge. Space corbels no more than 24 inches apart, and fasten them into a solid wood or plywood-backed cabinet side, not drywall.
At 18 inches or more (deep breakfast bars), skip corbels alone. Steel rod supports embedded in the underside, or a full plywood sub-base running back to the wall, hold up better.
What are the most common mistakes people make when attaching butcher block?
The list is short. Every item on it costs real money to fix.
Rigid fasteners. Screwing the top down through round holes with no movement allowance is the most common and most destructive mistake. The wood moves, the screws do not, and within a season or two you get cracks along the grain or a warped top.
No gap at the wall. Scribing tight and filling with rigid caulk cancels out your movement clips. Leave 1/8 inch, fill with silicone, done.
Finishing only the top. Seal one face and you build in a moisture differential. The top stays dry, the bare bottom drinks ambient humidity, and the slab cups toward the dry side. Finish all six faces.
Skipping pilot holes. Driving screws into undrilled hardwood edges splits the wood. Pilot holes are not optional, especially in hard maple or walnut.
Using the wrong silicone. Kitchen-and-bath silicone is fine. Paintable silicone with latex additives is not. It stiffens and cracks within a year.
Ignoring the end grain at cutouts. Three coats on top, zero in the sink hole. The cutout is exactly where water gets in and rots the slab from the inside out.
How does butcher block attachment compare to other countertop types?
Seeing the methods side by side makes the difference obvious. The table below covers the main residential countertop types and how each one gets held down.
| Countertop type | Primary fastening method | Movement allowance needed | Silicone at sink? | Notes |
|---|---|---|---|---|
| Butcher block | Figure-8 clips or slotted screws | Yes, across grain | Required | Finish all 6 faces before install |
| Laminate countertops | Construction adhesive + screws | No | Recommended | Particleboard subbase handles substrate movement |
| Granite countertops | Silicone dots + brackets | No | Required | Weight holds most runs; brackets at walls |
| Solid surface (Corian) | Silicone or manufacturer clips | Slight (thermal) | Required | See Corian countertops for specifics |
| Engineered quartz | Silicone + brackets | No | Required | No drilling into slab |
| Marble countertops | Silicone + brackets | No | Required | Same method as granite |
Butcher block is the only common countertop material that changes size meaningfully with humidity. Everything else on that list is either fully inorganic or bound with resin that kills seasonal movement.
If you are comparing finishes for another natural material, the care and sealing logic shares some DNA with how to clean stone countertops, though the actual products differ a lot.
Fabricators quoting mixed-material kitchens (butcher block island, stone perimeter) should note that the labor curve for wood is different: no crane lifts, lower material cost, but more finish prep time and more callbacks when the movement gaps are wrong. Costing those installs accurately is one of the jobs SlabWise was built for.
How do you maintain butcher block after it is installed?
Good attachment buys you nothing if you skip maintenance afterward. Wood is the one countertop that asks for regular attention, and gives it back if you keep up.
For oil-finished tops, reapply food-safe mineral oil or butcher block oil every 3 to 6 months, or any time the wood looks noticeably lighter or dry. No stripping needed. Clean the surface, let it dry, flood on oil, and wipe off the excess after 20 minutes. The Forest Products Laboratory notes that equilibrium moisture content in a typical heated U.S. home runs from about 6 to 9 percent in winter to 11 to 14 percent in summer [6], and that swing is exactly what drives the need for regular treatment.
Poly and hardwax-oil finishes are simpler day to day: wipe with a damp cloth, dry it right away, keep standing water off. Recoating depends on traffic, usually every 3 to 7 years for hardwax oil and every 5 to 10 years for a well-applied water-based poly.
Inspect the sink bead every 12 months. Any cracking, peeling, or discoloration means it is time to cut out the old silicone, clean both surfaces with denatured alcohol, and lay a fresh bead. A failed sink bead is a water-damage event waiting for its moment.
Sanding and refinishing is possible, and it is a genuine edge wood has over stone or quartz. A light pass with 120 grit, then 180 grit, then fresh finish, brings a beat-up top back to near-new. You cannot do that with granite countertops or Cambria countertops.
Frequently asked questions
Do I need to acclimate butcher block before attaching it?
Yes. Let the block sit in the kitchen, or a room with similar humidity, for 48 to 72 hours before installation. That lets the wood reach a moisture content close to its in-service conditions. Skip acclimation and the top can move hard right after install, loosening clips or opening seam gaps within the first few weeks.
Can I use construction adhesive to attach butcher block countertop?
No. Construction adhesive cures rigid and bonds permanently. Seasonal wood movement pulls against that bond and eventually cracks the top, warps it, or delaminates the cabinet rails. Use figure-8 clips or elongated-slot screws that let the wood move freely across the grain while still holding the top down.
How many clips do I need for a standard countertop run?
One figure-8 clip every 24 inches along each run, plus one within 6 inches of any inside corner. A standard 96-inch single-wall run needs at least five clips. Add clips wherever the cabinet has a stretcher rail, since those are solid fastening points. Pre-drilling pilot holes in the rails before the top goes on makes placement much easier.
How wide a gap should I leave between butcher block and the wall?
Leave 1/8 inch between the countertop edge and any fixed wall or backsplash, and fill it with 100 percent silicone, not grout or latex caulk. The silicone flexes as the wood moves. A tight scribed joint with a rigid filler creates a restraint, and the caulk line cracks within one heating season.
What screws work best for attaching butcher block countertop?
Use #8 or #10 coarse-thread screws, 1 to 1.25 inches long, to attach figure-8 clips to the cabinet rails. For the clip-to-countertop connection, use short 5/8-inch screws with a washer so you do not break through the top face. Zinc-plated or stainless both work; go stainless near a sink where moisture lives.
Should I seal the bottom of butcher block countertop?
Yes. Apply the same penetrating oil, or a thin coat of your chosen finish, to the bottom face, both long edges, and both end-grain faces before installation. This equalizes moisture uptake across all faces. Finish only the top and the bare bottom absorbs humidity faster, so the slab cups toward the dry side.
Is butcher block safe around an undermount sink?
Yes, with proper prep. The cutout exposes highly absorbent end grain or short grain. Apply three to four coats of penetrating finish to the interior of the cutout, letting each coat absorb fully, and seal the sink rim with 100 percent waterproof silicone. Reapply finish to the cutout edges every 6 to 12 months. Skipping this is the top cause of butcher block failure near sinks.
Can butcher block countertop be glued to cabinets?
Not with rigid glue or construction adhesive. Some installers use small dabs of silicone at the four corners to help locate the top during clip installation, which is fine because silicone stays flexible. Any rigid adhesive across the full footprint fights wood movement and causes damage within one to two seasonal cycles.
How do I attach butcher block at an inside corner?
Leave a 1/8-inch gap between the two slabs at the inside-corner joint and fill it with silicone. Both slabs expand toward the corner in humid weather, and that gap gives each piece room. Add a figure-8 clip within 6 inches of the corner on each piece. Never butt the two pieces tight and fill with rigid caulk.
How long after sealing butcher block can I install it?
Wait for the final coat to cure before setting the top. Penetrating oils like mineral oil and tung oil typically need 24 to 48 hours. Water-based polyurethanes need 48 to 96 hours for the last coat. Check the product's data sheet. Installing before the finish cures can trap solvents between the wood and the cabinet top.
What is the maximum overhang for butcher block without corbels?
The Architectural Woodwork Institute's standards suggest 8 to 10 inches as the unsupported overhang limit for solid wood before torque under load becomes a concern. In practice, 12-inch overhangs are common and often fine. At 12 inches or more, add corbels spaced no more than 24 inches apart, fastened to a solid wood or plywood-backed cabinet side.
Can I attach butcher block countertop directly to a concrete or tile base without cabinets?
Yes, but you need a compressible underlayment or clip system that allows movement. Setting butcher block on tile or concrete with silicone dabs works if the bond stays flexible and the edges are free to move. Rigid epoxy or thinset mortar cracks or warps the top over time. Keep all edges free from rigid fastening.
Sources
- USDA Forest Service, Forest Products Laboratory, Wood Handbook: Tangential wood shrinkage across the grain ranges from approximately 4.4 percent (soft maple) to over 7 percent (dense species) across the full green-to-oven-dry range; equilibrium moisture content in a heated kitchen sits near 8 percent.
- National Kitchen and Bath Association (NKBA), Kitchen and Bathroom Planning Guidelines: NKBA recommends cabinet installation tolerances of plus or minus 1/8 inch over the full run for level and plumb.
- U.S. Environmental Protection Agency, EPA.gov: The EPA has not established a formal food-safe category for wood finishes; most water-based polyurethanes are considered food-safe once fully cured, typically 30 days.
- U.S. Environmental Protection Agency, VOC regulations for architectural coatings: EPA VOC content limits for architectural coatings apply to solvent-based epoxy finishes used at the sink cutout.
- Architectural Woodwork Institute, Architectural Woodwork Standards: Solid wood countertop overhangs beyond 8 to 10 inches without support can induce torque under load sufficient to cause cracking at the supported-to-cantilevered transition.
- USDA Forest Service, Forest Products Laboratory, Wood Handbook: Wood equilibrium moisture content in a typical heated U.S. home ranges from about 6 to 9 percent in winter to 11 to 14 percent in summer, driving seasonal movement in installed wood countertops.
- National Kitchen and Bath Association (NKBA), Installation Best Practices: Industry guidance calls for movement-accommodating clips or slotted fasteners for wood countertop installation.
- USDA Forest Service, Forest Products Laboratory, Wood Handbook: Applying finish to all faces of a wood countertop equalizes moisture uptake and prevents differential cupping.
- International Code Council, International Residential Code (IRC 2021): IRC structural provisions inform acceptable load transfer and support requirements for kitchen countertop overhangs in residential construction.
- U.S. Consumer Product Safety Commission, cpsc.gov: CPSC guidance on kitchen product safety informs installer requirements for secure countertop fastening to prevent displacement under load.
Last updated 2026-07-09