TL;DR
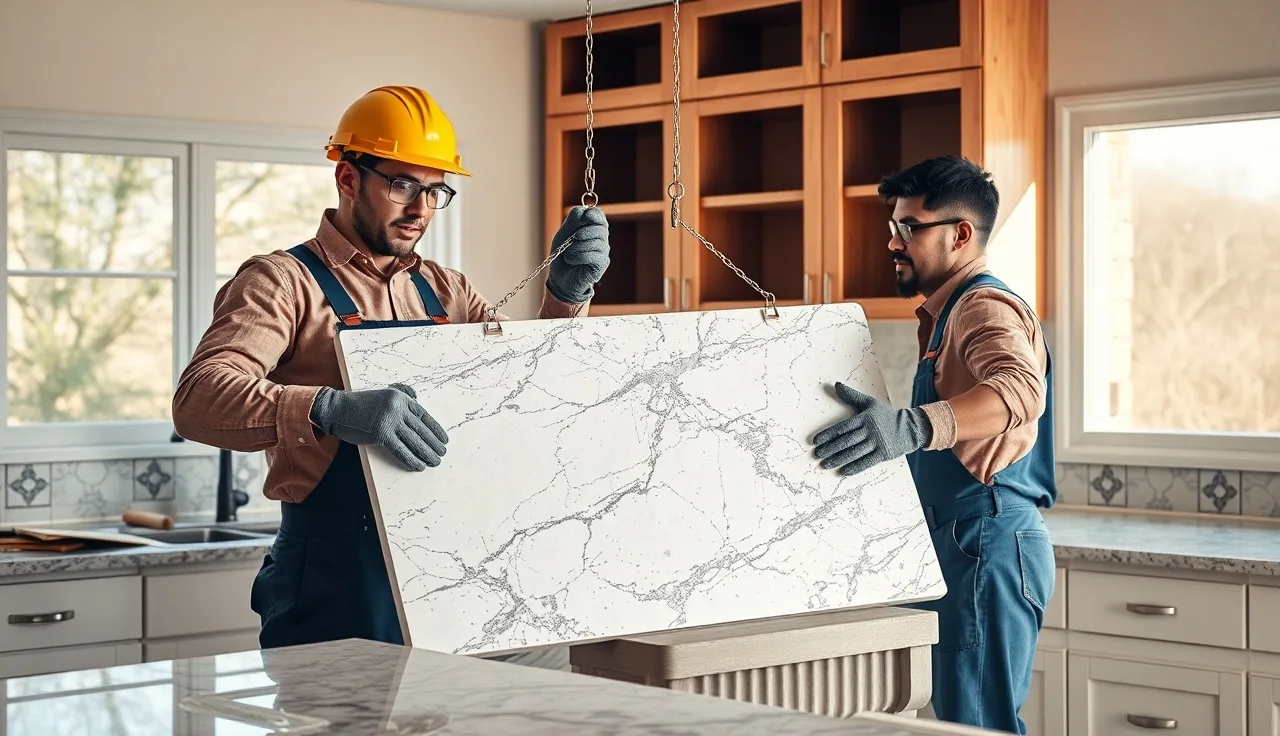
- Removing old stone countertops takes a utility knife, an oscillating multi-tool, wide and narrow pry bars, a reciprocating saw with a bi-metal blade, a heat gun, suction cup handles, safety glasses, cut-resistant gloves, and at least one helper.
- Granite and quartzite run 15-20 pounds per square foot, so lifting gear and a second person are not optional.
Why does the tool list matter before you start demo?
Stone countertop removal looks like pure brute force from the outside. It isn't. Granite, marble, quartzite, and engineered quartz are brittle under tension, and they're bonded to cabinets with silicone caulk, construction adhesive, or both. Wrong tool, wrong sequence, and you crack the slab before it comes free, damage the cabinet boxes, or pull the backsplash tile off with it.
The other issue is weight. A standard 1.25-inch-thick granite slab runs roughly 18 pounds per square foot [1]. An average kitchen island top of 25 square feet comes in around 450 pounds. That number alone explains why this is a two-person minimum job and why suction cup handles aren't optional.
Getting the right tools together before demo day keeps the job to a few hours instead of an emergency hardware store run mid-project. Here's the complete list, broken down by function.
What is the full tool list for removing stone countertops?
Here's everything you realistically need, organized by what each tool does during removal.
Cutting and scoring tools
- Utility knife with fresh blades: Cuts through silicone caulk at the seam between countertop and backsplash. Dull blades tear rather than slice; keep extras.
- Oscillating multi-tool (with scraper blade and wood/metal blade): The workhorse of any countertop demo. It gets into tight spots under the lip of the countertop to sever adhesive beads and cut any mounting screws or staples a fabricator left behind.
- Reciprocating saw with bi-metal blades: Useful if the countertop has been framed in or if you're cutting a laminated substrate below the stone so you can lift in sections.
Prying and lifting tools
- Wide putty knife or stiff floor scraper (4-6 inch): Slips under the leading edge of the stone once caulk is cut, to break the adhesive bond without a sudden jerk.
- Flat pry bar (18-24 inch): Gives you the mechanical advantage to pop the slab up once the adhesive is scored. Use it against a block of wood on the cabinet top to avoid gouging.
- Small cat's paw or mini pry bar: Gets into corner sections and tight seams where the wide bar won't fit.
Handling and carrying tools
- Suction cup handles (minimum two, rated 150+ lbs each): The single most-underrated item on this list. Carrying a stone slab without them is how people drop slabs on feet or break their wrists trying to grip a polished edge.
- Moving blankets or carpet scraps: Protects the slab face once it's down and protects flooring.
Heat application
- Heat gun or hairdryer: Mild heat softens silicone caulk and makes some adhesives more pliable, which cuts the force needed to pry. Keep heat below 200°F on the slab surface to avoid thermal shock.
Safety gear (non-negotiable)
- Safety glasses or goggles: Stone chips fragment unpredictably.
- Cut-resistant gloves (ANSI A4 or higher): Polished stone edges are sharp; silicone-grip gloves alone aren't enough.
- Steel-toe boots: A dropped slab corner is a serious crush injury.
- Dust mask (N95 minimum): Silica dust from fracturing stone is a real inhalation hazard. OSHA's respirable crystalline silica standard (29 CFR 1910.1053) sets the permissible exposure limit at 50 micrograms per cubic meter as an 8-hour TWA [2].
Supporting supplies
- Painter's tape and a marker: Mark where seams are before anything comes apart so you can note which sections go where if you're salvaging.
- Trash bags and a bucket: Caulk residue, silicone strips, and small debris.
- Shop vacuum: Stone dust and grit get everywhere.
That's the full list. You likely already own half of it. The oscillating multi-tool, suction cup handles, and cut-resistant gloves are the items most DIYers don't have and most need.
How heavy are stone countertops, and why does weight dictate your tool choices?
Weight is the variable that changes everything else about the job.
| Stone type | Approx. weight (lbs/sq ft at 1.25" thick) |
|---|---|
| Granite | 18-20 |
| Marble | 16-18 |
| Quartzite | 17-19 |
| Engineered quartz (e.g., Cambria, Silestone) | 16-18 |
| Soapstone | 17-20 |
| Laminate over plywood | 3-5 |
Source: Stone weight figures are industry-standard estimates based on material density [1].
A 30-square-foot L-shaped kitchen top in granite can hit 600 pounds. You cannot carry that as one piece with two people and no equipment. This is why experienced fabricators break a multi-section top into individual pieces at the seams, carry each section out with suction cups, and set each piece on a dolly or moving blanket rather than trying to muscle the whole run.
For homeowners keeping the stone (for resale, donation, or reuse), preserving the seam locations matters. Mark them with painter's tape before the first cut so you know which sections to lift separately. Most residential tops come out in two to four sections.
If you're working alone because a helper genuinely isn't available, rent a slab dolly or a panel carrier from a tool rental shop. It isn't as good as a second person, but it beats improvising.

What is the step-by-step removal process using these tools?
The order of operations matters as much as the tool list itself.
Step 1: Clear everything. Remove the sink, cooktop, and any under-mount fixtures first. Disconnect plumbing at the shut-off valves, not at the faucet. An under-mount sink adds 30-80 pounds and its weight will crack the slab if it's still attached when you pry.
Step 2: Cut the caulk. Run your utility knife along every joint: counter-to-backsplash, counter-to-wall, and counter-to-cabinet lip. Do this slowly. You're looking for the silicone bead, not the stone. Multiple passes beat forcing it in one.
Step 3: Score the adhesive. Switch to the oscillating multi-tool with a scraper blade. Slide it under the leading edge of the stone and work back toward the wall in short strokes. You'll feel and hear the adhesive releasing. On older kitchens (pre-2000), fabricators often used more adhesive than modern standards call for, so this step takes longer.
Step 4: Apply heat if needed. If the adhesive isn't releasing, run the heat gun along the underside access point for 30-60 seconds per foot and repeat the oscillating tool pass. Don't rush this with more heat; you just need the silicone to get pliable.
Step 5: Insert the pry bar. Once adhesive is scored along a section, place the flat pry bar under the stone with a wood block protecting the cabinet. Gentle upward pressure, not a sudden lever. Have your helper hold the opposite end of the slab.
Step 6: Attach suction cups and lift. Both people attach suction cup handles, confirm the lock, then lift straight up together. Keep the slab vertical as fast as you can once it's off the cabinet. A horizontal stone slab flexes. Vertical is much stronger for carries.
Step 7: Move to staging area. Carry or dolly the slab to a staging area right away. Lean it vertically against a padded wall. Never lay it flat on concrete unsupported. Flat on concrete is how slabs crack from their own weight on an uneven surface.
Do you need any power tools, or can this be done with hand tools only?
You can do a small, lightly-bonded countertop removal with only hand tools. A fresh utility knife, a floor scraper, and a good pry bar will get through sections where silicone was the only adhesive. That's often the case with laminate countertops or older installs where the fabricator used minimal adhesive.
For stone, though, plan on the oscillating multi-tool. Silicone adhesive under 20 square feet of granite is not something you can score cleanly with a hand scraper alone without either destroying the blade in five minutes or torquing the slab. The multi-tool does in 10 minutes what a hand scraper does in 45 minutes with worse results.
A reciprocating saw is optional but handy if the countertop substrate (usually 3/4-inch plywood) is also being replaced. Some fabricators screw through the substrate into the cabinet rails; the reciprocating saw cuts those screws flush so you don't have to find them all.
What safety equipment is mandatory when removing stone countertops?
Safety glasses are not optional. Stone fractures with speed. A small chip traveling even a few feet can permanently damage vision, and polished stone throws shards in unpredictable directions when a pry bar slips.
Cut-resistant gloves rated ANSI A4 or better are the right choice here. Standard work gloves and silicone-grip gloves protect against grip loss and minor abrasion, but the sharp edge of a freshly pried granite slab will go straight through them. The ANSI/ISEA 105-2016 standard for hand protection rates gloves on a numeric cut scale from A1 to A9; A4 is the minimum for stone handling [3].
Dust is the hazard most people underestimate. The moment a stone slab cracks, chips, or breaks at a seam, it releases respirable crystalline silica. Silica at those particle sizes causes silicosis, a progressive and irreversible lung disease. The risk from a one-time DIY removal is lower than for fabricators cutting stone daily, but N95 masks cost about a dollar each and the downside of skipping them is real. OSHA's silica rule applies to construction work, but the underlying health risk doesn't stop at job classification [2].
Steel-toe boots matter at the carry step. If a suction cup fails during a lift, the slab goes straight down.
Can you remove stone countertops without damaging the cabinets underneath?
Yes, usually, with patience and the right technique. Cabinet damage almost always comes from one of three mistakes: prying too aggressively before the adhesive is scored, letting the slab drop rather than lowering it, or pulling the backsplash with the countertop because the backsplash-to-countertop caulk joint wasn't cut first.
The wood block under the pry bar is the single most important cabinet-protection trick. Without it, the bar's fulcrum point is the cabinet face frame or the cabinet top rail, both of which dent or split easily.
If the countertop was installed with heavy construction adhesive rather than silicone, you may still get some surface tearing on the plywood cabinet top. That's usually fine because the plywood top gets replaced anyway with a new build-up layer when the new countertop goes in. Where you want to be careful is around the cabinet face frames (the visible front rails and stiles), the finished sides of cabinet runs, and any painted or stained surfaces within pry-bar range.
Taping cardboard or a moving blanket over the face frames before you start prying takes two minutes and prevents most cosmetic damage.
How do you remove an under-mount sink before pulling the countertop?
Under-mount sinks attach in one of two ways: epoxy and silicone alone, or epoxy and silicone plus metal mounting clips threaded up from below.
Start by going under the sink cabinet and loosening any visible mounting clip nuts with a screwdriver or socket set. Once clips are loose, run a utility knife around the entire perimeter of the sink-to-stone joint to cut the silicone. Then push up from below while your helper guides from above. The sink will feel stuck even after the clips are off because silicone bonds to the underside of the stone. Steady upward pressure with occasional tapping from the underside usually releases it.
Never leave the sink attached and try to pry the countertop up. The sink's weight acts as a lever moment at the sink cutout edge, which is the thinnest and most fragile part of any stone top. That's where slabs crack.
Leave the faucet attached to the sink if you're just demoing and not reusing either. One less connection to deal with in tight quarters.
What tools do professionals use that DIYers typically don't have?
Professional fabricators and demo crews bring a few items that rarely show up in DIY tool kits.
Slab dollies with cushioned rails. These let one or two people move an entire slab vertically on wheels. Renting one from a tool rental shop (around $40-80 per day) is worthwhile for jobs over 50 square feet.
Panel carriers (a.k.a. material handlers). A clamp-style carrier grips the slab from the top and lets one person carry a section while the other stabilizes. They're common in fabrication shops and occasionally at rental centers.
Diamond-grit oscillating blades. When a fabricator leaves adhesive so thick that a standard scraper blade can't get through cleanly, a diamond-grit blade on the multi-tool cuts it without chewing the blade up in minutes.
Angle grinder with diamond cup wheel. Pros use this to remove adhesive residue from the cabinet top after the stone is out. For a homeowner doing one kitchen, a hand scraper and some patience get the same result eventually.
For anyone quoting a kitchen countertop replacement after removal, fabricators who use tools like SlabWise can generate accurate square footage and pricing estimates quickly, which helps set realistic budget expectations before material selection starts.
How long does it take to remove stone countertops, and how many people do you need?
A typical kitchen countertop run of 40-60 square feet takes two people about two to four hours from first cut to slab out the door, assuming no complications. Add an hour if the sink was under-mount and set in heavy epoxy. Add another hour if the fabricator used construction adhesive throughout rather than silicone.
Where jobs drag is when the bonding is heavier than expected or when a section cracks mid-removal and has to be broken into smaller pieces and cleaned up. A cracked section isn't a safety crisis, but it does mean more lift-and-carry trips.
One person cannot safely remove a stone countertop of any meaningful size alone. Two people is the minimum. Three is better for anything over 50 square feet or for long sections that need to travel through a narrow hallway or down stairs.
If you're replacing the stone with a new surface, consider whether you want the new fabricator's crew to do the demo as part of the installation job. Many fabricators include removal in their quote or charge a modest fee (usually $150-$400 for a standard kitchen depending on region and difficulty) [4]. It's often worth it because they bring the right equipment and dispose of the old material.
What do you do with the stone after it's removed?
A few options, depending on condition.
Donate or sell it. Habitat for Humanity ReStores accept used countertops in many markets [5]. Salvage yards and online classifieds (Facebook Marketplace, Craigslist) move used granite and marble to buyers doing DIY projects, laundry rooms, or outdoor kitchens. Stone in good condition with clean seams has resale value.
Repurpose it. A removed granite section makes an excellent potting bench top, garage workbench, or hearth extension. Stone doesn't care what it's under.
Rent a dumpster or haul it yourself. Stone is classified as construction debris. Most municipal curbside programs won't take it. A 10-yard dumpster rental runs roughly $300-$600 depending on region and fill weight [6]. Many disposal companies charge extra for heavy materials like stone. A standard 10-yard dumpster can hold about 4,000 pounds of debris [6], so one kitchen countertop run fits fine.
Hire a junk removal service. Services like LoadUp or 1-800-Got-Junk charge by volume and handle stone. Expect $150-$350 for a kitchen's worth depending on location.
If you're getting a new stone surface installed, check whether your fabricator will haul the old material. Many will, especially if their crew is doing the demo anyway.
What can go wrong during stone countertop removal?
The most common problem is an unexpected crack in the stone. This happens most often at cutouts (sink, cooktop) and at seams, where the stone is thinnest or already has a glued joint. A crack doesn't make the job dangerous, but it creates more debris to handle and more trips out. If you're planning to resell or donate the stone, a crack cuts its value hard.
The second common problem is backsplash tile coming off with the countertop, because grout meets caulk at the counter-tile joint and some installers tile right over that caulk joint rather than leaving a proper movement gap. Cutting that joint carefully before prying prevents most of this. If the tile is already old and the grout crumbly, accept some tile loss as likely.
Pulling the countertop into a finished wall is a less common but real problem in tight galley kitchens where the counter runs wall-to-wall. Make sure you've cut the caulk all the way into the corner before you start lifting.
Then there's plumbing. If shut-off valves are corroded and won't close, or if a garbage disposal is hard-wired rather than plug-in, you can get into an unexpected plumbing or electrical sub-project. Check both before demo day, not during it.
For reference, the countertop installation process has its own set of pitfalls that inform what good removal looks like.
Are there tools or steps specific to certain stone types?
Mostly no. Granite, marble, quartzite, soapstone, and engineered quartz all respond to the same removal sequence. The differences are about weight and brittleness rather than tool selection.
Marble and travertine are more prone to cracking at pry points than granite, so go slower and use more heat-and-score passes before inserting the pry bar. Soapstone is dense and heavy but softer; it chips at edges more readily than granite, so protect the face once it's off the cabinet.
Engineered quartz (including Cambria and similar brands) is basically a polymer-bound composite and behaves a lot like granite for removal purposes. Same tools, same sequence.
Marble countertops that were installed with epoxy adhesive (common in high-end installs from the late 1990s through 2000s) are harder to separate from the substrate than silicone-bonded tops. More oscillating tool time, more heat, more patience.
If you're curious how your specific stone type should be cared for before you decide whether to salvage it, the guides on how to clean stone countertops and how to clean quartzite countertops cover what condition indicators to look for.
Frequently asked questions
Can one person remove a stone countertop alone?
Technically possible for very small sections, like a 12-inch bathroom vanity top, but genuinely unsafe for anything kitchen-sized. Granite runs 18-20 pounds per square foot, so a standard 30-square-foot counter section is 540-600 pounds. Without a second person and suction cup handles, controlling that weight during the lift and carry is not realistic. Get a helper or rent a panel carrier.
Do I need a diamond blade to remove granite countertops?
No. Removal is about cutting adhesive and caulk, not cutting the stone itself. A standard oscillating multi-tool with a scraper blade handles the adhesive. A utility knife handles the silicone caulk. You'd only need a diamond blade if you planned to cut the stone slab itself into smaller sections for easier handling, which is occasionally useful on very large islands but isn't normally required.
How do I keep from cracking the countertop during removal?
Score all caulk and adhesive thoroughly before applying any upward pressure. Use a wood block under the pry bar so force distributes across the cabinet top rather than concentrating at one point on the stone. Apply heat to stubborn adhesive spots rather than increasing pry force. Lift sections straight up rather than angling them. The cutout and seam areas are the most fragile; take extra time around those spots.
What is the easiest type of stone countertop to remove?
Older installs with silicone-only bonding are the easiest, regardless of stone type. Silicone cuts cleanly and releases with moderate pry force. Heavy epoxy adhesive, common in high-end marble and some granite installs, is the hardest to separate. The adhesive type matters more than the stone type for removal difficulty.
Should I remove the backsplash before or after the countertop?
Cut the caulk joint between the countertop and backsplash before the countertop comes off, but leave the backsplash itself in place unless you're replacing it. Removing the countertop first gives you better access to the backsplash removal after if needed. Trying to remove backsplash tile before the countertop usually just makes both jobs harder.
How do I remove adhesive residue from cabinet tops after the stone is out?
A stiff floor scraper removes most adhesive beads once the slab is off. For silicone residue, a silicone remover or mineral spirits softens what the scraper misses. For epoxy, a heat gun plus scraper is usually needed. Clean the cabinet top completely before the new countertop goes in; adhesive lumps under a new slab create high spots that cause stress fractures over time.
Is it worth hiring a professional for stone countertop removal?
For most homeowners, yes, especially if a new countertop is being installed. Fabricators who include removal in the install quote bring the right equipment, two or three people, and proper disposal. The cost is typically $150-$400 for a standard kitchen. Doing it yourself saves that money but requires renting or buying tools you may not own and arranging disposal separately. The math usually favors the pro if you value your time honestly.
What respirator do I need for removing stone countertops?
An N95 filtering facepiece respirator (rated by NIOSH) is the minimum for occasional DIY stone removal. It filters at least 95% of airborne particles including respirable crystalline silica. A P100 half-face respirator gives more protection if the stone is cracking or breaking significantly during removal. OSHA's silica standard (29 CFR 1910.1053) sets the PEL at 50 micrograms per cubic meter for occupational exposure.
Can I reuse or resell removed granite countertops?
Yes, if the removal goes cleanly. Granite in good condition with intact seam sections sells on Facebook Marketplace and Craigslist for $5-$20 per square foot depending on color and condition. Habitat for Humanity ReStores accept countertop donations in many regions. Cracks or heavy adhesive residue reduce resale value significantly. Mark the seams before removal and plan your lifts to keep sections intact if resale is the goal.
Do I need a permit to remove stone countertops?
No permit is required in any U.S. jurisdiction for countertop removal alone. If the removal connects to electrical work (a hardwired cooktop cutout) or plumbing disconnection beyond the shut-off valve, those aspects may require a permit depending on your local code. Check with your local building department if you're unsure. Countertop removal by itself is considered cosmetic renovation in all standard building codes.
How do suction cup handles work, and what weight rating do I need?
Suction cup lifters use a pump mechanism to create a vacuum seal against the polished stone surface. Most quality lifters for stone use a manual or lever-pump to deepen the vacuum and a release lever to break it. For countertop removal, look for lifters rated at least 150-200 pounds each. Use two per person. Always test the seal before lifting by trying to pull the cup off by hand; if it holds against your full pull, the vacuum is good.
What's the difference between removing stone countertops versus laminate countertops?
Laminate countertops like Formica attach with construction adhesive and are far lighter, around 3-5 pounds per square foot. Most laminate tops can be pried off by one person with a wide putty knife and a flat pry bar. No suction cups needed. Stone removal requires more tools, two people, and more careful adhesive scoring because the weight and brittleness create injury and damage risks that laminate simply doesn't have.
What should I do if the countertop cracks mid-removal?
Stop applying force and assess where the crack runs. If the section is still mostly intact, complete the lift carefully with suction cups on either side of the crack. If it has fully separated into two pieces, treat them as two independent sections and lift each one out separately. Clean up all shards before continuing. A cracked slab is not a job-stopper; it just creates more handling steps and rules out resale of that section.
How do I dispose of old stone countertops?
Stone is construction debris and most curbside programs won't take it. Options include: renting a 10-yard dumpster ($300-$600 depending on region), hiring a junk removal service ($150-$350), donating to a Habitat for Humanity ReStore, selling on local classifieds, or asking your new countertop fabricator to haul it away as part of the install. Landfills accept stone debris; call ahead to confirm your local facility's heavy-material policy.
Sources
- Natural Stone Institute (formerly Marble Institute of America) -- Natural Stone Weight Reference: Granite at 1.25-inch thickness weighs approximately 18-20 pounds per square foot; industry-standard density reference for stone slab materials.
- OSHA -- Respirable Crystalline Silica Standard for Construction (29 CFR 1926.1153) and General Industry (29 CFR 1910.1053): OSHA permissible exposure limit for respirable crystalline silica is 50 micrograms per cubic meter as an 8-hour TWA.
- ISEA (International Safety Equipment Association) -- ANSI/ISEA 105-2016 Hand Protection Classification Standard: ANSI/ISEA 105-2016 rates cut-resistant gloves on a scale from A1 to A9; A4 is recommended as a minimum for stone handling applications.
- HomeAdvisor (Angi) -- Countertop Removal Cost Guide: Professional countertop removal costs typically range from $150 to $400 for a standard kitchen, depending on region and material type.
- Habitat for Humanity -- ReStore Donation Acceptance Policy: Habitat for Humanity ReStores accept donated countertops in good condition at many locations across the U.S.
- U.S. EPA -- Construction and Demolition Debris Management: Stone is classified as construction and demolition debris; a standard 10-yard dumpster holds roughly 4,000 pounds and rental runs about $300-$600 depending on region and fill weight.
- NIOSH (CDC) -- N95 Respirators and Personal Protective Technology: NIOSH-approved N95 filtering facepiece respirators filter at least 95% of airborne particles, including respirable crystalline silica generated during stone cutting or fracturing.
- OSHA -- Controlling Silica Exposures in Construction (OSHA guidance): OSHA guidance identifies stone countertop fabrication and removal as tasks that can generate respirable crystalline silica above the action level of 25 micrograms per cubic meter.
- Natural Stone Institute -- Dimension Stone Design Manual and Safety Guidelines: Industry guidance recommends suction cup lifters rated for the slab section weight and a minimum of two workers for any stone section exceeding 50 pounds.
Last updated 2026-07-10