TL;DR
- Undermount sink reveal is the thin strip of stone you see between the bowl rim and the cutout edge.
- Most fabricators target 1/8" to 3/16", held to 1/16" tolerance around the whole perimeter.
- Consistency comes from three things: accurate templating, a router bit depth set with a real gauge and a test cut, and measuring reveal at eight points before the slab leaves the shop.
What exactly is undermount sink reveal depth?
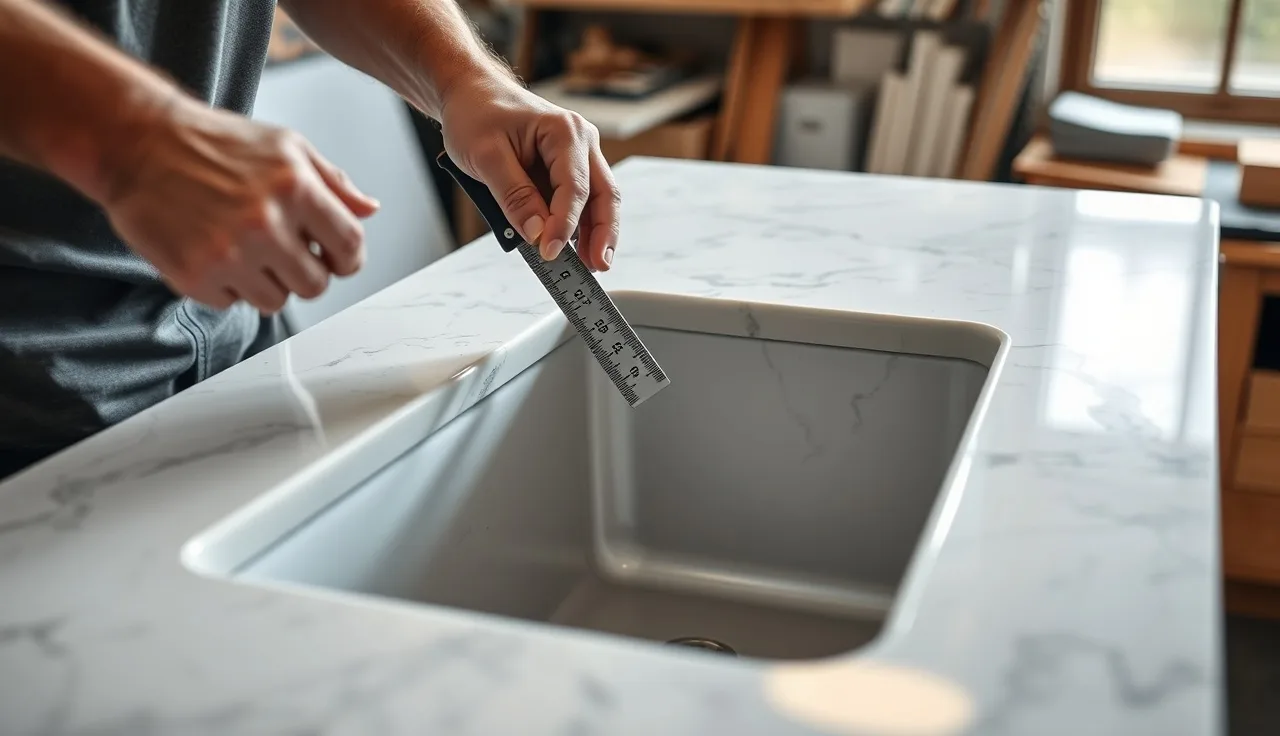
Reveal depth is the distance from the top face of the countertop down to the finished cutout edge, the small horizontal ledge the sink rim presses against from underneath. Look down at a finished undermount sink. That thin ring of polished stone between the bowl and the cutout is the reveal.
Do not confuse reveal with overhang. Overhang is horizontal: how far the cutout edge sticks out past the bowl rim when you view it from above. Reveal is vertical. Both matter, and they get controlled at different steps of the job.
Most fabricators target 1/8" to 3/16" of reveal, measured with a depth gauge at several points around the perimeter. Some shops run exactly 1/8". A few high-end shops go to 3/32" for a tighter look. Almost nobody runs reveal deeper than 1/4", because water sits on the wide ledge and the caulk line turns into a cleaning problem.
Here is why consistency beats the exact number. Run 1/8" on one side and 5/16" on the other, and the sink looks crooked even when it is dead level. The eye reads that variation as a defect. Often it is one.
What reveal depth do most fabricators actually target?
1/8" is the honest starting point for most stone. No ANSI or ASME standard dictates a specific undermount reveal for residential countertops, so the number comes from trade practice. The Natural Stone Institute (formerly the Marble Institute of America) recommends a positive reveal, meaning the stone overhangs the rim slightly instead of sitting flush or recessed [1].
Here is the range you actually see across shops:
| Reveal target | Where you see it | Notes |
|---|---|---|
| 3/32" | High-end custom shops | Very clean look, needs tight saw and router tolerance |
| 1/8" | Most production shops | Industry default, good balance of look and water runoff |
| 3/16" | Thicker sinks, composite bowls | Extra ledge fits thicker rim flanges |
| 1/4" | Almost nobody on purpose | Edge of acceptable, water sits on the ledge |
Start at 1/8" for most stone [1]. Some composite and cast iron sinks carry a 1/4" flange, and a thick rim will rock on a shallow ledge, so bump those to 3/16". Measure the actual sink flange before you commit to a router depth. The spec sheet lies more often than you would think.
Why does reveal depth vary in the first place?
Four things cause inconsistent reveal, and they tend to pile on top of each other.
First, slab thickness. Natural stone is not milled to a precise thickness. A nominal 3/4" (2 cm) slab can run anywhere from 0.68" to 0.82" across one piece, and a 3/4" quartz slab is steadier but still moves about +/- 1/32" [2]. If you set router depth off the router base, which rides the top face, thickness variation does not matter, because the cut references the surface you see. If you set depth off a fixed spoilboard underneath, every bit of thickness variation shows up as reveal variation.
Second, template shift during routing. Let the CNC template or hand jig move even 1/32" mid-cut and the bearing rides a new line, so the cutout geometry changes. This is mostly a hand-routing problem. A properly fixtured CNC kills it.
Third, polishing that changes the top face. Some shops rough the sink hole, then grind and polish the edge profile before finishing the top. Grind any material off the top face after you set router depth, and the reveal gets deeper by exactly that amount.
Fourth, sink substitution. Homeowners swap sink models between template day and install day more often than shops expect. Different models carry different rim widths and flange depths. Blanco, Kohler, and Kraus undermount bowls can differ by 1/8" in flange thickness at similar overall dimensions [3].
How do you set up a router jig for consistent reveal depth?
For hand-routing, use a flush-bearing pattern bit run against a template. The template controls horizontal position. The bit depth controls reveal. Here is the setup that holds variation inside 1/16".
Step 1: Get the actual sink in hand. Measure the flange thickness with calipers. Write it on the sink with a paint marker.
Step 2: Build or pull your template for that exact sink model. The template inner opening should equal the finished cutout size you want. Targeting 1/8" overhang (horizontal)? The opening is the sink bowl outer dimension minus 1/4" on each axis.
Step 3: Set bit depth. Clamp a scrap of the same slab material you are about to cut. Set the cutter to extend below the router base by the slab thickness minus your target reveal. For a 0.75" slab and a 0.125" target, that is 0.625". Use a dial depth gauge or a machinist's depth micrometer. Do not trust the router's built-in scale, which is good to maybe 1/16" on a lucky day.
Step 4: Make a test cut in the scrap. Measure actual reveal at four points. Adjust until you hit target within 1/64".
Step 5: Lock the collet and the depth collar. Do not touch the depth stop again until the job is done.
The whole thing takes about ten minutes and saves callbacks. The mistake people make is skipping step 4 and trusting the scale.
For CNC shops, reveal depth is the Z-depth of the profile pass in the CAM program. Set Z=0 at the top face of the slab so thickness variation drops out of the math. Confirm Z-zero by probing the slab surface at the start of every job. Do not rely on fixture height [4].
Does slab material change how you control reveal depth?
Yes, for a couple of reasons. Granite and quartzite are harder and more abrasive than engineered quartz. Router bits wear faster on them, and a worn bearing or a rounded cutter shifts your effective depth over the course of a day. Shops cutting mostly natural stone should check bearing condition every few jobs. A bearing with 0.005" of play drops that much variation into the reveal at the inside corners of a rectangular cutout.
Engineered quartz (Cambria, Silestone, Caesarstone) machines more consistently because the material is uniform, but the resin matrix is hard on bearings too. For Cambria countertops and similar products, the maker usually calls for water cooling during CNC work, which keeps bit geometry stable and cuts reveal drift from cutter heat [5].
Marble countertops are soft enough that an aggressive feed rate tears out at the inside corners of a sink cutout, and that tearout reads as inconsistent reveal. Slow the feed and take two passes on marble and softer limestones: a rough pass leaving 1/16", then a finish pass to dimension.
For granite countertops, the inside-corner radius is the usual trouble spot. A round bit cannot cut a square inside corner, so reveal at the corners runs slightly wider than on the straight runs. Most fabricators live with it, because the mount clips pull the rim up tight and the corner radius of the sink rim usually hides the difference anyway.
How do you verify reveal depth before the slab leaves the shop?
Measure reveal at eight points before delivery. This is the step most shops skip when they are behind, and it is the one that prevents the most callbacks.
Use a depth micrometer or a digital depth gauge with a flat base wide enough to span the cutout edge. A 6" steel rule stood on end is not accurate enough. The tip rocks on the polished surface and hands you false readings.
Check at least eight points: two on each long side, one on each short side, one on each inside corner radius. Write the readings down and compare. Any two that differ by more than 1/16", find the cause before the slab ships.
Secondary check: dry-set the sink from below with the planned clips or rails, then look at the reveal from above with a flashlight held at a low angle. Raking light shows variation as small as 1/32". Your eye is a sharp instrument here. If it looks off, measure again.
Production shops sometimes photograph the sink set in the cutout as part of job documentation. That photo is your record if a dispute comes up after install. SlabWise's job documentation tools let you attach photos and measurements to a job file, so the installer carries the shop's pre-delivery readings on-site. That saves a lot of phone calls.
Over-cut reveal gives you four bad options: re-cut to a wider cutout for a larger sink, fill the ledge with color-matched epoxy and re-polish (rarely convincing on dark stone), discount the job and document the deviation, or cut a new piece. There is no way to add stone back to an edge you already removed.
How does the installation process affect final reveal consistency?
A perfectly cut slab can still show uneven reveal if the sink hangs wrong. Undermount sinks hold to the underside of the stone with clips, adhesive, or both. The common system uses a rail or clip kit that threads into holes drilled in the bottom of the slab [6]. Tighten those clips unevenly and they pull the rim higher on one side, tilting the bowl and changing the apparent reveal.
The fix is simple. Snug all clips finger-tight first. Then go around the perimeter in a star pattern (like lug nuts on a wheel) in quarter-turn increments until the rim sits parallel to the stone underside. Put a spirit level on the sink grid or bowl and confirm the bowl is level before final tightening.
Silicone under the rim matters too. A bead that runs too thick on one side, or goes on unevenly, lifts the rim on that side even after the clips are down. The standard bead is 3/16" diameter, laid 1/4" in from the inner edge of the cutout. Too much silicone is as bad as too little, because the excess has nowhere to go and opens a gap the clips cannot close.
For countertop installation in general, the cabinet tops need to be level before the slab drops. A slab shimmed level keeps its sink cutout level, but racked cabinet tops let the slab flex a little on stone under 3/4" thick, and that flex draws a curved reveal line down a long edge.
What tools and fixtures do professional shops use?
Shops that hold 1/16" reveal consistently lean on the same short tool list.
Templating: a digital measuring system (Prodim, Festool LeiKa, or a similar laser arm) captures the exact cabinet opening. These output a DXF that feeds straight to CNC with no manual redraw, which kills the transcription errors that put cutouts in the wrong place [7].
Routing: a 1/2" shank flush-trim or pattern bit with a precision-ground bearing. Cheap bits have measurable bearing play. A good Whiteside or Amana bit with a sealed bearing holds tighter [8]. Replace the bearing rather than just sharpening the bit when variation starts creeping in.
Depth setting: a digital depth micrometer, not the router thumbscrew scale. A Starrett 440 series or a Mitutoyo digital gauge holds 0.001" resolution and runs $80 to $150 [9]. That is cheaper than one callback trip.
Verification: a set of feeler gauges works in a pinch. Slide a 0.125" feeler along the ledge, and if it passes without rocking, your reveal is at or just above 1/8". Less precise than a micrometer, much faster for a quick go/no-go.
Installation: a torque screwdriver set to a fixed value for the clip bolts takes guesswork out of clip tension. Overkill for a one-off. It pays off when an installer sets six sinks in a day.
Can you template and cut for consistent reveal without a CNC?
Yes. CNC makes it faster, but consistent undermount reveal is very doable with a hand router and a good template.
Start with a rigid template. MDF is the standard, 3/4" thick, cut on a CNC or a carefully set table saw. The opening has to match the final cutout size exactly, because any error in the template transfers straight to the stone.
Clamp the template to the stone with at least four clamps, placed so nothing can shift mid-cut. Even a 1/32" slide shows up as visible variation.
Run a rub collar or bearing against the template edge at a slow, steady feed. Do not stop mid-cut. Stopping and restarting can leave a small step in the surface that reads as reveal variation.
Hand routing a sink cutout in granite or quartz usually takes two passes. First a rough plunge to clear the bulk of the waste, often with a jigsaw through a hole drilled at each corner. Then a bearing-guided trim pass with the pattern bit. The reveal depth is set on the trim pass only. The jigsaw work is just roughing out the hole.
Above three or four undermount sinks a week, a bridge saw with a programmed plunge or a dedicated CNC starts paying for itself in labor and consistency. Below that, a good router template setup is the right call.
What are the most common reveal depth mistakes and how do you fix them?
Inconsistent bit depth across a long production day is the single most common problem. Routers vibrate. Depth collars creep. Check your depth setting at the start of every third sink when you are running volume. Two minutes of checking beats a re-cut.
Using the wrong template for the sink model. Manufacturers change bowl dimensions without changing the name, and third-party distributors ship the same nominal SKU from different factories. Measure the actual sink in hand, never the spec sheet, before you pull a template.
Not accounting for edge profile grinding. Polish the top edge profile (ogee, eased, whatever) after cutting the sink hole, and if that polishing takes any material off the top face, the reveal gets deeper. Either finish all top-face polishing before you set reveal depth, or build the expected grinding stock into your bit depth math.
Over-tightening clips on one side. Covered under installation, but worth saying twice: uneven clip tension fakes reveal variation on a perfectly cut slab. An installer who does not understand reveal will blame the shop.
Forgetting the inside corner radius. A 1/2" bit leaves a 1/4" inside radius. A 3/8" bit leaves 3/16". If the sink mounting flange has a tighter radius than the bit left, the sink will not seat flat, and you get a visible gap at the corners. Match the bit radius to the sink corner geometry, or square up the corners with a die grinder and a small diamond bit.
How does reveal depth differ for different sink materials?
The stone cutting is the same no matter the sink material, but the target reveal and the install approach change with the rim.
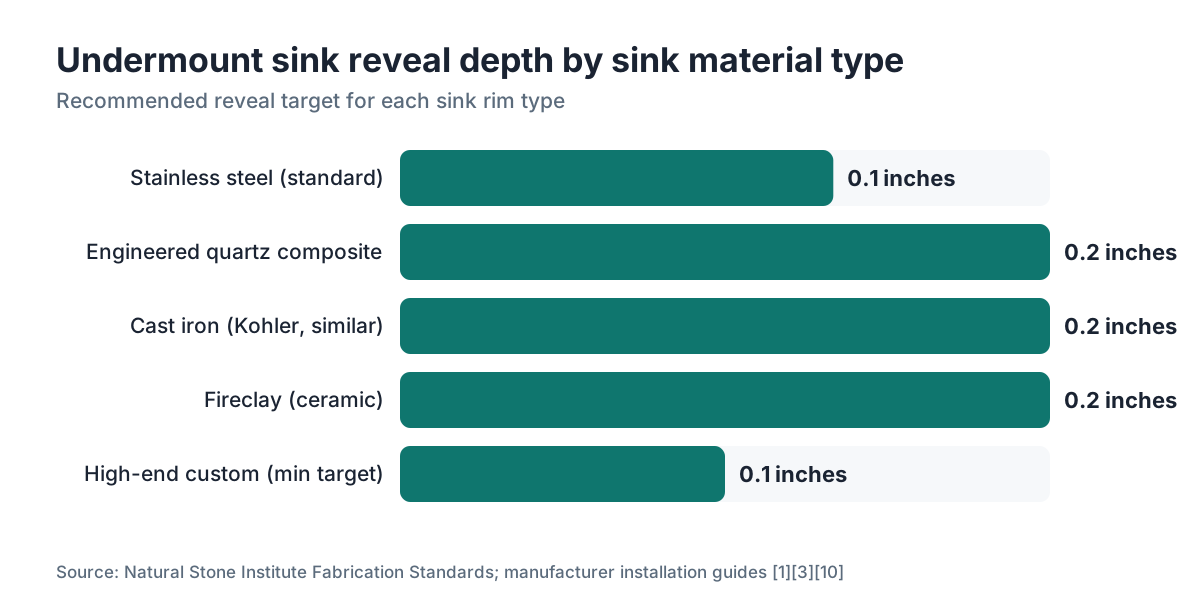
Stainless steel sinks are the most common. The rim runs 1/8" to 3/16" thick, and the standard 1/8" reveal works well. A stainless rim is rigid enough that small differences in clip tension barely move the apparent reveal.
Cast iron sinks (many Kohler models) carry a thick porcelain-coated rim, sometimes 1/4" or more. Check the model's flange thickness before setting reveal. 3/16" is common with cast iron so the heavy rim clears the ledge without rocking.
Composite granite sinks (Blanco Silgranit and similar) have a formed composite rim that runs fairly consistent, usually right around 3/16". The 1/8" target works, but measure first.
Fireclay is the problem child. It is cast ceramic, and the rim thickness can swing by as much as 1/4" around a single sink because of the casting process [10]. Set fireclay reveal at 3/16" and check the actual rim at several points before cutting. Some fireclay sinks need shimming with silicone to even out their own rim before the clips go in.
For kitchen countertops in general, the sink cutout is the most consequential single cut on the job. A bad cutout on a granite or quartz slab usually means a new piece, which wipes out the margin on the whole job.
What should homeowners know about specifying reveal depth?
You do not need to learn router jig setup. But a few things protect you during selection and install.
First, bring your actual sink to the template appointment, or at least have it delivered to the house before the fabricator shows up. Template off a spec sheet, then find the delivered sink is a slightly different model, and the shop has to re-template. That costs time and sometimes money.
Second, ask what reveal the shop plans to run and get it in the quote paperwork. "1/8" positive reveal, consistent to within 1/16" tolerance" is a reasonable line to request. Most experienced shops will agree without blinking. It is what they already do.
Third, if your material is marble or a softer stone, ask whether the shop has cut that stone before. Inside-corner handling on marble is different from granite, and tearout at corners is a real risk with an inexperienced crew.
Fourth, inspect the reveal before the installers leave. Grab a flashlight, hold it at a low angle, and scan the perimeter. Variation shows. If something looks off, ask them to measure it before they pack up. Once 100% silicone cures, usually about 24 hours at room temperature [11], the sink is much harder to adjust without pulling it out entirely.
Frequently asked questions
What is the standard undermount sink reveal depth?
The industry default is 1/8" (about 3 mm), the positive reveal the Natural Stone Institute recommends. Some high-end shops run 3/32" for a cleaner look. Sinks with thick cast iron or fireclay rims often call for 3/16" so the rim seats flat. Going past 1/4" is usually a mistake, because water pools on the wide ledge.
How do you measure reveal depth accurately?
Use a digital depth micrometer or a flat-base depth gauge, never a steel rule or the router's built-in scale. Rest the base on the top face of the stone and measure down to the reveal ledge. Check at least eight points: two per long side, one per short side, one per inside corner. Any reading more than 1/16" off the others needs investigation before the slab ships.
What causes uneven reveal on an undermount sink?
Four main causes: slab thickness variation (if you reference from below), template shift during routing, grinding the top face after setting router depth, and uneven clip tension at install. On hand-routed jobs, a worn router bearing is another common culprit. CNC jobs with proper surface probing take most of these variables off the table automatically.
Can you fix an undermount sink that was installed with the wrong reveal depth?
Over-cut reveal leaves few options: replace the stone, move to a larger sink whose wider rim covers more ledge, or fill with color-matched epoxy and re-polish (rarely convincing on natural stone). Under-cut reveal is more forgiving. You can remove a little material with a hand grinder and re-polish, though getting a consistent depth that way is hard.
Does the type of stone change the reveal depth target?
The target stays the same across stone types, but the cutting changes. Marble and softer limestones need slower feed rates to avoid tearout at inside corners. Granite and quartzite wear router bearings faster, so bit checks come more often. Engineered quartz machines consistently but still benefits from water cooling during CNC cuts to keep the cutter geometry stable.
How do you set router depth for a sink cutout on a CNC machine?
Set Z=0 at the top face of the slab, found with a surface probe at the start of each job. The profile pass depth is then slab thickness minus target reveal, referenced from that probed surface. This makes slab thickness variation irrelevant. Never reference from a fixed spoilboard Z-height without probing, or thickness variation transfers straight to reveal inconsistency.
What reveal depth should I use for a fireclay sink?
Start at 3/16" for fireclay, because the cast ceramic rim can vary by up to 1/4" in thickness around a single sink. Measure the actual rim at four or more points before cutting. Some installers shim the low spots with silicone to even out the rim before tightening clips. A fixed 1/8" reveal that works for stainless can leave a visible gap on an uneven fireclay rim.
How do sink mounting clips affect the final reveal appearance?
Uneven clip tension tilts the bowl, so one side of the rim sits higher against the ledge than the other. That creates apparent reveal variation on a perfectly cut slab. Snug clips finger-tight first, then work around in a star pattern in small increments, like torquing lug nuts. Confirm the bowl is level before final tightening. A torque screwdriver helps on days with multiple sinks.
What is the difference between reveal and overhang on an undermount sink?
Reveal is vertical: the distance from the top face down to the cutout edge, the ledge the rim presses against. Overhang is horizontal: how far the stone extends past the bowl rim when viewed from above. Both matter for looks. Router bit depth controls reveal. Template opening size relative to the bowl outer dimension controls overhang.
Should the sink be on-site at the time of templating?
Yes, always. Template from a spec sheet and you risk cutting for the wrong flange dimensions if the delivered sink is a slightly different model or a different production run. Bowl dimensions and flange thickness change without notice from manufacturers. Having the physical sink present takes two minutes to measure and prevents the most common reveal mismatch.
How much tolerance is acceptable for undermount sink reveal?
Most production shops treat plus or minus 1/16" (about 1.5 mm) as acceptable, so the reveal at any point should not vary from the spec by more than that. Variation over 1/16" is visible to the naked eye under raking light. High-end custom shops often aim for plus or minus 1/32", which needs CNC cutting with surface probing and careful template control.
What silicone bead size should I use under an undermount sink rim?
A 3/16" diameter bead laid about 1/4" in from the inner edge of the cutout is standard. Too little leaves voids where water intrudes. Too much creates a thick spacer that keeps the rim off the ledge, which makes reveal variation worse. Use 100% silicone, not siliconized acrylic, for a waterproof bond that survives the wet environment under a sink.
Can I use a hand router to achieve consistent reveal without a CNC?
Yes. A rigid MDF template accurate to the final cutout size, clamped with at least four clamps, plus a flush-bearing pattern bit on a 1/2" shank router will hold 1/16" reveal reliably. The critical points: set depth with a dial gauge on a scrap of the same slab, make a test cut and measure before touching the real stone, and never stop mid-cut, because stopping can leave a step in the surface.
Does reveal depth affect how easy the sink is to clean?
Somewhat. A deeper reveal (near 1/4") makes a wider ledge that collects water and debris and is harder to wipe, especially if the caulk line sits at the back of that ledge. A shallow 1/8" reveal leaves almost no ledge for buildup. Tighter reveals are better for hygiene, one reason experienced fabricators prefer the 1/8" standard over 3/16" unless the rim demands it.
Sources
- Natural Stone Institute (formerly MIA), Fabrication and Installation Standards: Positive reveal of 1/8" is the recommended standard for undermount sink cutouts in stone countertops
- ASTM International, ASTM C615 Standard Specification for Granite Dimension Stone: Natural stone slab thickness tolerance for dimension stone; engineered quartz holds tighter tolerance but still varies
- Blanco USA, Sink Installation Instructions (product documentation): Undermount sink flange dimensions vary by model and manufacturer; Blanco specifies rim and flange thickness per product line
- OSHA Technical Manual, Section III: Machinery and Machine Guarding: CNC surface probing and work-zero referencing are standard practice to ensure dimensional accuracy in machined parts
- Cambria, Fabrication and Installation Guide: Cambria recommends water cooling during CNC routing operations to maintain bit geometry and cut quality
- Kohler Co., Undermount Sink Installation Instructions (K-series): Undermount sink clips thread into pre-drilled holes in the stone underside; clip tightening sequence affects rim seating
- Whiteside Machine Company, Router Bit Technical Specifications and Bearing Standards: Precision-ground router bearings with sealed races reduce play; worn bearings with measurable play affect cut accuracy
- The L.S. Starrett Company, 440 Series Depth Micrometer Product Specifications: Starrett 440 series depth micrometer holds 0.001" resolution; retail price range $80-$150 depending on range and configuration
- Kohler Co., fireclay sink product documentation: Fireclay sinks are cast ceramic and show rim thickness variation around the perimeter due to the casting process
- Dow (DuPont), Dowsil 100% Silicone Sealant Technical Data Sheet: 100% silicone sealant typically cures in 24 hours at room temperature; siliconized acrylic is not suitable for wet environments
- U.S. Department of Labor, Bureau of Labor Statistics, Occupational Outlook Handbook: Tile and Stone Setters: Reference for stone fabrication trade practices and installation standards in the countertop industry
Last updated 2026-07-10