TL;DR
- Etching is acid eating a thin layer off the marble surface.
- It's not a coating failure and not a stain.
- Light etch marks (dull spots) come out with a honing powder or wet/dry sandpaper starting around 400-grit, then a repolish.
- Deep etches need a pro with diamond abrasives.
- Budget $30-80 for DIY supplies or $300-800 for a professional re-hone of a standard kitchen counter.
What actually is an etch mark, and why does marble get them?
An etch mark is acid damage, not a stain. A stain is foreign material that soaked into the stone. An etch is physical: acid dissolved a thin layer of calcium carbonate (the mineral marble is made of) and left that patch microscopically rougher than the stone around it. The rough patch scatters light differently, so you see a dull spot, sometimes almost white on dark marble, sometimes barely there on an already-matte finish.
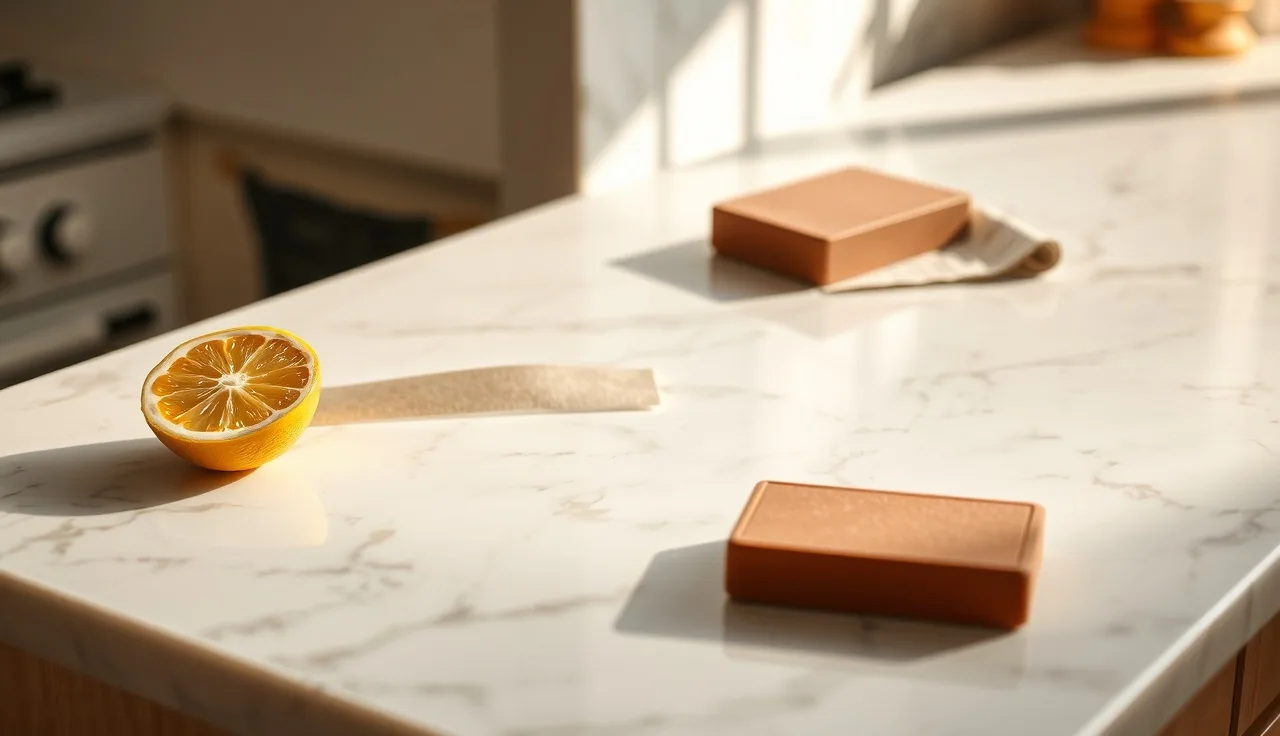
Calcium carbonate reacts with almost any mild acid in a kitchen. Lemon juice, vinegar, tomato sauce, wine, coffee, even the citric acid in a lot of dish soaps. The reaction is fast, often under a minute of contact. A wet lemon slice left on polished Carrara for 30 seconds can leave a permanent dull ring. That's not a cleaning failure. That's chemistry.
Marble rates a 3 on the Mohs hardness scale. That makes it softer than granite (6-7) and much softer than quartzite (7+). [1] The softness that lets sculptors carve marble is the same softness that lets acid chew it. If you went with a honed marble finish at install, etches are still happening, you just can't see them as easily because the surface is already matte. Polished marble shows every single one.
Here's the part people fight before they accept it: you cannot clean an etch away. Soap and water won't do it. A magic eraser won't do it. You have to remove material around the etch until the surface is level and uniform again, then rebuild the finish. That's honing.
How do you tell the difference between a stain and an etch?
Run a fingertip across the spot. Feel a slightly rough or sunken texture compared to the stone around it? That's an etch. Feel nothing but smooth surface that just looks darker, like a wet shadow? That's a stain, usually oil or another liquid that soaked in.
Here's a second test. Dampen the spot with clean water. If the mark vanishes when wet and comes back when dry, it's a stain, and you treat it with a poultice, not abrasives. If the mark stays visible (or changes character) when wet, it's almost certainly an etch.
Some spots are both. An oily, acidic liquid like salad dressing can stain and etch in the same drip. Treat the stain first with a poultice, then handle the leftover etch with abrasives. Do it in the other order and the abrasion drags staining material deeper into the stone.
What grit sequence do you need to re-hone marble?
The grit sequence depends on how deep the etch runs. Shallow etches (you can barely feel them) need little material removal. Deep etches (a clear ridge or dip under your fingernail) need a more aggressive start.
Here's the framework stone restoration contractors use:
| Etch severity | Starting grit | Intermediate grits | Finishing grit |
|---|---|---|---|
| Very light (barely visible) | 800 | 1,500 | 3,000 |
| Light to moderate | 400 | 800, 1,500 | 3,000 |
| Moderate to deep | 220 | 400, 800, 1,500 | 3,000 |
| Severe (scratches or chips) | 120 or less | 220, 400, 800, 1,500 | 3,000 |
Each grit erases the scratch pattern left by the one before it. Skip a step and you'll get swirl marks at the finer grit that never polish out, and you'll have to drop back down anyway. Skipping grits doesn't save time. It costs time.
For a honed (matte) finish, stop at 400. For satin, stop at 800. For a polished finish, run through 1,500 and 3,000, then use a marble polishing powder (usually tin oxide-based or oxalic acid-based) to bring up the final gloss. [2] The powder is a chemical-mechanical step that tightens the micro-surface and creates the shine. Sandpaper alone will never reproduce a factory polish, no matter how fine you go.
What materials and tools do you need for DIY marble honing?
For one etch spot, say 2 to 4 inches across, you don't need much.
Wet/dry silicon carbide sandpaper in the grits you need (any hardware store or online). Skip standard woodworking sandpaper. It falls apart when wet and cuts unevenly on stone. Look for wet/dry silicon carbide or aluminum oxide sheets rated for stone or metal. Norton and 3M both make reliable ones. [3]
A hard rubber sanding block, or a small flat wooden block wrapped in the paper. Flat pressure is the whole game. Sand freehand with your fingers and you'll dish out a rounded low spot that hides until the light hits it wrong.
Clean water in a spray bottle. You work wet, always. The water lubricates the paper, carries away the marble dust, and keeps the surface from heat-burning. Spray often.
Marble polishing powder for the final step if you want gloss back. Tenax, StoneTech, and Miracle Sealants all make ones that work. Figure $15-30 for a small container, and follow the label because application differs by brand.
A clean white microfiber cloth for buffing.
Optional but handy: a spray bottle of isopropyl alcohol (70% or higher) to wipe the area between grits so you can actually read your progress.
Total material cost for a spot repair runs roughly $20-50. Doing the whole countertop? Add a diamond hand pad set ($40-80), because paper sheets wear out fast over large areas.
Step-by-step: how to re-hone a light etch mark yourself
This covers a light to moderate etch on previously polished marble where you want a polished finish back.
Step 1: Clean the area. Get rid of grease, soap film, and debris. A little dish soap and water, rinsed and dried, is fine. You want bare stone.
Step 2: Pick your starting grit. Light etch you can barely feel: start at 800. Etch you can clearly catch with a fingernail: start at 400.
Step 3: Wrap the block and wet the surface. Spray until the area is visibly wet. Work small overlapping circles with even, moderate pressure. Not hard. You want steady contact, not force. Keep it wet the whole time. Work the etch and blend out about an inch past its edge in every direction so the repair feathers into the surrounding stone.
Step 4: After 30 to 60 seconds, wipe dry and look. The whole worked area should read uniformly matte at that grit. Still see the original etch? Keep going. Uniform dull texture everywhere? Move up a grit.
Step 5: Repeat through each grit, keeping the surface wet. Between grits, wipe clean and check in raking light (hold a flashlight low and angled across the stone). You're hunting for leftover scratches from the previous grit. Don't advance until they're gone.
Step 6: After your finest grit (1,500 or 2,000), apply the polishing powder per the label. Usually you dampen the spot, sprinkle a little powder, and buff with a clean cloth or a low-speed drill fitted with a felt pad. Circles. A sheen starts to come up.
Step 7: Buff clean and judge it in natural light from several angles. A real polish looks like glass. See haze? Go back to the powder step.
Step 8: Once you're happy, clean the surface and apply a marble sealer if the stone is unsealed or due. [4] Honing opens the pores a little, so sealing after a repair is smart.
One spot takes 20 to 45 minutes of actual work. A full countertop takes several hours by hand and is genuinely tiring. That's usually the moment people decide to call a pro.
When should you hire a professional stone restorer instead of doing it yourself?
Be honest with yourself first. DIY re-honing goes sideways when someone skips a grit, leans too hard, or fails to feather the edge, and ends up with a low spot or a halo of mismatched texture. On cheap tile, who cares. On a $4,000 slab, the math on that mistake changes.
Hire a pro if any of these are true.
The etching covers more than a square foot. Pros run angle grinders or random orbital machines with diamond pads and can re-hone a full kitchen counter in 2 to 3 hours. By hand, that same job eats your whole day and usually comes out worse.
You see actual scratches, more than etch. Deep scratches want low grits (120 or below) and machine power. Hand sanding at 120 on a 3-Mohs stone is possible but slow and hard to keep flat.
Your polish is high-gloss and it matters to you. Pros have the machines and diamond tooling to bring stone back to a factory mirror. The best DIY powder result gets close, but usually not identical.
You have a rare or expensive marble. A $200 per square foot book-matched slab is not the place to practice.
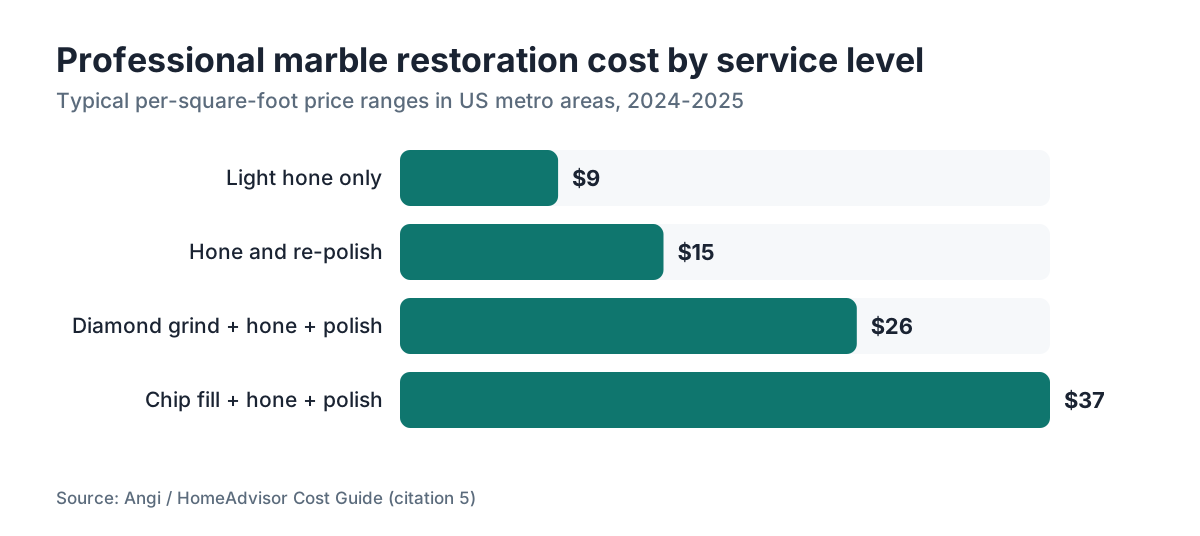
Pro pricing varies by region and severity. A standard kitchen counter re-hone and polish in the US runs roughly $300-800. [5] Many companies price by the square foot, and $8-20 per square foot is common across metro areas. The range is wide because labor costs swing hard: the same job runs more in San Francisco than in rural Tennessee. Get at least two quotes and ask flat out whether the price includes sealing.
If you're still weighing stone options before you commit to marble, our kitchen countertops guide lays out the maintenance demands across every major surface.
What is marble polishing powder and does it actually work?
Marble polishing powder is a fine abrasive compound, usually tin oxide or oxalic acid-based, that builds a mechanical and sometimes mild chemical polish on calcium carbonate. It works by cutting a very fine, even scratch pattern too small to scatter light, which your eye reads as gloss.
Oxalic acid-based powders do brighten calcite minerals a little chemically, which is why some people say they make the stone "pop." The effect is real but small. The abrasion does most of the work.
For very light haze or a minor etch you can barely feel, powder alone (no sandpaper) sometimes fixes it. You're polishing a slightly rough surface back to smooth when the damage is that shallow. Try this first on a light etch before you reach for paper. Fixed in 2 to 3 minutes of buffing? Great. No visible improvement? The etch is too deep for powder and you need to sand.
Powder does nothing for moderate or deep etches. If the surface sits physically lower or feels rough, you have to remove material evenly from the area around it to level everything. Powder over a rough surface just polishes the rough, and it still looks wrong.
Some contractors use polishing compounds and low-speed buffing machines instead of loose powder for the final step. Same idea, similar chemistry. Either works if the prep (sanding through the grits) was done right.
How do you avoid future etch marks on marble?
The honest answer: you can't fully prevent etching on marble in an active kitchen. You can only cut down the frequency and the severity.
Seal the stone. A penetrating sealer does not stop etching (sealers fight absorption and staining, not acid erosion), but it protects against the staining side of an acidic spill and makes cleanup faster so liquids sit less. [4] Apply a good impregnating sealer once a year on polished marble, or run the water test: if a water drop soaks in under 5 minutes, it's time to seal.
Use cutting boards and trivets. Every time. This isn't a lecture, it's physics. Lemon on marble equals etch, and no sealer changes that.
Go with a honed finish if you can. Honed marble etches at the same chemical rate as polished, but the damage is invisible because the surface already reads matte. Plenty of designers prefer the look, and it's a lot easier to live with. More on finish choices in our marble countertops guide.
Match the material to the use. Marble bathrooms etch far less than marble kitchens because bathrooms don't see citrus and wine. A marble vanity is a reasonable low-maintenance pick. A marble cooking island is a standing maintenance commitment.
Want the marble look without the etch risk? Engineered surfaces like Cambria countertops (quartz-based) mimic veined stone and are basically acid-proof. Worth knowing before you sign.
Does re-honing change the color or look of your marble permanently?
Yes, and you should understand how before you start.
Honing removes material. On a polished surface, working at any grit below about 3,000 leaves the stone matte or satin instead of glossy. You have to run the full grit sequence and use polishing compound to bring the gloss back. Stop early and the area you worked stays duller than the counter around it.
Color can shift a little. Some marbles look brighter and whiter polished because the reflective surface throws light back at you. Honed, that same stone reads slightly grayer and more stone-like. Most people call this neutral or even prefer it, but it is a change.
Spot-hone and then repolish, and in most cases it blends well with the stone around it. The odds of a visible boundary go up if your marble has strong directional veining, uneven background color, or if the surrounding stone has aged and patinated differently than a freshly worked spot.
Full-counter re-honing by a pro sidesteps the mismatch problem because they work the entire surface at once. Spot repair is a blend job by nature, and the result rides on the stone and the hands doing it.
What do fabricators and stone pros charge for marble re-honing, and how do they price it?
Stone restoration pricing in the US doesn't run off one formula. The most common approach is per-square-foot pricing with a minimum charge for small jobs.
Typical ranges for 2024-2025, from industry surveys and posted contractor pricing: [5]
| Service level | Typical price range (per sq ft) | Minimum charge |
|---|---|---|
| Light hone only (no polish) | $6-12/sq ft | $150-200 |
| Hone and re-polish | $10-20/sq ft | $200-300 |
| Full diamond grind + hone + polish | $18-35/sq ft | $300-500 |
| Chip fill + hone + polish | $25-50/sq ft | varies |
Minimum charges exist because setup, travel, and machine prep cost the same no matter how small the job. A 1-square-foot etch spot costs almost as much to fix professionally as a 6-square-foot area once you're paying a minimum.
Fabricators who offer restoration as a side service often price a bit under dedicated restoration companies, because they already own diamond tooling for fabrication work. If you have a good relationship with your fabricator, ask them first.
For shop owners tracking restoration jobs alongside fabrication, tools like SlabWise help you build and quote restoration scopes the same way every time, so you don't leave money on the table on minimum-charge work.
For how marble stacks up against other materials on cost and upkeep, the granite countertops and how to clean stone countertops guides walk through the tradeoffs.
Can you re-hone marble tile floors or backsplashes the same way?
The chemistry and the abrasive sequence are identical. Marble is marble, whatever the format. The real differences are geometry and scale.
Backsplash tile: small area, vertical surface. Hand sanding with wet/dry paper works fine. The catch is keeping water off the wall and nearby surfaces, so tape up plastic sheeting and work carefully. Grout lines mean a flat block won't ride evenly, so you work by hand in sections. Matching the finish on one or two damaged tiles to the surrounding tiles gets tricky.
Floor tile: large area, horizontal, and floors often carry worse etching from years of acidic cleaners. This is almost always a pro job, because machine grinding is the only practical way to handle more than a few square feet. Floor restoration also has to deal with lippage (height differences between tiles), which needs different tooling than counter work. [9]
Same rule for both formats: assess severity first, start with the finest grit that will actually cut the damage, and work up to the finish level you want.
Frequently asked questions
Can marble etching be fixed permanently, or will it just happen again?
The specific damage you remove is gone for good. But marble etches again anytime it meets acid. Re-honing restores the surface, it doesn't change the stone's chemistry. For real etch resistance you need a different material. A honed finish makes future etches far less visible, but the underlying vulnerability stays exactly the same.
What household products actually cause marble etching?
Anything acidic: lemon juice, vinegar, wine, tomato products, coffee, orange juice, most soft drinks, many all-purpose cleaners, and anything with citric acid or bleach. Even some dish soaps are acidic enough to lightly etch over time. Damage can happen in under a minute of contact. Alkaline and pH-neutral cleaners are safe for marble.
Does sealing marble prevent etch marks?
No. Penetrating sealers guard against liquid absorption and staining, not acid erosion of the calcium carbonate surface. A sealer can slow how fast a spill reaches the stone if it beads up, buying you time to wipe, but acid that sits on sealed marble long enough still etches. Sealing is worth doing anyway for stain protection.
How long does it take to re-hone a full marble kitchen counter professionally?
A pro with an angle grinder or random orbital machine and diamond pads usually takes 2 to 4 hours for a standard kitchen counter (25-40 sq ft), including honing and repolishing. Drying and sealing add another 1 to 2 hours. Plan for a half-day kitchen outage. Hand-sanding the same area yourself would eat most of a full day.
What grit sandpaper do I start with for a barely visible etch mark?
Start at 800-grit wet/dry silicon carbide for a light etch you can barely feel. If 800 clears it within 30 to 60 seconds of wet sanding, you're set to run through 1,500 and 3,000, then finish with polishing powder. If 800 barely makes a dent after two minutes, drop to 400 and reassess.
Is honed marble easier to maintain than polished marble?
Yes, in practice. Honed marble still etches chemically, but the damage is nearly invisible because the surface already reads matte. You won't see a dull ring where a lemon sat. The tradeoff: honed marble shows fingerprints and oily smudges more readily than polished. Most people who cook hard on marble prefer honed for exactly this reason.
Can I use a random orbital sander on marble to speed up the process?
With the right wet/dry hook-and-loop discs and very careful technique, yes. Use the lowest speed, keep the surface wet, and never let the machine sit still or press hard. A random orbital on a 3-Mohs stone removes material fast enough to dish out noticeable dips if you're careless. Most DIYers do better by hand for anything under 4 square feet.
How do you match the sheen of a repaired spot to the surrounding polished marble?
Run every grit in sequence without skipping, feather your sanding 1 to 2 inches past the etch boundary, and spend extra time on the polishing powder step. Check the repair in raking light (a flashlight held low and angled) at each step to catch mismatches early. Slight sheen variation usually disappears once the surface is sealed and gets a few days of normal use.
What is the difference between honing and polishing marble?
Honing is abrasive material removal that leaves a matte or satin surface. Polishing is the finer process after it, either mechanical with very fine abrasives or chemical with polishing compounds, that produces a reflective, glossy surface. Every polished marble counter was honed first. You hone to remove damage, then polish to restore gloss. Stop at honed if you prefer matte. [8]
Can you re-hone marble with a pumice stone or household abrasives?
Pumice runs about 6 on the Mohs scale, harder than marble's 3, so it scratches marble. It's also irregular and hard to keep flat, so it tends to gouge uneven scratches instead of a controlled honed surface. Bar Keepers Friend (oxalic acid plus mild abrasives) can help with very light dulling, but for real etches, proper silicon carbide sandpaper in sequence beats it easily.
How often does marble typically need to be re-honed in a kitchen?
No fixed schedule. It rides entirely on how hard the surface gets used and whether spills get wiped fast. A kitchen where lemon and wine hit marble daily could need re-honing every 1 to 2 years. A carefully run kitchen where marble mostly sees water might go 5 to 10 years. Most restoration companies see marble kitchen counters every 2 to 4 years on average.
Does re-honing work on cultured marble or marble-look surfaces?
No, or at least not the same way. Cultured marble is a resin-and-filler composite with a gel coat surface, not natural stone. The honing described here removes actual stone. On cultured marble you'd cut straight through the gel coat and ruin it. Marble-look quartz, porcelain tile, and laminate can't be re-honed either. This guide is for natural marble only.
What should I ask a stone restoration contractor before hiring them?
Ask what abrasive system they run (diamond tooling is professional-grade; generic sandpaper on a rental orbital is not), whether the quote includes sealing, whether they carry liability insurance for accidental damage, and whether they can show photos of a similar job. Ask if the price is per square foot or flat rate, and what happens if the damage runs deeper than expected once they start.
Sources
- U.S. Geological Survey, Mineral Resources Program - Mohs Hardness Scale: Marble rates approximately 3 on the Mohs hardness scale, granite rates 6-7, and quartzite rates 7+
- Natural Stone Institute - Stone Finishes and Surface Treatments: Polished marble finishes are produced using progressively finer abrasives followed by polishing compounds including tin oxide and oxalic acid-based products
- 3M Abrasives - Wet/Dry Finishing Papers Product Information: Silicon carbide wet/dry sandpaper is the appropriate abrasive type for stone surface finishing; standard wood-cutting sandpaper degrades when wet
- Marble Institute of America (now Natural Stone Institute) - Care and Maintenance Guidelines: Penetrating sealers protect against staining through absorption but do not prevent acid etching of calcium carbonate stone surfaces; sealing is recommended after any abrasive surface work
- Angi - Stone Countertop Polishing and Restoration Cost Guide: Professional marble countertop re-honing and polishing costs approximately $300-800 for a standard kitchen counter, with per-square-foot rates typically ranging $8-20 in most US metro areas
- ASTM International - Standard C503: Standard Specification for Marble Dimension Stone: Marble as defined for commercial dimension stone is a metamorphic rock composed predominantly of calcium carbonate (calcite) or magnesium carbonate (dolomite)
- University of Florida IFAS Extension - EDIS Publications on Household Acids and pH: Common kitchen acids including lemon juice (pH 2-3), vinegar (pH 2.4-3.4), and tomato juice (pH 4) are capable of reacting with calcium carbonate surfaces
- Natural Stone Institute - Countertop Fabrication Standards (ANSI/NSI 373): Honing is defined in stone industry standards as the process of producing a flat, non-reflective matte surface using abrasive tooling; polishing is a subsequent operation producing a reflective surface
- Tile Council of North America - Installation Handbook: Marble tile floors may require professional grinding and honing to address lippage and widespread surface etching from acidic cleaning products used over time
- EPA - Safer Choice Program Ingredient Standards: Many all-purpose household cleaners contain citric acid, lactic acid, or other acidic components that are harmful to calcium carbonate stone surfaces
Last updated 2026-07-10