
TL;DR
- Calibrating a CNC router for stone means checking spindle runout (target under 0.001 in), squaring all three axes, setting accurate tool-length offsets, verifying the vacuum or water table, and running test cuts in scrap before you touch real stone.
- A full calibration takes 2 to 4 hours.
- Repeat the key checks every 40 to 60 machine hours.
Why does CNC calibration matter so much for stone?
Stone punishes error in a way wood and plastic never will. A 0.005-inch axis error that stays invisible on an MDF cabinet door turns into a visible step at a granite miter, or a sink cutout that binds against the undermount bowl. You can't sand stone. You can't fill it. You scrap the slab and start over.
The math is brutal. A remnant slab of mid-grade quartz runs $15 to $40 per square foot at wholesale, so a botched 30-square-foot counter is $450 to $1,200 in material before you count labor or the customer's patience [1]. Calibration done right costs about three hours of a tech's time. Calibration skipped costs a slab.
Then there's tooling. Diamond bits for stone run $40 to $300 each depending on profile and diameter [2]. A machine that's out of tram, spinning a wobbling spindle, or driving the Z-axis 0.01 inch too deep will eat a profile bit in one shift instead of 200 linear feet of edge. Calibration is tool-life insurance as much as quality insurance.
Modern controllers store offset tables, work coordinate systems, and tool databases that drift. Fanuc, Siemens 840D, Syntec, and the proprietary controllers on Intermac and Park Industries machines all keep values that wander over time from vibration, thermal expansion, and plain wear. Calibration brings those stored numbers back into agreement with physical reality.
What tools do you need before starting calibration?
You can't calibrate by feel. These instruments are the minimum for a real stone CNC setup, and none of them are optional.
Dial test indicator (DTI) or digital indicator, 0.0001-inch resolution. Your main instrument for spindle runout, axis straightness, and tramming the spindle perpendicular to the table. A Mitutoyo 513-series or equivalent costs $80 to $150 and pays for itself on the first slab it saves [3].
Granite surface plate or precision-ground reference bar. A small 12x18-inch Grade B plate ($80 to $200) gives you a known flat reference for table flatness and squareness. Your spoilboard is not flat enough to self-reference, ever.
Precision machinist's square, 6 to 12 inch. For checking X-to-Y squareness by the tramming method.
Test bar or ground rod. A 6-inch ground tool-steel rod chucked in the spindle lets you sweep the indicator around the spindle nose to read runout and tram without a special collet adapter.
Feeler gauges. For table-surface gaps and collet seating.
Laser or ballbar system (optional but worth it). A ballbar like Renishaw's measures circular interpolation error and backlash in one test [4]. Overkill for a small shop. Standard in high-volume operations cutting 20-plus slabs a day.
You also need the machine's own maintenance manual (pull the PDF from the manufacturer's support portal if the paper copy is gone), a spindle bore clean of coolant deposits, and at least one sacrificial piece of material, ideally the same thickness as your most common stock.
How do you check and correct spindle runout?
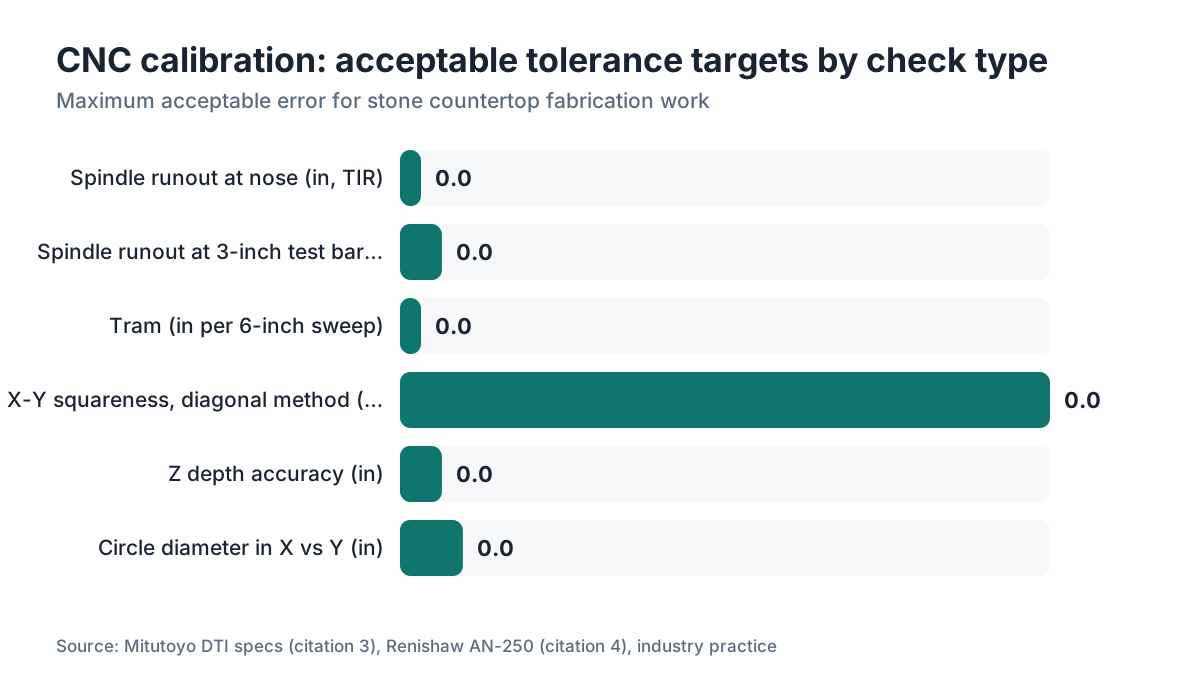
Spindle runout is the wobble of the spindle centerline as it turns. Every bit of that wobble travels straight to the tool tip, and at a 3-inch profile bit it gets amplified. The target for stone CNC work is 0.001 inch (1 thou) or less at the spindle nose. Anything above 0.003 inch and you're already trading away tool life and edge quality [3].
To measure runout:
- Power the spindle off and lock it out per your machine's lockout-tagout procedure. OSHA 29 CFR 1910.147 requires an energy-control procedure before any maintenance contact with a spindle [5].
- Insert a clean ground test bar into the collet or tool holder. Wipe the bore first with a lint-free cloth. One grain of grit ruins the measurement.
- Mount the dial indicator on the spindle head casting, not on the gantry or a table fixture. Mount it wrong and you're measuring two errors stacked together. Position the probe tip against the test bar about 0.5 inch from the collet face.
- Rotate the spindle by hand through 360 degrees. The total indicator reading (TIR) is your runout. Note the high and low spots.
- Move the probe 2 to 3 inches down the bar and repeat. Rising TIR at the lower point means the bar is tapered or bent. Steady TIR means the spindle is the source.
If runout beats your target, work through this order:
- Try a different tool holder or collet. Worn ER collets cause more runout in stone shops than anything else, and a new ER32 collet costs $15 to $30 [2].
- Clean the collet bore and the spindle taper. Coolant slurry builds up fast in a stone shop.
- If runout stays high across multiple clean collets, suspect the spindle bearings. On a high-frequency spindle (the 18,000 to 24,000 RPM units common on stone machines), bearing replacement runs $800 to $2,500 in parts plus labor depending on spindle size [2]. That job goes to the spindle maker or a certified rebuild shop. Not your in-house crew.
How do you tram the spindle perpendicular to the table?
Tramming confirms the spindle axis is exactly perpendicular to the table in both X and Y. An out-of-tram spindle leaves a slight scallop or convex bump on any flat-bottom pocket. On a sink cutout, that bump keeps the sink rim from seating flush.
The standard method uses a tramming bar: a rod with an indicator at each end set at equal radius from center, or a single indicator swept in a circle by hand.
- Chuck the tramming bar, or your ground test bar with the indicator on a mag-base clamped to the spindle housing.
- Position the spindle over a known-flat reference, either your granite surface plate on the table or a freshly surfaced spoilboard.
- Sweep the indicator through 180 degrees, front to back. The difference between front and back reading is your Y-axis tilt. Write it down.
- Rotate 90 degrees and sweep left to right. That's your X-axis tilt.
- Target: under 0.001 inch per 6-inch sweep for precision stone work. Under 0.002 inch is fine for most edge-profiling jobs.
Correcting tram depends on the machine. Most gantry-style stone CNCs have adjustment bolts on the spindle head casting or the Z-axis carriage plate. Adjusting one axis usually disturbs the other, so work iteratively: fix the larger error first, recheck, then fix the smaller one. Machines with no physical tram adjustment (some budget imports) force you to shim the table support legs instead. That's a last resort and it drifts.
Re-check tram after any spindle crash. Even a minor plunge into the table at full RPM can shift the head alignment past your tolerance.
How do you square the X, Y, and Z axes to each other?
Squareness is a different problem from tram. Tram checks the spindle angle against the table surface. Squareness checks whether the motion axes are actually perpendicular to each other. When they aren't, a rectangular sink cutout comes out as a parallelogram.
The standard shop test is the diagonal method:
- Mill a large rectangle (say 24x48 inches) in scrap MDF or foam.
- Measure both diagonals with a steel tape, corner to corner.
- Diagonals equal to within 1/32 inch means your X-Y squareness is fine for most countertop work. For precision miters, get inside 1/64 inch.
Shops with a ballbar get a cleaner answer. Renishaw's QC20-W traces a circular path and reports squareness error in arc seconds [4]. Their application note AN-250 covers the setup. One arc-second of squareness error over 36 inches of travel produces about 0.0003 inch of positional error per inch, and that compounds across a long cut.
Z-axis perpendicularity (the depth axis) matters most for through-cuts. A Z tilted slightly in X leaves an angled kerf, and polished edges won't mate. Check it by running the spindle down against a precision square held on the table, sweeping an indicator along the square's face as Z descends.
Squaring ball-screw machines usually means adjusting the linear guide rail mounts. Most shops hand that to the manufacturer's service tech on first setup, then re-verify it themselves annually or after any real crash.
How do you set tool-length offsets accurately for stone tooling?
Every tool in the magazine is a different length. The controller has to know each length exactly, so that when you program a 0.75-inch depth of cut you get 0.75 inches no matter which bit is loaded. That stored value is the tool-length offset (TLO).
In stone work, TLO errors show up three ways:
- Tabs left on a cutout that should be through-cut
- Over-depth plunges that groove the spoilboard and damage the bit tip
- Edge profiles running 0.5 to 1 mm shallow or deep, so the profile no longer matches the sample the customer signed off on
Two main methods for setting them:
Tool touch-off plate (electronic). The machine lowers each tool onto a precision plate of known height (usually 1.000 or 2.000 inches). The controller records the Z position at contact and calculates the offset. Most stone controllers support this natively. It runs 30 to 60 seconds per tool and repeats to plus or minus 0.001 inch if the plate is clean and the spindle is at operating temperature [6].
Manual gauge measurement. Measure each tool's length from collet face to tip on a bench gauge, then enter the values by hand. Slower, and open to typos, but it works when the touch-off system dies mid-week.
One stone-specific catch: measure TLOs after a diamond tool has been dressed or trued on the wheel, if you run a dressing station. A freshly dressed bit is shorter than the original. If your table still holds the pre-dress length, your first plunge runs 0.01 to 0.05 inch shallow.
Keep a log. Date-stamp the new TLO every time you replace or dress a tool. After six months of records you'll see exactly how fast each tool type wears, which tells you when to swap bits before they fail mid-slab instead of after.
How do you set up and verify the water table or vacuum fixture?
Stone machines use water for cooling and dust control. The water table, or the overhead flood-coolant system, belongs in calibration because pressure and flow drive tool temperature, and tool temperature drives dimensional accuracy through thermal expansion.
A high-frequency spindle at 18,000 RPM can grow its shaft 0.001 to 0.003 inch as it heats from a cold start to steady state [7]. That's real money when your TLOs were set cold. Run the spindle at operating speed for 10 to 15 minutes before setting TLOs or cutting precision calibration parts. Same logic as warming a car in January.
For water-table machines:
- Confirm the table drains freely. Pooled water under a slab makes an unstable, rocking workpiece. Even 0.5 mm of inconsistent support under a 2 cm slab shows up as Z-depth variation across the cut.
- Check coolant concentration. Most shops run clean water or water with a light surfactant. No cutting oil, which contaminates the stone surface and fouls the adhesives used for sink mounting and seaming.
- Check nozzle aim on any overhead flood. Coolant hitting the wrong angle pushes slurry back into the cut, raising tool load and heat.
For vacuum-fixture machines (common on 5-axis and CNC-positioned bridge saws):
- Test vacuum holding force before every production run, not only at calibration. OSHA and several state agencies flag inadequate workholding as a leading cause of CNC struck-by injuries [5].
- Inspect the seal gaskets on each vacuum zone. One cracked gasket can drag the whole table below safe holding.
- The practical shop rule is a minimum holding force of 3x the cutting force. The exact number depends on slab weight and lateral toolpath forces, but no fabricator should run stone on a vacuum table reading below 20 inHg during the cut.
If you mix wet cutting and vacuum fixturing (some shops fixture rough-cut pieces on vacuum for finish work), isolate the vacuum circuit from water. Wet vacuum lines kill pumps fast.
How do you run a calibration test cut and what should you measure?
Every measurement above is preamble. The test cut is where you find out if all those numbers actually agree with each other.
Use sacrificial material as close to your production stone as you can get on thickness. A 3/4-inch piece of MDF won't behave like 3/4-inch limestone. Keep a stack of cheap ceramic tile or a thin granite remnant on hand for this.
Run the sequence:
-
Square pocket test. Program a 6x6-inch pocket, 5mm deep. Measure with calipers. Is it actually 6.000 x 6.000? (X-Y accuracy.) Is the bottom flat within 0.002 inch? (Z consistency and tram.) Are the corners square? (Axis squareness.)
-
Circle test. Program a 4-inch diameter cutout. Measure the actual diameter in X and Y. If X reads 4.002 and Y reads 3.997, you have a scale-factor error in one axis, usually a ball-screw pitch setting that's slightly off. Fix it in the controller's axis-scaling parameters.
-
Depth test. Program three blind pockets at 5mm, 10mm, and 15mm. Measure with a depth micrometer. A consistent error (all three 0.3mm shallow) points to a TLO issue. A growing error (5mm fine, 15mm off by 0.8mm) points to Z-axis pitch error or backlash.
-
Edge profile test. Run your most common profile bit along a straight edge of the test material. Check the shape against your sample template. Inconsistency (deeper on one end than the other) means the material isn't level, vacuum is uneven, or the Z-axis has a straightness error.
Write down every measurement. A calibration run with no records is just a test cut. A calibration run with records is a baseline you can compare against next month to see where the machine is drifting.
Shops running jobs across multiple machines can tie job specs and nesting layouts to machine parameters with a tool like SlabWise, which makes it easier to catch when a machine's real output starts drifting from the programmed dimensions.
How often should you recalibrate a stone CNC?
The honest answer is more often than most shops do it.
Run a full calibration (all axes, tramming, TLOs, test cuts, documentation) at these moments:
- Initial machine installation
- After any spindle crash or hard stop
- After moving the machine, even across the same shop floor
- After replacing the spindle or any linear guide components
- Every 6 to 12 months as scheduled maintenance
Run partial checks (spindle runout, TLOs, quick circle test) every 40 to 60 machine hours, roughly weekly in a busy shop. Many machine makers publish calibration intervals in their maintenance schedules. Park Industries, for one, recommends monthly checks on critical parameters for its TITAN and APEX series machines [8].
Temperature matters more than most shops admit. A CNC in a shop that swings from 45 degrees F in the morning to 85 degrees F by afternoon is a different machine at 8 a.m. than at 3 p.m. Ball screws expand about 0.0000063 inch per inch per degree Fahrenheit [7]. On a 10-foot X-axis, a 40-degree swing produces about 0.030 inch of thermal expansion. That's a lot for precision stone. If you can't climate-control the shop, at least run the machine 20 to 30 minutes before production and set TLOs only after it reaches operating temperature.
What are the most common calibration mistakes in stone shops?
These errors turn up again and again in the technical literature from machine builders and in the CNC maintenance community.
Calibrating cold. Set TLOs or check runout right after startup and every number you record describes a thermal state the machine leaves within 15 minutes of production. Warm up first.
Skipping the tool-length log. A bit breaks mid-job, gets swapped in a hurry, and the TLO entry gets skipped or guessed. One wrong TLO entry can cost a slab.
Trusting the controller display over a physical measurement. The controller says X is at 0.000. The indicator on the table says 0.003. Believe the indicator. Controllers accumulate small errors between homing cycles.
Ignoring Z-axis backlash. Backlash in Z is especially destructive in stone, because stone toolpaths reverse Z constantly (profiling, routing sink cutouts). With 0.005 inch of uncompensated backlash, depth cuts go inconsistent in exactly the spots where Z reverses direction.
Not checking after a collet change. A new collet, same maker and same nominal size, can shift runout. Five minutes with the indicator after any collet swap saves a lot of grief.
Eyeballing the cut. A finished granite edge looks great even when it's 0.5mm out of spec. By the time the error is visible to a customer, you've already cut 20 similar slabs the same way. Measure. Don't eyeball.
Shops cutting granite countertops hit an extra wrinkle: hardness varies within a single slab (real, not a myth), and that loads the spindle unevenly and shifts apparent Z depth across a long toolpath. Re-verify Z offsets whenever you switch to a noticeably different stone type.
How do different stone types affect your calibration approach?
Calibration targets don't change with the material. Which errors hurt most does.
Granite (Mohs 6 to 7). Hard and abrasive. Tool-length offsets drift faster because diamond tooling wears quickly. Check TLOs at least every 20 to 30 linear feet of edge profiling on hard granites. Granite's brittleness also means a spindle 0.002 inch out of tram chips polished edges that softer stones would shrug off.
Quartz engineered stone (Cambria, Silestone, and the like). Extremely consistent in hardness and thickness, which makes calibration errors more obvious, not less. A slab uniformly 0.750 inch thick exposes any Z-axis inconsistency perfectly. The upside: consistent stock lets you trust your Z offsets longer than with natural stone, which varies plus or minus 2mm or more within a single slab [1].
Marble (Mohs 3 to 4). Softer, more forgiving of minor runout on edge chipping, but far more prone to heat damage. Water coolant calibration matters more here than on granite. Weak cooling on marble opens micro-fractures along the cut edge that may not show right away but weaken the piece over time.
Quartzite. Often mislabeled and sold as marble, but as hard as granite in reality. Treat it exactly like granite for calibration. If you're also cleaning quartzite pieces, see how to clean quartzite countertops for the care side.
Soapstone (Mohs 1 to 2). Very soft, and the tooling rarely sets your precision requirements. The real challenge is holding it flat. Soapstone slabs often carry natural waviness a vacuum table won't fully pull down, so your Z depth follows the slab's own topology. A probing cycle that maps the slab surface before cutting is worth the 3 to 5 minutes it takes.
For the full picture on stone countertop materials and how they behave, see our overview of kitchen countertops and the deeper coverage of marble countertops.
What safety checks belong in every calibration session?
Calibration is maintenance, and maintenance is when most CNC injuries happen. A few items are non-negotiable.
Lockout/tagout before any physical contact with the spindle, tool holders, or moving axes. OSHA 29 CFR 1910.147 defines the energy-control procedure [5]. Spindles on stone machines spin up to 24,000 RPM, and a collet that releases a test bar at speed is a projectile. There is no acceptable shortcut here.
Wear PPE during coolant system checks. Stone slurry carries silica particles. A wet-slurry splash to the eyes is a medical emergency, and chronic silica exposure causes silicosis, a progressive and fatal lung disease. California's Division of Occupational Safety and Health (Cal/OSHA) sets permissible exposure limits for stone fabrication under California Code of Regulations, Title 8, Section 5155 [9]. OSHA's National Emphasis Program on silica specifically targets stone countertop fabrication shops [10].
Don't run calibration test cuts with guards removed. It's tempting to leave the enclosure open to watch. Don't. A diamond bit that catches a hard inclusion in a tile test piece slings fragments at real velocity.
After you re-enable the machine from lockout, jog every axis slowly through its full travel before running any program. Listen for grinding, clicking, or irregular motion, the kind of noise that means the calibration work itself introduced a mechanical problem.
Shops with separate countertop installation crews should keep calibration records accessible, so installers know if the machine was recently recalibrated and what tolerances to expect on the pieces they handle.
What does a complete calibration checklist look like?
Here's a working checklist for the full procedure. Adapt it to your machine model.
Pre-calibration (before touching anything)
- Review the machine log for recent crashes, fault codes, or unusual wear
- Run the machine at operating temperature for 15 to 20 minutes
- Clean the spindle bore, all collets, and tool holders
- Confirm all coolant lines are clear and flowing
Spindle check
- Measure runout at the spindle nose with a dial indicator (target: 0.001 in TIR or less)
- Measure runout at the test bar tip, 3 inches below the collet
- Check collet condition; replace if worn or pitted
Axis checks
- Tram the spindle in X (target: 0.001 in per 6-inch sweep or less)
- Tram the spindle in Y (same target)
- Run the diagonal test on scrap; check squareness
- Check Z-axis perpendicularity against a precision square
Tool-length offsets
- Set TLOs for all production tools via touch-off plate or bench gauge
- Log each TLO value with date and tool serial/ID number
- Confirm the spindle is at operating temperature during this step
Fixturing and coolant
- Test vacuum holding at all zones; confirm 20 inHg or more during a simulated cutting load
- Check water/coolant flow rate and nozzle direction
- Inspect vacuum seals and water-table drainage
Test cuts
- Run a 6x6-inch square pocket; measure X, Y, and depth
- Run a 4-inch circle; measure diameter in both axes
- Run the three-depth pocket test; verify Z accuracy at 5mm, 10mm, 15mm
- Run an edge profile; compare to the sample template
Documentation
- Record all measurements with pass/fail against tolerance
- Note any corrections made and their magnitude
- Sign and date the record; file it in the machine log
A shop using SlabWise for job management can tie calibration records to specific jobs, so if a dimensional problem surfaces after delivery you can pull the exact calibration state at the time that piece was cut. That traceability earns its keep when a customer dispute lands.
Shops also working with engineered products like Cambria countertops should note that Cambria's warranty documentation specifies fabrication tolerances. Calibration records proving your machine was within spec at time of fabrication can matter if a warranty claim comes up.
Frequently asked questions
How long does a full CNC calibration take for a stone shop?
A thorough calibration covering spindle runout, tramming, axis squareness, tool-length offsets, fixturing checks, and test cuts runs 2 to 4 hours. A partial check (TLOs and a quick circle test only) takes 30 to 45 minutes. Don't rush the full one. A calibration crammed into 20 minutes of shortcuts is worse than none, because it hands you false confidence.
What spindle runout is acceptable for cutting granite?
The practical target for granite and other hard stone is 0.001 inch (1 thou) total indicator reading at the spindle nose. Up to 0.002 inch works for rough-cutting, but polished edge profiles and precision sink cutouts need the tighter spec. Above 0.003 inch, expect faster tool wear and visible quality problems on polished edges.
Do I need to recalibrate after moving the CNC machine?
Yes, always. Moving a machine even 10 feet across the same floor is enough to disturb axis squareness, tramming, and sometimes homing-switch repeatability. Level the machine on its new footprint first, then run a full calibration before cutting any production stone. Skipping this is one of the most common causes of mystery quality problems after a shop rearrangement.
How does room temperature affect CNC calibration accuracy?
A lot. Ball screws expand about 0.0000063 inch per inch per degree Fahrenheit. On a 10-foot axis, a 40-degree swing produces roughly 0.030 inch of thermal expansion. Set tool-length offsets and run test cuts only after the machine has held steady operating temperature for 15 to 20 minutes. Shops with large daily swings should recheck TLOs each shift.
Can I calibrate a stone CNC myself or do I need a technician?
Most checks (spindle runout, tramming, TLOs, test cuts) a trained shop employee can do with proper measuring instruments. Squareness corrections that require adjusting linear guide rails or ball-screw mounts are usually better left to the manufacturer's service tech, at least the first time, to avoid introducing new errors. Document whatever the tech does so you can repeat the verification yourself later.
What causes tool-length offsets to drift between calibrations?
Three main causes: tool wear (the tip shortens as diamond wears away), thermal expansion of the spindle shaft (it grows longer as it heats), and collet wear (a worn collet seats the tool at a slightly different depth each time). Setting TLOs after warmup, logging every tool change, and replacing collets on a schedule keeps the drift manageable.
What is backlash and how does it affect stone countertop cuts?
Backlash is the small gap in a ball-screw or rack-and-pinion mechanism that creates a dead zone when an axis reverses direction. In stone cutting, where Z reverses often during profiling and routing, uncompensated backlash produces inconsistent depth cuts. Most controllers have a backlash compensation parameter. Measure it with a dial indicator and enter the measured value. Don't guess.
How do I check if my CNC table is flat enough for stone work?
Place a Grade B surface plate on the table and sweep a dial indicator across it in a grid, checking every 6 to 12 inches. For most countertop work, the cutting surface should be flat within 0.005 inch across full travel. Spoilboards wear and develop low spots. Resurface the spoilboard on the machine itself with a light facing pass rather than shimming individual zones.
Why do my sink cutouts come out slightly out of square even though my program is correct?
Usually one of two things: X-to-Y squareness error (the motion axes aren't truly perpendicular), or a slab that shifted mid-cut because vacuum fixturing lost hold. Check squareness with the diagonal method on a large test rectangle. Also verify vacuum pressure at all zones while the machine is cutting, not only at rest. A partial vacuum loss during a long perimeter cut moves the slab just enough to skew the geometry.
Does the CNC calibration procedure differ for 5-axis stone machines versus 3-axis?
The 3-axis checks (runout, tramming, X-Y-Z squareness, TLOs) are identical. 5-axis machines add rotary axis calibration: the A and B (or C) axes need their pivot-point coordinates and angular accuracy verified, usually with a specialized probing cycle or a precision sphere artifact. The manufacturer's service manual covers the 5-axis-specific steps. Same principles, more involved execution.
How do silica dust regulations affect CNC maintenance and calibration in stone shops?
OSHA's silica standard (29 CFR 1926.1153 for construction, 29 CFR 1910.1053 for general industry) requires wet cutting or equivalent dust controls during stone fabrication. During calibration, when you may run dry test cuts or inspect with guards open, you're still in a silica environment. Wear an N95 or P100 respirator during any dry work and keep wet-cutting water systems running. Some states, California included, add requirements.
What records should I keep from each calibration session?
At minimum: date and machine ID, who performed the calibration, all measured values with pass/fail against tolerance, any corrections made and how much, tool-length offsets logged by tool ID, and test-cut results with measurements. If you face a customer dispute over a dimensional error, these records establish when the machine was last confirmed accurate and what the tolerances were at that time.
How do I know if my CNC needs calibration versus a different type of repair?
Calibration fixes dimensions consistently off by a fixed amount, edges that are correct but slightly out of tram, and depth inconsistency across the full table. Repair, not calibration, is the answer when you hear grinding or clicking during axis motion, when spindle runout stays above 0.005 inch after collet changes, when the machine faults on axis limits without a programming reason, or when it can't hold position after homing. Those point to mechanical wear or component failure.
Sources
- USGS, Mineral Resources Program: Stone (Dimension) 2022 Minerals Yearbook: Wholesale prices for mid-grade engineered stone and natural stone slabs, plus thickness variation in natural stone slabs of ±2mm within a single piece
- Braxton-Bragg (primary stone tools distributor): Diamond Tooling Technical Reference: Diamond profile bit prices of $40-$300 each depending on profile and diameter; ER collet prices of $15-$30; spindle bearing replacement parts of $800-$2,500
- Mitutoyo Corporation: Dial Test Indicators Product Specifications: Dial test indicator resolution of 0.0001 inch for precision measurement; industry target of 0.001 inch TIR for stone CNC spindle runout; tool-touch-off repeatability of ±0.001 inch
- Renishaw plc: QC20-W Ballbar System Technical Specification and Application Note AN-250: Ballbar system measures circular interpolation error and axis squareness; one arc-second of squareness error produces approximately 0.0003 inch of positional error per inch of travel
- OSHA: 29 CFR 1910.147 The Control of Hazardous Energy (Lockout/Tagout): Requires an energy-control procedure before any maintenance contact with a powered spindle or moving machine component; inadequate workholding is a leading cause of CNC struck-by injuries
- Fanuc Corporation: CNC Parameter and Tool Offset Manual (Series 0i-Model F): Tool touch-off plates set tool-length offsets in 30-60 seconds per tool; CNC controllers store offset tables that drift from vibration and thermal expansion
- NIST: Measurement Science for Manufacturing (Thermal Effects in Machine Tools): High-frequency spindle shaft thermal expansion of 0.001-0.003 inch from cold start to steady-state; steel thermal expansion coefficient of 0.0000063 inch per inch per degree Fahrenheit
- Park Industries: TITAN CNC Maintenance Manual and Recommended Service Intervals: Park Industries recommends monthly checks on critical calibration parameters for TITAN and APEX series stone CNC machines
- California DIR, Cal/OSHA: Title 8 CCR Section 5155 Airborne Contaminants: California Code of Regulations Title 8 Section 5155 sets permissible exposure limits for silica in stone fabrication operations including countertop shops
- OSHA: National Emphasis Program on Respirable Crystalline Silica (CPL 03-00-023): OSHA's National Emphasis Program on silica specifically targets stone countertop fabrication shops for inspection and enforcement
- OSHA: 29 CFR 1910.1053 Respirable Crystalline Silica (General Industry Standard): Requires wet cutting or equivalent dust controls during stone fabrication including countertop work; applies to general industry stone shops
- International Journal of Machine Tools and Manufacture: Thermal Error Modeling in CNC Machines (Vol. 75, 2013): Thermal expansion of machine tool components is a primary source of positional error in precision CNC machining, particularly along long axis travels
Last updated 2026-07-10