TL;DR
- Luan strip templating means cutting thin strips of 1/8-inch luan plywood, hot-gluing them into a rigid frame that traces the exact shape of a countertop, then bringing that frame to the shop to trace onto stone.
- A careful template holds accuracy to 1/16 inch.
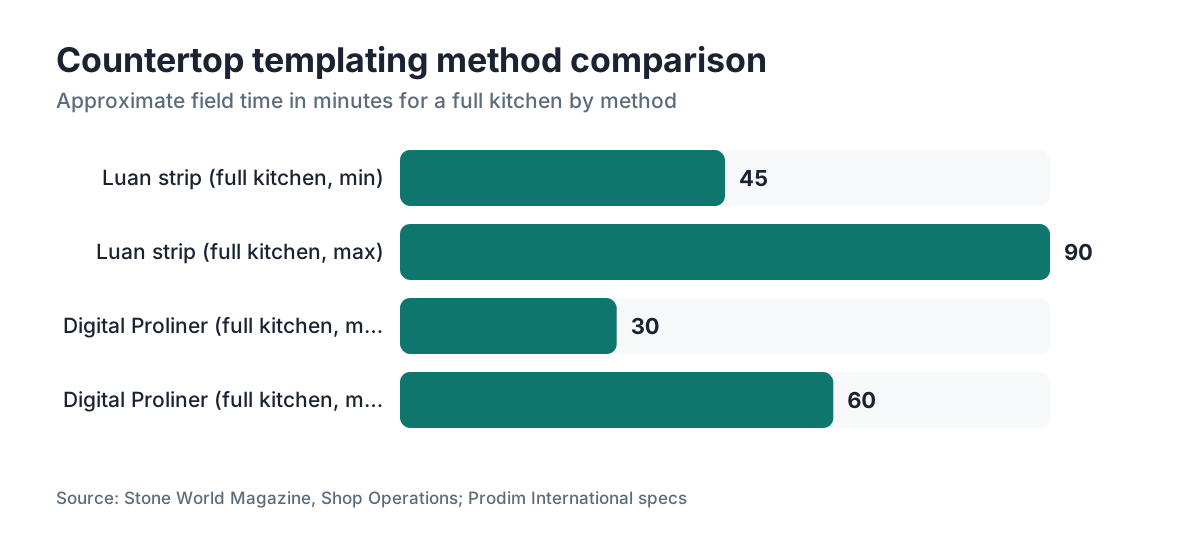
- Most experienced fabricators finish a full kitchen in 45 to 90 minutes.
What is luan strip templating and why do fabricators use it?
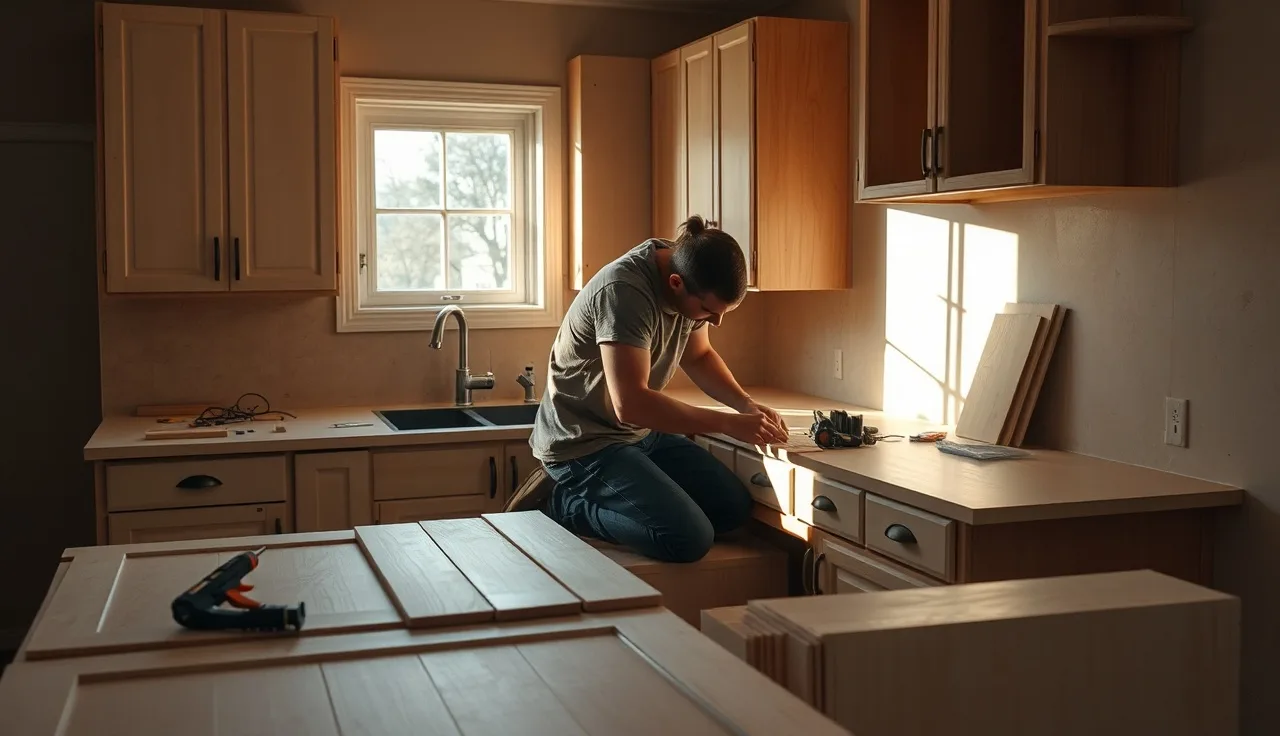
Luan strip templating is the physical way to capture the shape of a countertop area before any stone gets cut. You build a flat, rigid frame from thin strips of luan plywood, hot-glued together on the cabinet tops, that mirrors every wall angle, inside corner, sink cutout, and backsplash return in the room. Pull it off the cabinets, carry it back to the shop, and you have a full-scale map of exactly what to cut.
The alternative is digital templating with a device like the Proliner or a laser scanner. Digital is faster to pull in the field and better on complex curves. But the gear costs $15,000 to $40,000 depending on the system [1], and plenty of shops, especially smaller regional fabricators, find luan accurate enough for nearly any job done carefully. A well-made luan template holds dimensional accuracy to within 1/16 inch. That is tight enough for most stone work.
Homeowners rarely template their own jobs. Understanding the process still helps you ask the right questions when a fabricator shows up. Sloppy templater, sloppy countertops. It really is that direct.
Luan gets used because it is thin (1/8 inch is standard), cheap, and easy to cut with a utility knife or jigsaw. It does not soak up moisture fast enough to warp during a normal site visit, and its surface takes hot glue without the glue cooling too fast to bond. Quarter-inch luan comes out for frames that need extra stiffness on long runs over 8 feet.
What materials and tools do you need before you start?
Show up with the right kit and templating goes fast. Show up short a glue stick and you are running to the truck mid-corner. Here is what a working templater carries.
Luan sheet stock. Buy 4x8 sheets of 1/8-inch luan plywood, also sold as door-skin plywood. A single sheet costs roughly $12 to $18 at most lumber yards [2]. Two to three sheets covers a full kitchen. Some templaters pre-rip strips at the shop, others cut on site. Both work.
Strip dimensions. Rip strips 1.5 to 2 inches wide. Narrower than 1.5 inches and they flex too much. Wider than 2 inches and you burn material for no gain. Length matters less because you overlap and glue as you go.
Hot glue gun. A full-size, high-temperature gun, not the little craft kind. Small guns do not push enough volume or heat to bond fast. Carry at least two full sticks of glue per linear foot of countertop as a rough rule.
Marking tools. A fine-point black marker, a pencil, and a scratch awl. You mark sink locations, seam references, and the edge line right on the template.
Tape measure and a good square. A 25-foot tape is standard. A framing square checks your inside corners.
Utility knife or jigsaw. For trimming strips to length on site. A jigsaw with a fine blade cuts cleaner where you have power.
Clamps. Optional, but small spring clamps hold strips flat while glue sets on long spans.
Sharpie or lumber crayon for labeling. Every section gets labeled before it leaves the site: which room, which run, which way the front edge faces. Sounds obvious. People skip it and pay for it later.
Camera or phone. Shoot the space from several angles, shoot the template in place, shoot every reference mark. Those photos bail you out when a question comes up at the saw.
How do you actually build a luan strip template, step by step?
Work in sequence and skip nothing. Out-of-order templating produces out-of-square templates.
Step 1: Confirm the cabinets are level and set. Luan templating captures the surface as it exists on install day. If the cabinets are not shimmed and leveled yet, you are capturing the wrong geometry. Check with a level before you touch any luan.
Step 2: Mark the front edge of every cabinet run. Snap a line or run tape along the front edge of each run. This is your reference for overhang, typically 1.5 inches on a standard kitchen per NKBA planning guidelines [6], but verify against the drawings or the homeowner. Write your overhang number on the frame as you build, not after.
Step 3: Lay your first perimeter strip along the wall. Start at the back wall. Hold a strip tight against the wall, flat on the cabinet deck, and hot-glue it down. Let it conform to any bow or wave. This is the whole advantage over measuring: the strip physically records the wall's shape. On walls with more than 3/8-inch bow over a 10-foot run, scribe the strip instead of just butting it.
Step 4: Build out from the wall. Add parallel strips toward the front edge, bridging them with cross-pieces glued perpendicular. Think of a ladder: two rails, rungs every 12 to 18 inches. The glue joints are the structure. On short runs under 4 feet, a simple rectangular frame is plenty.
Step 5: Handle inside corners carefully. Inside corners between two runs are where most template errors hide. Cut your strips so they meet exactly in the corner. Check the angle with a square, and if it is not 90, write the actual angle on the template. Lots of kitchens run 88 or 91 degrees because the walls are not square. Never assume 90.
Step 6: Mark sink and cooktop cutout locations. Drop a plumb line or use a combination square to transfer the exact center of the sink opening onto the template. Mark the front-to-back distance from the front edge, and mark both sides of the opening. Many fabricators glue a small luan locator block at each cutout corner for clarity. For cooktops, follow the manufacturer's cutout dimensions from the installation guide.
Step 7: Mark the front edge line. Run a strip along the full front to define the countertop face. That strip becomes the cut line at the saw. Double-check the overhang at several points before gluing.
Step 8: Add seam locators if needed. When slab dimensions force a seam, mark the proposed spot with a bright line and a note: 'SEAM HERE.' Templater and shop manager agree on seam placement before the template leaves the job.
Step 9: Label everything. Homeowner's name, date, room, and an arrow pointing toward the window or the range. Something that orients the template in space. Every piece should describe itself.
Step 10: Pull the template carefully. Lift from several points at once. Hot-glued luan is surprisingly strong, but it cracks if you peel one end up while the other is still stuck. Slide a putty knife under the strips to release them from the cabinet if you need to.
How do you handle curved or irregular countertop edges?
Straight runs are easy. Curves and crooked walls are where luan templating earns its accuracy.
For a curved island or peninsula, you have two moves. First is the thin-strip flex method: rip your luan down to 3/4 inch or even 1/2 inch wide. Strips that narrow bend along a gentle curve without snapping. Glue them in overlapping layers, building a rigid laminated arc. This works well for a radius of 18 inches or larger.
Tighter radii call for a different approach. Cut a series of small triangular gussets and glue them on the inside of the curve to lock the shape. Think orange-peel: you approximate a curve with small flat segments. Finer segmentation, more accurate curve.
Irregular walls (bumps, pipes, appliances interrupting a clean line) get scribed. Hold the strip in final position, then drag a scribing compass or a small block along the wall while running a pencil across the strip. The pencil traces the wall's profile onto the luan. Cut to that line and the strip fits the wall exactly.
Glass tile and uneven tile backsplashes cause a lot of trouble. The tile face sits proud of the wall behind it, so decide whether your back line represents the tile face or the substrate. Most fabricators template to the tile face and note it, so the shop does not cut the slab to tuck behind the tile.
What are the most common templating mistakes and how do you avoid them?
Certain problems show up at the shop over and over. Here is what goes wrong and how to stop it.
Strips lifting off the cabinet deck. Apply glue too cold and the bond fails when the template moves. Use a hot-temp gun and let each joint set at least 20 seconds before you stress it. In cold weather, warm the strips slightly before gluing.
Missing the wall bow. A wall that looks straight can curve 1/4 inch or more over 8 feet. Butt your strip against the ends without pressing it flat along its length and you capture a straight line where the wall actually curves. The slab then gaps in the middle. Press the strip firmly the whole way before gluing cross-members.
Wrong overhang. The common number is 1.5 inches, but designs call for 1.25, 1.75, or 2. Confirm with the homeowner before you mark the front edge. Write the agreed overhang on the template.
Forgetting appliances. Slide-in ranges sit between cabinets, so the counter fits around the range cutout. Freestanding dishwashers change cabinet spacing. Measure and mark every appliance opening.
Unlabeled templates. Happens more than anyone admits. A template that reaches the shop with no name, no date, and no orientation is a support call waiting to happen. Label during build, not after.
Distortion in transport. Luan racks if it leans against a van wall at an angle for a long drive. Lay templates flat or support them at multiple points. A long template tied diagonally in a truck bed springs back when untied and shifts the geometry. High-volume shops sometimes build a wooden sled to hold templates rigid on the road.
How do you transfer a luan template to stone in the shop?
Getting the template onto the slab is the whole point. Do it wrong and every field error you missed gets cut into expensive stone.
Lay the slab on the cutting table finished face up. Set the luan template on top, face side down, so the lines you drew on top of the template (which represent the top of the counter) now touch the face of the stone. Confirm orientation before you trace. Your front edge mark lines up with the intended front edge of the slab.
Trace the perimeter with a fine-tip marker or a carbide scribe. Mark the sink cutout corners, seam locations, and any interior cutouts clearly. Pull the template off and verify the traced lines make sense: corners square up, front edge runs parallel where it should.
Most shops double-check by measuring the traced outline against the field dimensions. A discrepancy over 1/8 inch on any critical dimension is worth chasing down before the saw runs.
For sink cutouts, transfer the center point and use the manufacturer's template for the actual hole size. The luan gives you location, not the exact opening.
Some fabricators run software like SlabWise to cross-check luan measurements against the quote dimensions before cutting. If the quoted slab yield does not match the template outline, something is off somewhere. Catch it before the saw runs and you save a slab.
Once the layout is confirmed, the slab goes to the bridge saw or CNC. Keep the luan template until install is done, in case the field needs an adjustment. OSHA woodworking standards under 29 CFR 1910.213 also require guarding and safe operation on the saws and jigsaws you use to rip strips, which matters most on the shop end where the tools run all day [8].
How accurate is luan strip templating compared to digital templating?
Shops argue about this, and the honest answer is: it depends on the templater.
A careful, experienced luan templater holds accuracy to 1/16 inch on most jobs. Digital systems like the Proliner report accuracy within 1 mm, about 3/64 inch, under good conditions [3]. So digital is tighter on paper. In the field, user error, dirty laser targets, and reflective surfaces drag digital accuracy down, while a skilled luan templater who presses strips flat and checks corners can match or come close on straightforward layouts.
Digital pulls clearly ahead on complex geometry: curved islands, radius edges, kitchens with six or more angles. Capturing a true curve in luan takes the flex-strip technique, and there is some approximation baked in. A Proliner captures the curve mathematically and sends it straight to the CNC, which is faster and cleaner for that case.
Luan wins on cost and simplicity. Materials for a full kitchen template run $20 to $40. Digital gear carries a five-figure price plus calibration and training. A shop running 10 to 20 jobs a week recovers that fast. A shop running 3 to 5 jobs a week has a very hard time justifying it.
Field time is close for experienced operators. A seasoned luan templater takes 45 to 90 minutes on a full kitchen [9]. A skilled Proliner operator takes 30 to 60 minutes. That gap is small against the total job cost.
One place luan is genuinely worse: documentation. A digital template makes a permanent file you can retrieve, edit, and re-cut. A luan template is a physical object that gets damaged, lost, or misread. Shops burned by that tend to photograph and measure their luan templates before trusting them for a re-cut.
What thickness and grade of luan should you use?
Use 1/8-inch luan, also sold as 2.5mm luan plywood or door-skin plywood. That is the standard across most shops. At this thickness strips flex enough to follow mild wall bows and corner transitions without cracking, and stay rigid enough to hold shape once glued into a frame. Thin luan (2.5mm) is a standard engineered-wood product category, produced mainly from lauan species for door and panel work [10].
Quarter-inch (6mm) luan comes out for the front-edge strip or for long unsupported spans over 8 feet, where the extra stiffness stops sagging when you lift the template. Run quarter-inch everywhere and you add weight and make flex templating for curves harder.
On grade, you want a smooth face with no voids in the core. Voids make strips snap unpredictably when you flex them around a curve. Most home improvement stores stock a utility-grade luan that works fine. Skip OSB and MDF: OSB is too rough for clean marking, and MDF is heavy and soaks up moisture on a damp job site.
Some fabricators have moved to corrugated plastic (Coroplast) or thin polystyrene sheets. Both are moisture-proof and very light. The catch is they are harder to bond with standard hot glue and cost more per sheet. For most shops luan is still the standard because it is cheap, everywhere, and proven over decades.
How do you handle undermount sink and cooktop cutout templating?
Undermount sinks need the most precision of any cutout in a kitchen, because the reveal between the sink rim and the stone edge shows from below and any wobble is obvious.
Do not template the actual sink opening in luan and transfer it as-is. The hole you need in the stone is not the hole in the sink flange. Fabricators define the cutout by the sink's outside dimension minus the reveal they want to show. Reveal specs vary: 3/16 inch is common for undermount [5], but some designers want a zero-reveal (flush) look and others an exaggerated 1/4 inch. Confirm the reveal before cutting.
What you do template in luan is the sink's front-to-back and left-to-right center location. Drop the sink into the cabinet opening (no countertop yet), find its center, and transfer that center point to the luan with a plumb bob or combination square. Mark two cross-lines: one parallel to the front edge, one perpendicular. Those lines, carried to the slab, place the cutout template exactly.
Cooktops always ship with a paper cutout template. Tape it to the luan in the correct position and trace it. The luan then carries both the counter shape and the accurate cooktop geometry into the shop as one unit.
Faucet holes usually are not cut during initial cutting. They get drilled later with a diamond core bit, in the shop or on site. Mark their location on the template anyway.
What is the right process for a bathroom vanity versus a kitchen?
Bathroom vanity templating follows the same basic process with a few differences worth knowing.
Vanity tops are smaller and faster. A typical 60-inch double-vanity template takes 20 to 30 minutes. The front overhang on a vanity is usually 1 inch, not 1.5 inches, because the cabinetry is shallower and the overhang scales down with it. Confirm against the homeowner or the cabinetmaker's spec sheet.
Bathroom walls carry tile more often, and backsplash height matters. If the tile is already set and the counter has to slide under a tile edge, note the maximum depth the stone can go. A slab 1/4 inch too thick at the back will not seat.
Toilet clearance and plumbing-wall clearance are real issues in small baths. Mark any supply lines or drain rough-ins on the template so the shop does not cut into a spot where drilling could hit a pipe.
Vessel-sink vanities with no cutout are simpler. You need the outline of the top, the back line against the wall, and the faucet hole location. Vessel faucet holes are almost always 1.375 inches in diameter (standard 35mm), placed a set distance from the back edge based on vessel height and spout reach.
For logistics once your template is done, see our guide to countertop installation.
How should you store and transport luan templates without damaging them?
A template that shows up warped or cracked is useless, and building from a bad template makes a slab that does not fit.
Carry templates flat whenever you can. Most fabricators run a van or truck with a flat roof rack or an interior shelf. Flat templates do not rack. Templates stood on edge or leaned at an angle twist as the vehicle moves.
For templates wider than 36 inches (uncommon on standard counters but real on islands), glue a diagonal cross-brace across the frame before you pull it off the job. That triangulates the frame and stops racking.
Keep templates dry. Luan absorbs moisture slowly, but a template left in a wet truck bed overnight can bow enough to throw off accuracy. The USDA Forest Products Laboratory Wood Handbook notes that thin plywood panels change dimension with moisture and recommends indoor storage for stability [7]. Store templates inside the vehicle, not the open bed.
Label each piece with its run name and a numbered sequence when a kitchen comes out as several pieces (common when sections cannot fit through doorways as one). Stack them in order. Bag any small locator blocks in a zip-lock taped to the main template.
At the shop, hang templates vertically on a wall rack for a day or two, or stack them flat on a shelf. A long template leaned against a wall for more than 48 hours can take a set in that angle. Sounds fussy. It happens with humid wood in a warm shop.
When does luan templating make sense versus just measuring?
Simple jobs raise the question: can you skip the physical template and just measure?
On very simple layouts, yes. A straight run with a drop-in sink and no odd wall angles can be fabricated from measurements alone. Some experienced fabricators do exactly that on repeat jobs in production housing, where cabinet layouts are standardized and walls are reliably square. They measure, note dimensions on a drawing, and cut from that.
Even on simple jobs, though, physical templating catches what measuring misses. The wall that reads 96 inches has a 3/8-inch bow in the middle. The corner that measures 90 degrees is actually 89.5. Those errors never show on a dimension sketch. They show on a physical template, and they show in the installed countertop if you ignore them.
The bigger question is what a mistake costs. For marble or quartzite, re-cutting a slab because the numbers were off runs $500 to $2,000 or more depending on slab price [4]. Forty-five minutes of templating is cheap insurance. For a laminate countertop or a Formica countertop, where material is cheap, measuring-only is more defensible.
My rule: for natural stone, engineered quartz, and porcelain, template every time. The material cost justifies it. For budget materials on straightforward layouts, use your judgment, but know what you are risking.
Frequently asked questions
Can a homeowner do their own luan template, or does it have to be a professional?
A careful homeowner can build a serviceable template for a simple, straight run. The technique is not complicated. The risk is in the details: confirming the right overhang, scribing irregular walls accurately, and marking sink locations precisely. Errors on an expensive slab cost real money. Most fabricators prefer to template themselves so they own the accuracy. Some charge a template fee of $75 to $200, worth paying on complex layouts.
What is the typical cost of a professional template visit?
Template fees range from $0 (folded into the job price) to $150 to $250 as a standalone charge, depending on shop and region. Some fabricators bake the cost into their per-square-foot price. Others itemize it, especially when the job site is far from the shop. A revisit to re-template after a remodel change typically runs $75 to $150.
How far in advance of countertop installation should templating happen?
Template only after cabinets are fully installed, leveled, and secured, and after any tile that sits behind the countertop is set. Template before cabinets are level and you capture the wrong geometry. Most fabricators template 1 to 2 weeks before the install date, which gives the shop time to fabricate without rushing. Rushing stone fabrication raises the chance of cutting errors.
What luan strip width works best for most templating jobs?
1.5 to 2 inch strips cut from 1/8-inch luan are the standard. That width holds shape once glued into a frame, flexes enough to follow minor wall irregularities, and turns inside corners without much waste. For curves, rip strips down to 3/4 inch so they flex smoothly. Use wider strips (2.5 to 3 inches) only for the front-edge reference strip where extra stiffness helps.
Do luan templates work for thick materials like 2cm versus 3cm stone?
Yes. The template captures the plan (top-down) shape of the countertop regardless of thickness. Thickness is a spec that travels separately, noted on the job sheet. The template itself does not encode thickness. What changes between 2cm and 3cm material is the edge profile and the weight of the slab, and neither affects how you build or read the luan template.
Can you reuse a luan template if the homeowner wants a second identical countertop later?
Technically yes, if the template was stored flat, kept dry, and the cabinet layout has not changed. In practice luan templates are fragile enough that reusing one months later is risky. Minor warping or handling damage shifts the geometry. Most fabricators photograph and dimension-verify templates before storage and treat a reuse as a new template job, using the old one only as a reference check.
How do you template around a window sill or a bay window countertop run?
A window sill interruption means the counter runs up to the wall on both sides of the window but stops short of it. Template each side as a separate run, noting the exact width of the window rough opening and the sill height. If the countertop wraps the sill (as in a bay window seat), build the template to capture that return angle precisely and note the depth of the return on the frame.
What happens if the luan template is slightly off, can it be corrected in the shop?
Small errors under 1/8 inch can sometimes be corrected at the saw if the cutter catches the discrepancy during layout. Errors larger than 1/8 inch on critical dimensions usually mean a return trip to re-template. It is always faster to re-template than to cut a slab wrong and source new material. Experienced cutters cross-check the template outline against the quoted dimensions before cutting.
Should the template include the backsplash shape, or just the countertop deck?
For a standard 4-inch stone backsplash or a full-height slab backsplash, fabricators usually template the backsplash as a separate piece. The deck template shows where the backsplash sits relative to the front edge. Outlet locations, switch plates, and any electrical boxes the backsplash has to work around should be marked on the backsplash piece, including box height above the counter surface.
How do you account for out-of-square rooms when templating?
Luan strip templating handles out-of-square rooms naturally, because the strips follow the actual wall geometry rather than assuming 90-degree corners. The template captures the true angle, and when you transfer it, the slab gets cut to that true angle too. Note any corners more than 2 degrees off square on the template face, so the cutter is not surprised when the layout looks unexpected.
Is there a difference in how you template granite versus quartz versus marble?
The process is identical regardless of material. The physical template does not know what stone it represents. What differs is the tolerance for error you accept before re-templating, because slab costs vary widely. A slab of granite might run $60 to $100 per square foot installed, while some marble countertops run $100 to $200 or more. Higher material cost makes careful templating more important, not less.
What is the difference between a luan template and a cardboard template?
Both are physical templates, but cardboard is softer, more prone to moisture damage, and harder to glue with hot glue without burning through. Some shops use cardboard for quick bathroom vanity layouts where precision is less demanding. For full kitchens and high-value materials, luan is the professional standard because it holds shape better and survives transport more reliably.
How do you find the centerline of a countertop run for centering tile or a focal point?
Measure the total length of the run as marked on the luan front edge strip, divide by two, and mark that center point on the template with a center-mark symbol. Transfer it to the slab during layout. You need this most when a range hood or window is supposed to sit centered on the counter. Mark the center in a second color so it is not confused with a seam line.
Sources
- Stone World, Digital Templating Equipment Overview: Digital templating devices like the Proliner cost approximately $15,000 to $40,000 depending on configuration and software package.
- The Home Depot, Luan Plywood Product Listings: 1/8-inch luan plywood (door skin) 4x8 sheets retail for approximately $12 to $18 per sheet at major home improvement stores.
- Angi, Countertop Installation Cost Guide: Natural stone and engineered quartz slab material costs range widely, with re-cutting errors on premium materials potentially adding $500 to $2,000 or more to job cost.
- Natural Stone Institute (formerly MIA+BSI), Dimension Stone Design Manual: Standard undermount sink reveal for stone countertops is commonly specified at 3/16 inch, though reveal can range from zero (flush) to 1/4 inch per designer specification.
- National Kitchen and Bath Association (NKBA), Kitchen and Bath Planning Guidelines: Standard countertop overhang on kitchen base cabinets is 1.5 inches per NKBA planning guidelines for residential kitchens.
- Forest Products Laboratory, USDA, Wood Handbook: Wood as an Engineering Material: Thin plywood panels (including luan door skins) absorb moisture and can experience dimensional change; indoor storage is recommended to maintain dimensional stability.
- Occupational Safety and Health Administration (OSHA), Woodworking Machinery standard 29 CFR 1910.213: OSHA woodworking standards require guarding and safe operation procedures for table saws and jigsaws used in shop operations, including strip-ripping luan.
- Stone World Magazine, Shop Operations and Templating Practices: Industry surveys of stone fabrication shops indicate field templating time for a full kitchen averages 45 to 90 minutes for experienced luan templaters.
- APA, The Engineered Wood Association, Plywood Design Specification: Thin luan plywood (2.5mm) is a standard product category in the engineered wood industry, produced primarily from lauan species and used widely in door and panel applications.
Last updated 2026-07-11