TL;DR
- Templating a backsplash with outlets means mapping every receptacle box onto your template material before any stone gets cut.
- You need three numbers per box: the centerline, the rough opening size, and the NEC clearance distance.
- Get any of them wrong and you either crack the slab on install or fail electrical inspection.
- This guide walks the full process.
What does it mean to 'template' a backsplash with outlets?
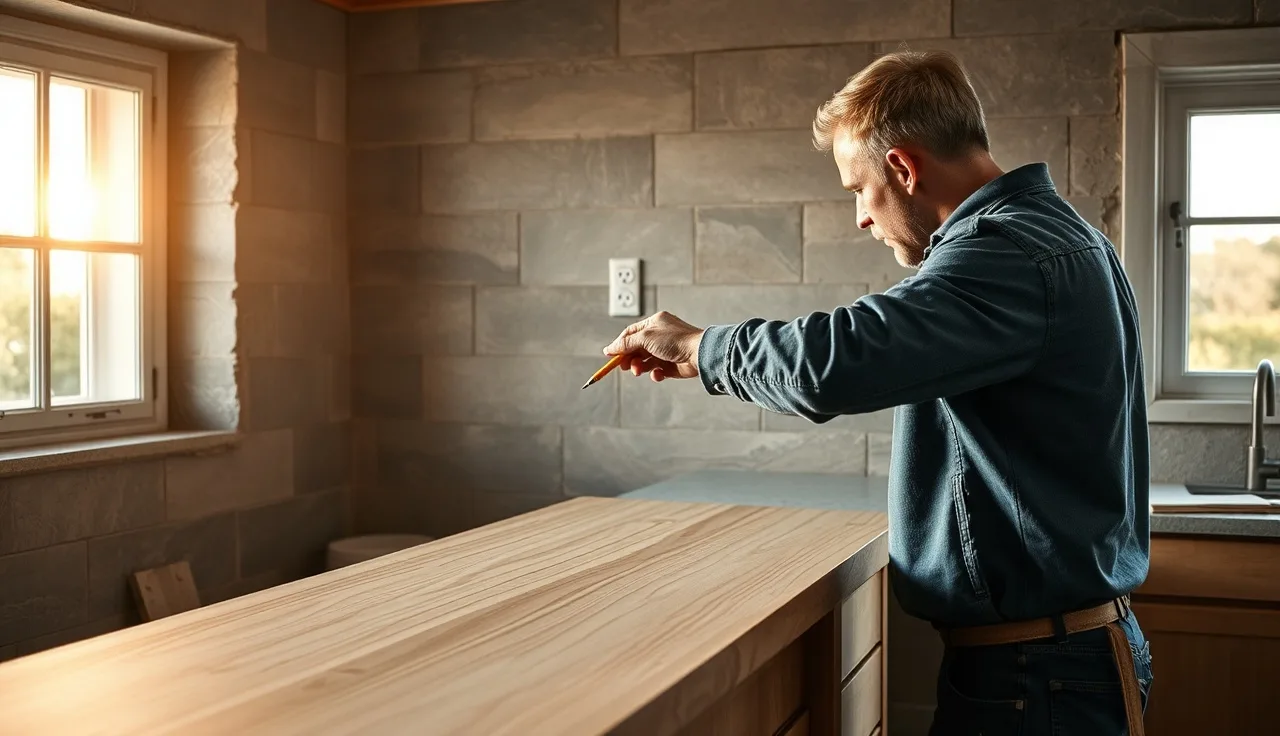
Templating is how a fabricator builds an exact replica of the wall your backsplash will cover, before a single piece of stone, porcelain, or solid surface gets cut. A plain rectangular backsplash is easy. Add outlets and the job gets harder fast.
The template has to capture three things at once: the overall dimensions, the exact location of every electrical box opening, and any variation in the wall itself. That means bows, high spots, and corners that aren't square. Miss one of those and you're either grinding on site or ordering a new piece.
Most shops template backsplashes with 1/4-inch luan plywood strips or with a digital laser system like a Proliner. Both work. Luan is cheaper but slower. Laser is faster on complex kitchens with a lot of outlets. The choice matters less than the accuracy, and every measurement should be verified twice before the template leaves the job site.
Here's what homeowners get wrong when they watch a fabricator work. The template visit is not the fast part. A templater who spends 90 minutes on a kitchen with six outlet cutouts is doing it right.
What tools do you need to template a backsplash with outlets?
For the luan-strip method you need 1/4-inch luan or Masonite strips (2 to 3 inches wide is fine), a hot-glue gun or construction adhesive, a fine marker, a tape measure, a 4-foot level, a small combination square, and a utility knife. Add a scribe block if the wall has any run-out.
For marking outlet locations, a self-centering outlet punch or a story stick helps, but a tape measure and a sharp pencil are enough if you work carefully. Record the center of the outlet box on the template, then transfer the box's rough-in dimensions outward from that center point.
Digital templating with a Proliner or similar device captures the wall geometry as a point cloud. You still mark the electrical box positions by hand in the software. The machine doesn't see the box unless you tell it where to look.
One tool a lot of fabricators skip and shouldn't: a digital level. Outlet boxes are supposed to be plumb. They often aren't. A box that's off by 3 degrees produces a cutout that reads as crooked on finished stone. Check it, and note it on your template.
What are the NEC electrical clearance rules that affect backsplash templating?
Two sections of the National Electrical Code drive backsplash cutout work, and the 2023 NEC (NFPA 70) is the edition most jurisdictions now enforce [1].
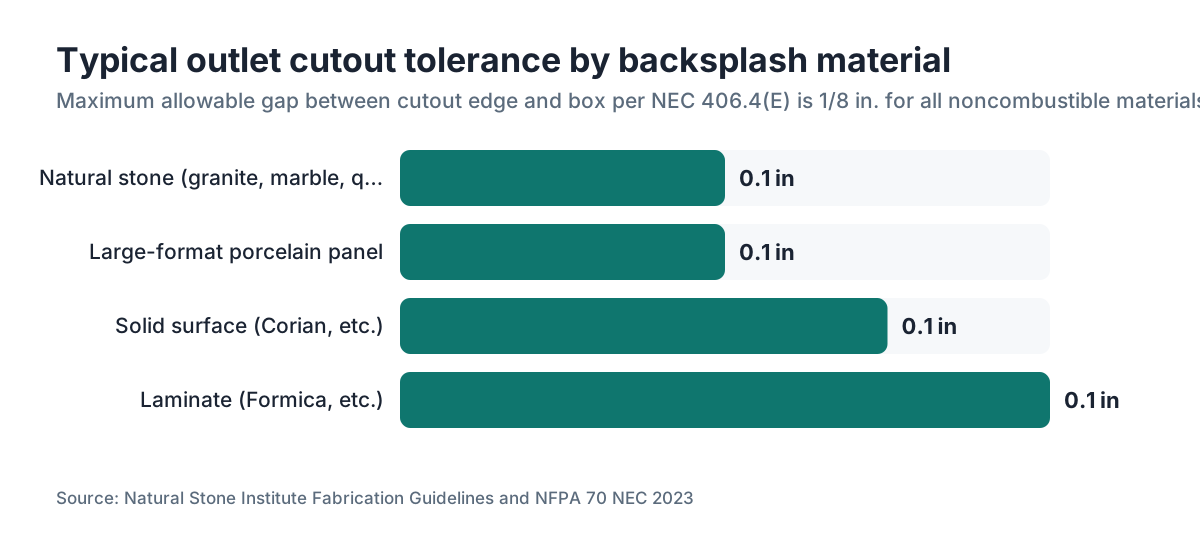
NEC 406.4(E) controls how tight your cutout has to be. When a box sits back in a noncombustible surface like stone or tile, the gap between the box edge and the finished surface can be no greater than 1/8 inch. The code states: "Where boxes are set back of the finished surface in noncombustible materials such as concrete, tile, gypsum, plaster, or similar materials, the gaps or open spaces at the edge of the box shall not be greater than 1/8 in." [1] That 1/8-inch maximum is not something an inspector negotiates.
NEC 210.52(C) governs receptacle placement in kitchens: no point along the countertop wall space can be more than 24 inches from a receptacle [2]. This rule doesn't change where you cut, but it explains why kitchens carry more outlets per linear foot than people expect. Budget your time for it.
A third rule catches people. NEC 314.20 requires box edges on combustible surfaces to sit flush with or project past the surface. Stone is noncombustible, so the 1/8-inch gap allowance applies instead, but the box still can't be deeply recessed. If it sits more than 1/8 inch behind the face of the stone, the electrician fixes it before you install [1].
Local jurisdictions amend the NEC. Confirm with the AHJ (Authority Having Jurisdiction) before install. NFPA publishes the code, but adoption happens state by state [3].
How do you measure outlet box locations accurately on the template?
Start from the countertop surface, not the floor. Backsplash outlets usually sit centered 18 inches above the finished countertop by builder convention, though no code fixes that height (only the 24-inch horizontal spacing rule applies) [2]. Measure from the actual countertop on site, never from a plan.
Here's the sequence that works:
- Press the luan strip against the wall and hold or tack it in place.
- Mark where each outlet box face meets the template. Pull the cover plate first if you can, because you're templating to the box rough-in, not the plate.
- Measure from a fixed reference (the template edge or a corner) to the left edge of the box, the right edge, the top, and the bottom. Write all four numbers on the template. Don't trust the center measurement alone.
- Double-check by measuring box-to-box spacing where there's more than one. That cross-check catches transposition errors.
- Note the box depth and how far it sits from the current wall face. That tells you whether the box lands flush after stone install or needs an extender.
Box extenders run about $1 to $3 each at electrical supply houses [4]. Cheap insurance. Buy them before the job if there's any doubt about depth. A box sitting 3/4 inch back from the drywall face will almost certainly need an extender once 3/4-inch stone goes on the wall.
How big should the outlet cutout be in the backsplash stone?
It depends on whether you're cutting for a standard duplex or a decora-style plate, and whether the cover plate laps over the stone or the stone butts against the plate edge.
For a standard residential box (the common single-gang opening is nominally 2 inches wide by 3 inches tall), most fabricators cut the stone opening at the box dimensions plus 1/16 to 1/8 inch per side. That gives clearance without breaking the NEC 1/8-inch gap limit [1].
Here's a quick reference for common box types:
| Box Type | Rough Opening (W x H) | Typical Stone Cutout |
|---|---|---|
| Single-gang standard | 2.0 x 3.0 in | 2.0-2.125 x 3.0-3.125 in |
| Single-gang decora | 2.75 x 4.5 in (plate) | Cut to box, plate covers gap |
| Double-gang | 3.75 x 3.0 in | 3.75-3.875 x 3.0-3.125 in |
| USB combo duplex | 2.0 x 3.0 in | Same as single-gang standard |
When the cover plate laps over the stone, you get more tolerance because the plate hides the edge. When the stone butts to the plate edge, tolerance drops to almost nothing and the cutout has to be precise.
Confirm the cover plate style with the homeowner before templating. Switching from a standard plate to a decora plate after the stone is cut can mean reordering the whole piece.
What's the safest method for cutting outlet openings in stone backsplash?
Most fabricators cut outlet openings on a CNC router or with a wet angle grinder and a diamond-tipped core bit. CNC is more accurate and repeatable, which matters when you have six or eight identical cutouts on one job. A skilled hand with a grinder can match CNC accuracy, but it takes real experience.
Thin backsplash material (usually 3/8-inch or 1/2-inch stone) wants to crack at the cutout corner. Stone doesn't behave like wood. Sharp interior corners concentrate stress. If the design calls for a true rectangular cutout, the corners should carry a small radius, 1/8 inch minimum, rather than a hard 90-degree corner. CNC does this automatically. Hand grinding doesn't unless you plan for it.
Laminate backsplashes (think Formica countertops or laminate countertops) forgive almost anything. A sharp jigsaw with a fine-tooth blade cuts outlet openings cleanly and the material won't crack. The edges still need to be square to fit the cover plate.
Solid surface like Corian countertops wants a router with a straight bit. It routs cleanly and the edges sand smooth without any trick technique.
Whatever tool you use, cut to your template, not to the wall. The template is your reference. The wall is never flat.
How do you account for walls that aren't flat behind the backsplash?
This is where a lot of backsplash installs go sideways, especially in older homes. Drywall bows. Plaster carries ridges. Tile backer has high spots at the seams. A backsplash cut perfectly to dimension but installed on a wavy wall will rock, gap, or crack under setting pressure.
Before templating, run a 4-foot level across the wall horizontally and vertically. Note the high spots. If the wall varies more than 3/16 inch over 4 feet, correct it before you template or skim-coat it after the fact.
On a luan template you can scribe the bottom edge to follow the countertop surface with a compass or scribe block. That captures the real profile of the counter's top edge, which matters when the counter isn't perfectly level. For granite countertops with edge profiles, that scribe line has to account for the profile detail, more than the flat top surface.
Digital systems handle wall variation by capturing many points across the surface, then producing a cutting file built on real geometry instead of assumed geometry. The catch: the CNC cuts to the file, so any wall variation left after install still gets managed with adhesive bed thickness or back-grinding.
The practical answer is to back-butter natural stone with a flexible tile adhesive or silicone rather than a rigid thinset. That flexibility eats minor wall imperfections without cracking the stone.
How does backsplash templating differ between stone, tile, and solid surface materials?
The process stays the same across every material: capture the wall geometry and the outlet locations accurately. What changes is how tight your tolerance has to be, and which mistakes you can walk back.
Natural stone (granite, marble, quartzite) has zero tolerance for a bad outlet cutout. You can't patch a bad cut. You can sometimes re-cut a piece slightly smaller if you catch the error before install, but that's not always possible on a large slab. Stone is also the most expensive to replace, so the templating time pays for itself the first time you avoid a reorder.
Porcelain tile backsplash works differently. Tiles get cut one at a time with a wet saw or angle grinder to fit around boxes, and the grout lines swallow small variations. That's not templating in the fabricated-piece sense, though digital templating does apply to large-format porcelain panels.
Solid surface like Corian countertops forgives you because field repairs are possible. A bad cut can sometimes be filled and re-routed. Still worth templating carefully, because repairs eat time and never vanish under raking light.
Laminate like Formica countertops forgives the most. Cover plates hide small errors and replacement is cheap. Even so, a cutout 1/4 inch off center looks wrong and is hard to hide.
The rule: spend more time templating for materials you can't repair. For marble countertops there's no such thing as over-measuring.
What are the most common templating mistakes that lead to a bad outlet cutout?
Measuring to the cover plate instead of the box. The plate comes off. The box is fixed. Template to the box rough opening and let the plate cover the gap.
Skipping the box plumb check. Boxes are supposed to be plumb and level. They often aren't. A tilted box makes a tilted opening that jumps out at you on finished stone.
Ignoring the countertop edge profile when scribing the backsplash bottom. If the counter has an ogee or bullnose, the backsplash bottom has to follow that profile or you get a visible gap where they meet.
Forgetting to mark the wall face. A luan template has two sides and it flips easily in the shop. Write "WALL FACE" or draw a big arrow before you leave the job site.
Using one measurement per box instead of four. A single center point leaves too much room for error. Four measurements (left, right, top, bottom, all from a fixed reference) define the box and check each other.
Not confirming material thickness before sizing the cutout. A 3/4-inch stone backsplash on a 1/2-inch drywall wall puts the box 1-1/4 inches behind the finished face. That almost always needs an extender. Miss it and the installer finds out on site with no parts on the truck.
Shops that run quoting and templating through purpose-built software, like SlabWise, can attach outlet notes straight to the job file so nothing falls through the crack between the template visit and fabrication.
Do you need an electrician involved during backsplash templating?
Sometimes yes, sometimes no. The templater measures where the boxes are. The electrician makes sure those boxes sit in the right place and stay legal once stone covers the wall.
If the boxes are already in the wall and at the right height, a skilled templater can work alone. The templater makes no electrical decisions. He's recording geometry.
But if there's any question about box depth, box location, or whether the existing rough-in still meets code after the backsplash adds thickness, get the electrician there before you template. It's a short visit and it saves you from pulling stone after install.
For new construction or full gut jobs, coordinate the timing. The rough-in inspection has to pass before backsplash stone goes on. In many jurisdictions, covering electrical rough-in before sign-off is a code violation [5]. Template after the rough-in inspection passes, never before.
For occupied kitchens where only the backsplash gets replaced, the boxes are usually already code-compliant from a prior inspection. The one thing to check is box depth: will the new material push the box face more than 1/8 inch behind the finished surface [1]? Measure the existing wall thickness and the new backsplash thickness, add them, and compare against how far the box projects now.
How do GFCI outlets and USB outlets affect the template differently than standard outlets?
A GFCI (Ground Fault Circuit Interrupter) outlet is physically larger than a standard duplex. A standard duplex fits a single-gang box with room left over. A GFCI carries a test/reset button and a bigger body, and while it still installs in a standard single-gang box, the body reaches farther into the box, which can cause clearance trouble when the backsplash sits tight to the wall.
What matters more for templating: GFCI protection is required in kitchens anywhere within 6 feet of a sink, per NEC 210.8(A)(6) [2]. Most backsplash outlets near the sink will be GFCI type. Their cover plates match standard size, so the cutout dimension is the same. Confirm it on site, though, because some GFCI devices use a larger plate.
USB combination outlets keep showing up in kitchen renovations. Same single-gang box, but a larger face plate for the USB ports. Some use a standard single-gang cover, others use a modified one. Check the specific device model before you finalize the cutout size.
Popup outlet systems install flush in the countertop instead of the backsplash, and they're a different templating problem entirely. They need a hole in the countertop surface plus coordination with the cabinetmaker. That's outside backsplash templating, but worth knowing about when a backsplash outlet layout gets messy.
The 2023 NEC also added arc-fault protection requirements for kitchens (AFCI outlets or breakers) under 210.12 [1]. That's an electrical concern, not a dimensional one, but it's one more reason to have the electrician verify the rough-in is current before stone goes up.
How long does it take to template a backsplash with outlets, and what does it cost?
For a typical kitchen backsplash with two to four outlet openings, a skilled templater using luan strips spends 60 to 90 minutes on site. Add another 30 minutes in the shop to transfer measurements to a cutting file or full-size template. Call it 90 to 120 minutes of labor total.
Kitchens with six or more outlets, irregular walls, or complex intersections (windows, range hoods, built-in appliances) can run 2 to 3 hours on site.
Digital templating with a Proliner or similar device is faster on complex kitchens, roughly 45 to 60 minutes on site, but the equipment costs $15,000 to $30,000 to own [6]. Shops spread that cost across many jobs. Some charge a separate templating fee. Others fold it into the fabrication quote.
As a homeowner, you usually won't see a line item for "outlet cutout" on a quote. Fabricators price backsplash cutouts as part of fabrication. But if your project carries an unusual number of outlets or complex cutout geometry, a shop can reasonably charge $20 to $50 per additional cutout beyond a standard allowance. Ask about it upfront.
Fabricators tracking per-cutout labor and material will notice that granite countertops and marble countertops take longer to cut cleanly than engineered surfaces, and pricing should say so. Job-costing software like SlabWise helps a shop track those real numbers across jobs instead of guessing.
What should a homeowner look for when reviewing a backsplash template before fabrication?
Ask to see the template before it goes to the shop. Most fabricators are fine with this, especially if you're still at a point where changes are possible.
Check that the outlet locations are marked clearly and that the measurements make sense. If you know an outlet sits 12 inches from the corner of the backsplash, confirm the template shows roughly that. You don't need to be precise. You're sanity-checking for obvious errors.
Confirm the cover plate style. Ask whether the shop is cutting to the box opening or sizing for the cover plate, and check it matches the hardware you chose. This is one of the most common reasons fabricated stone and finished install don't line up.
Ask whether a box extender is needed. If your new backsplash is thicker than what's on the wall now (common when you replace tile with stone), the answer is often yes. Order those parts now instead of stalling the install.
For a countertop and backsplash together, the countertop installation and the backsplash install usually happen in two visits, counter first and backsplash second. Make sure the templater accounts for finished countertop thickness when measuring backsplash height, since the backsplash bottom edge lands on top of the counter.
Frequently asked questions
Can I template a backsplash with outlets myself, or do I need a professional?
A careful DIYer can template a backsplash with outlets using the luan strip method, but the margin for error is small. One measurement transposed by 1/4 inch means a bad cutout in expensive stone. If you're having natural stone fabricated, most shops require their own template visit rather than working from a homeowner-supplied template, because liability for errors falls on whoever did the measuring.
How close to an outlet can a stone backsplash cutout edge be?
The NEC allows up to 1/8 inch gap between the box edge and the finished noncombustible surface (NEC 406.4(E)). In practice, fabricators aim for a cutout 1/16 inch per side larger than the box opening. That threads the needle between too tight (risks cracking the stone on install) and too loose (fails the 1/8-inch gap rule on inspection).
What happens if the outlet box is too deep after the backsplash is installed?
If the box face sits more than 1/8 inch behind the finished stone surface, it violates NEC 406.4(E) and will fail electrical inspection. The fix is a box extender, a metal or plastic collar that brings the box face flush with the stone. Extenders cost $1 to $3 each at electrical supply houses. This is easy to address before install but a headache after the stone is up.
Do GFCI outlets need a larger cutout in the backsplash?
The cutout is the same as a standard outlet because both use the same single-gang box rough opening. The difference is that GFCI cover plates sometimes have a slightly larger face than standard duplex plates. Confirm the cover plate dimensions for the specific GFCI device being used before finalizing the template, especially if the stone edge will butt directly against the plate edge.
How far above the countertop are kitchen backsplash outlets usually centered?
Most builders and electricians center backsplash outlets 18 inches above the finished countertop surface. This is a convention, not an NEC mandate. The code only requires that no point along the countertop wall space be more than 24 inches from a receptacle (NEC 210.52(C)). Always measure the actual box height on site during templating rather than assuming the 18-inch convention was followed.
Can a stone backsplash cover an outlet completely?
No. Covering an outlet with stone and no accessible opening violates NEC 314.29, which requires that boxes stay accessible without damaging the building structure. You must cut the stone around the opening. If an outlet is no longer wanted, a licensed electrician has to remove it and properly close the circuit before stone goes over that location.
What's the difference between templating a backsplash and templating a countertop for outlets?
Backsplash outlets sit in the vertical wall surface; countertop outlets (popup systems) sit in the horizontal slab surface. Backsplash cutouts follow NEC 406.4(E) for gap tolerance. Popup countertop outlets carry their own installation requirements from the manufacturer and need coordination with cabinetmakers for the in-cabinet wiring pathway. The templating geometry is entirely different: vertical versus horizontal planes, different reference surfaces.
How do I mark outlet locations on a digital template for CNC cutting?
After capturing wall geometry with a digital device, you enter the outlet box centerpoints and dimensions by hand in the software, usually as rectangular cutouts with corner radii. The key inputs are: distance from a fixed reference to the box center (X and Y), box width, box height, and corner radius. Most Proliner software handles this as a standard cutout feature. Verify the CNC output file shows the correct number of cutouts before you approve it for cutting.
Does the type of stone affect how the outlet cutout is made?
Yes. Granite and quartzite are hard and cut cleanly with a CNC or diamond core bit. Marble is softer but chips more easily at thin edges near cutouts. Soapstone is the softest natural stone and needs the sharpest tooling to avoid a rough edge. Thin large-format porcelain panels crack near cutouts if the stone isn't well-supported during cutting. In every case, interior corners need a small radius, not a sharp 90-degree corner.
What is a story stick and when should I use one for outlet templating?
A story stick is a straight piece of wood or rigid material where you mark the position of every outlet, window edge, and reference point along one wall run. It's faster than writing separate measurements for each feature and carries every position in one physical object that goes straight to the shop. It's most useful with four or more outlets on one wall, cutting the chance of misreading a list of numbers. Mark it clearly with face direction before you leave the site.
How does backsplash thickness affect the outlet box requirement?
Every 1/8 inch of backsplash thickness is 1/8 inch the box recesses relative to the finished surface. Standard 3/8-inch stone backsplash over 1/2-inch drywall: the box needs to project at least 3/8 inch past the drywall face to stay within the 1/8-inch gap limit after install. If the box was set flush with the drywall face (common in new construction before final wall finishes are known), it will almost certainly need an extender once stone goes up.
What's the typical cost to add outlet cutouts to a stone backsplash fabrication?
Many fabricators include one or two outlet cutouts in their base backsplash price. Additional cutouts typically run $20 to $50 each depending on shop and material. Hard materials like quartzite and granite sit at the higher end because they wear tooling faster and take more time. Ask during quoting how many cutouts are included and what the per-cutout add-on costs if you have more than two outlets along the backsplash run.
Should the backsplash template be made before or after the countertop is installed?
After, whenever possible. With the countertop in place, the templater measures the real height from the finished countertop surface to the outlet boxes and to the underside of the upper cabinets. That eliminates accumulated error from nominal dimensions. If the countertop install is delayed and the timeline is tight, template with the cabinet boxes in place and calculate the countertop offset using the confirmed stone thickness, but flag it as a risk on the job file.
Can outlets be added to a backsplash after the stone is already installed?
Adding an outlet after stone backsplash is installed means cutting a hole in finished stone on the wall, which is difficult and risks cracking the slab. It requires an electrician to run new wiring, a fabricator to cut the opening (usually with a wet angle grinder and core bit in place), and the box to be set and secured. It's doable but costs a lot more than planning it during the original install. If there's any chance you'll want an outlet, add it before the stone goes up.
Sources
- NFPA, NFPA 70 National Electrical Code (NEC) 2023 Edition: NEC 406.4(E) limits gap between box edge and noncombustible finished surface to 1/8 inch; NEC 314.20 governs box projection requirements; NEC 210.12 covers AFCI requirements in kitchens
- NFPA, NFPA 70 NEC 2023 Section 210.52(C) and 210.8(A)(6): NEC 210.52(C) requires no point along a countertop wall space be more than 24 inches from a receptacle; NEC 210.8(A)(6) requires GFCI protection for receptacles within 6 feet of a kitchen sink
- NFPA, NEC Adoption Map by State: NEC adoption is state by state; local AHJ may amend or adopt earlier editions
- U.S. Consumer Product Safety Commission, Electrical Safety Publication: Electrical box extenders are low-cost components used to bring recessed boxes flush with finished wall surfaces
- ICC, International Residential Code (IRC) 2021 Section R109.1 Required Inspections: IRC R109.1 requires rough-in electrical inspection before concealment by wall or surface materials
- Natural Stone Institute, Fabrication and Installation Guidelines: Digital templating systems (laser and photo-based) are standard fabrication-shop equipment; capital cost varies by device class
- Marble Institute of America (now Natural Stone Institute), Fabrication and Installation Guidelines: Natural stone backsplash typically fabricated at 3/8-inch thickness; interior cutout corners require a minimum radius to prevent stress cracking
- OSHA, Construction Safety Standards 29 CFR 1926 Subpart K Electrical: OSHA 29 CFR 1926 Subpart K references NEC compliance for electrical safety in construction settings
- Natural Stone Institute, Technical Manual Volume 2: Fabrication: CNC routing and wet grinding are standard methods for outlet and sink cutouts in natural stone; recommended corner radius minimums apply to prevent fracture
- U.S. Department of Energy, Building Technologies Office, Residential Kitchen Design Standards: Standard countertop height is 36 inches from floor; conventional outlet height above counter in kitchen backsplash zone is 18 inches from countertop surface per common building practice
Last updated 2026-07-11