TL;DR
- To set up a router for countertop edge profiling, pick the right bit profile, set bit height to match your material thickness (usually 1.5 inches for a standard counter), lock in a stable fence or bearing guide, and match the RPM to your bit diameter.
- Most ruined edges trace back to three things: wrong bit height, too fast a feed, or skipping a light final pass.
What does edge profiling actually mean for countertops?
Edge profiling is shaping the exposed edge of a countertop, taking a raw square-cut slab and turning it into a finished profile. Eased, beveled, bullnose, ogee, waterfall, dupont, cove, and laminate-style edges are all router profiles. The router removes material in a controlled pass and leaves one smooth, consistent shape down the whole length of the slab.
For homeowners this matters because the edge is the first thing you touch every time you walk past the counter. It changes perceived quality, how easily the edge cleans, and how the counter reads against your cabinets and backsplash. A bullnose on a thick quartz slab looks nothing like a pencil-round on a laminate sheet, even in the same color.
For fabricators, edge work is one of the highest-payoff skills in the shop. A clean ogee run adds perceived value that justifies real money. A chipped or wavy profile is the most common reason a customer rejects an install. Getting your router setup right the first time is not optional.
This guide covers wood and laminate countertops routed with a handheld or table-mounted router, and touches on solid surface (Corian-type) material. Natural stone and engineered quartz get profiled with wet CNC equipment and diamond tooling, not a woodworking router, so that process is separate.
What type of router do you need for countertop edges?
You have two practical choices: a handheld plunge or fixed-base router, or a router table. Both cut countertop edges fine. The right one depends on the material, the profile, and whether you can flip the workpiece.
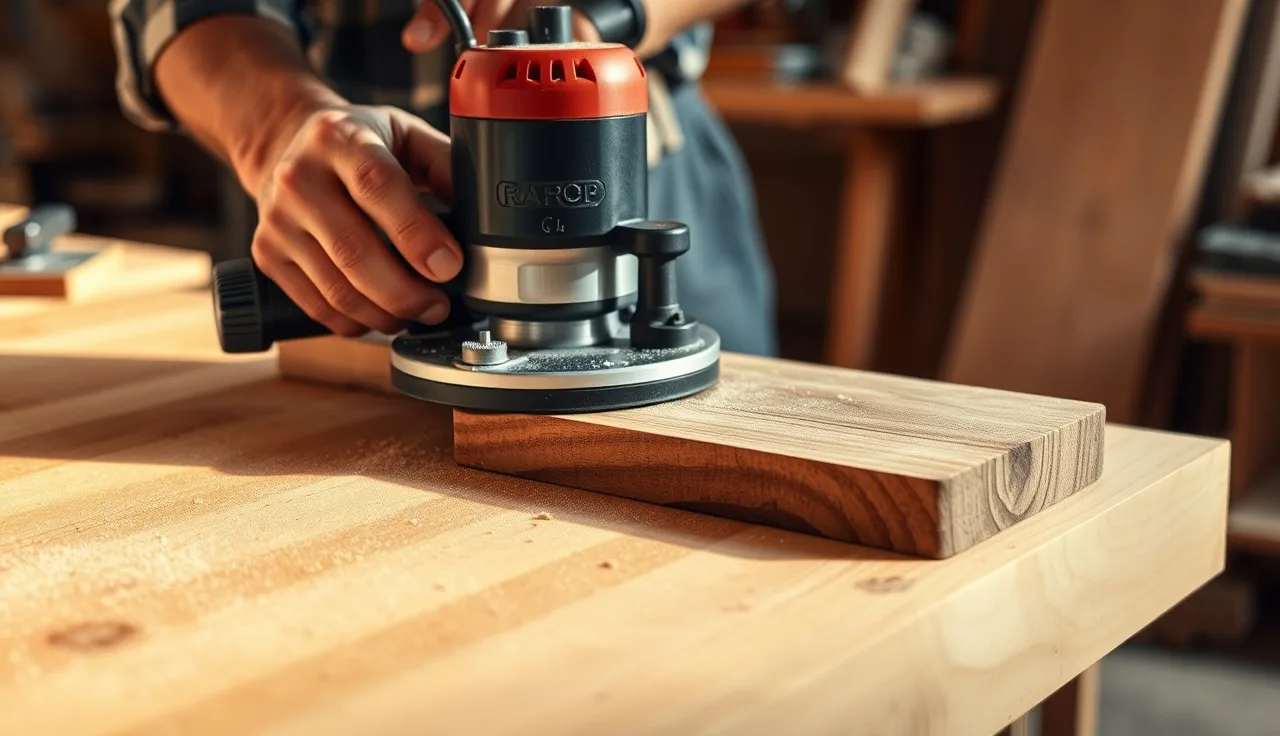
A fixed-base router with a 2.25 HP motor (around 1,600 to 1,800 watts) handles most edge profiles in wood and solid surface cleanly [1]. Plunge routers work too, but for edge profiling the plunge mechanism mostly gets in the way. You want a base you can lock at a precise height and leave alone.
A router table is easier for small pieces and for profiles that need several passes. You feed the workpiece past the bit instead of walking the router along the workpiece. The catch is that long slabs are clumsy to run across a table without serious infeed and outfeed support. Most pros run a handheld router with a guide bearing for installed or in-place counters, and a table for smaller pre-cut parts.
Own a trim router (one-horsepower class)? It can knock off an eased edge or a small roundover, but it will fight you on a full ogee or a deep cove in hardwood. Underpowered routers burn bits and leave rough cuts. Do not push the tool past what it wants to do.
For laminate countertops, a trim router is actually the standard tool, because laminate is thin and the profiles are shallow. For butcher block countertops, get at least a 2 HP fixed-base router for anything past a simple roundover.
Which router bit profiles are used for countertop edges?
The profile is part looks, part practicality. Here are the ones you will actually run into.
Eased edge (micro-bevel or 1/8-inch roundover): the default for modern kitchens. A slight rounding of the top and bottom arris. Easiest to run, easiest to keep clean, and least forgiving of chip-out because the edge sits right in your eyeline. Use a 1/8-inch roundover bit.
Bullnose: a full half-round that wraps the entire edge thickness. It needs a roundover bit with a radius equal to half your slab thickness. On a 1.5-inch counter that is a 3/4-inch radius roundover. These bits are big. Run them slow.
Bevel (chamfer): a straight angled cut, usually 45 degrees. Simple, fast, clean on contemporary kitchens. Use a chamfer bit.
Ogee (S-curve): the classic formal profile with a convex-then-concave S shape. Single-pass ogee bits exist, but a true Roman ogee is a dedicated bit. They cost more and demand a rock-solid setup, because any wobble shows up in the curve.
Dupont (triple pencil or stacked): a profile built up from several passes with different bits, for a layered look. Common on laminate buildup edges. Slow to set up, but rich to look at.
Cove: a concave scallop cut into the face of the edge, often paired with a top roundover. It needs a cove bit and, in hardwood, several shallow passes.
Bit quality matters more than almost anything else here. Carbide-tipped bits from a real manufacturer (Freud, Amana, and CMT are the brands trade publications keep recommending) outlast cheap bits by a wide margin and cut cleaner with less burning [2]. A $40 bit is a real investment. A $9 bit is a false economy on an expensive countertop.
For granite countertops or engineered stone, none of these woodworking bits apply. Diamond profile wheels on wet grinders or CNC machines are the correct tooling [9].
How do you set bit height for a standard countertop thickness?
Bit height (or bit projection above the table, depending on your setup) is the single most important setting. Get it wrong and the profile lands in the wrong spot on the edge face, leaving a shelf, a gap, or a shape that runs up into the top surface.
Standard countertop thickness by material:
| Material | Typical thickness | Notes |
|---|---|---|
| Laminate (post-form) | 3/4 inch (substrate) | Sheet on top adds minimal thickness |
| Laminate (builtup) | 1.5 inches | Two layers of 3/4-inch substrate |
| Butcher block | 1.5 to 1.75 inches | Varies by manufacturer |
| Solid surface (Corian-type) | 0.5 inch sheet, builtup to 1.5 inch | Edge buildup strip required |
| Engineered quartz | 0.75 inch or 1.25 inch | Stone does not use handheld router |
| Natural stone | 0.75 inch, 1.25 inch, or 2 cm/3 cm metric | Stone does not use handheld router |
With a bearing-guided bit (the common case for handheld work), you set the bit so the bearing rides the bottom or top edge and the cutter engages the full intended profile. Most roundover and ogee bits carry a pilot bearing that registers against the workpiece face on its own. Your job is the vertical: raise or lower the router base until the profile lands right.
Here is the method. Clamp a scrap of the same thickness as your counter in your vise or to the bench. Set the bit to rough height. Make a test pass. Measure where the profile sits on the edge face. Adjust in small steps, 1/32 inch at a time, until the profile is centered or exactly where you want it. Never dial in height on the real countertop.
On a router table, bit height above the table surface is what matters, and the same scrap-first rule holds. Lock the collet fully before any test pass.
How do you set up a router fence or guide for straight runs?
With a bearing-guided bit you do not always need a fence. The bearing rides the workpiece edge and steers itself. Fences earn their keep in two spots: straight cuts where the bearing alone would follow small dents in the raw edge, and non-bearing bits that need a fixed reference.
For handheld work, an edge guide clamped to the router base rides off the top face of the counter and holds the bit a set distance from the edge. That helps most on cove profiles, where the cutter has to hit a specific point on the edge face instead of tracking a bearing along the arris.
On a router table, the fence is the main guide for straight runs. Set it parallel to the bit center with a real straightedge, not by eye. The standard trick is to measure from the fence face to the bit tip at the front of the fence and again at the back, then confirm the two numbers match. A fence that is even slightly cocked cuts a taper over a long run.
On a long handheld run, clamp a straightedge (a factory-edge piece of MDF or a dedicated aluminum guide rail) to the counter face if you are not using a bearing bit. Slower to set up, but it gives you a dead-straight profile on very long pieces where a hand-guided bearing bit tends to drift.
One thing that catches beginners: the bearing has to ride clean, smooth material. If the raw edge has tearout, voids, or saw marks, the bearing follows them and telegraphs every flaw into the profile. Joint or sand the raw edge flat before you profile.
What router speed (RPM) should you use for countertop edge profiling?
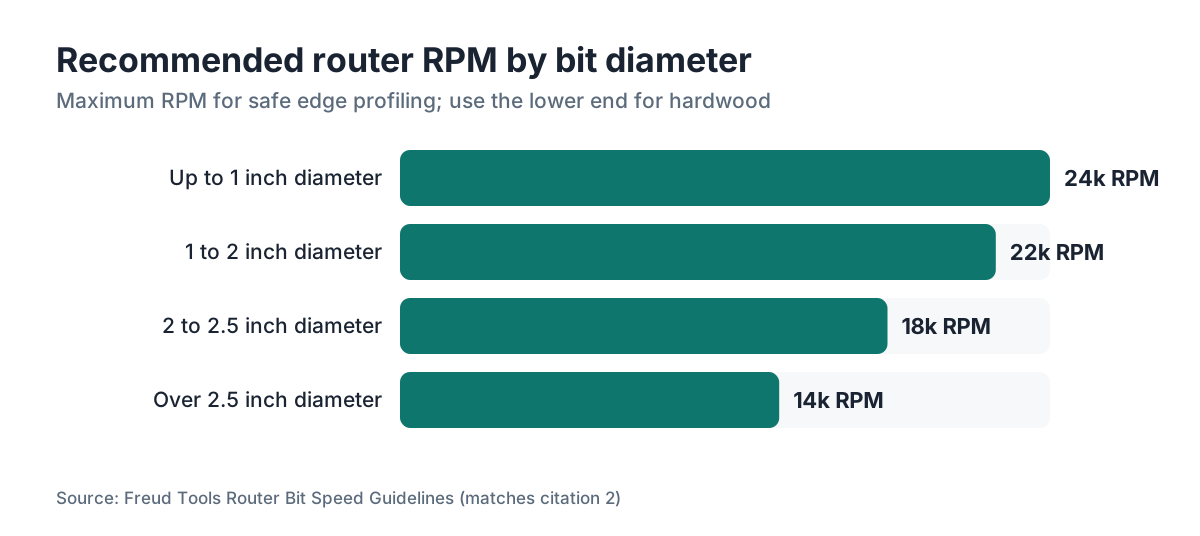
Speed and feed rate together set your cut quality. Most variable-speed routers run 8,000 to 24,000 RPM. The rule is simple: bigger bit, lower RPM. That keeps the bit's rim speed (the surface speed out at the cutting tip) in a safe, effective band [3].
A general speed chart for edge profiling:
| Bit diameter | Recommended RPM range |
|---|---|
| Up to 1 inch | 22,000 to 24,000 RPM |
| 1 to 2 inches | 18,000 to 22,000 RPM |
| 2 to 2.5 inches | 14,000 to 18,000 RPM |
| Over 2.5 inches | 10,000 to 14,000 RPM |
These come from bit manufacturer guidelines [2] and hold up across the industry. A large ogee or raised-panel bit spun at a full 24,000 RPM is genuinely dangerous. The rim speed is too high, the bit is far more likely to catch and kick, and the motor takes a beating for nothing.
Feed rate (how fast you move the router along the edge) is harder to pin to a number, because it rides on material hardness, bit sharpness, and depth of cut. Go by sound and feel. Too slow burns and glazes the wood. Too fast tears out and can stall the motor. In hardwood, hold a steady pace you could keep up for several minutes [6]. In MDF or softwood, you can move faster.
For solid surface like Corian countertops, use sharp carbide bits, moderate speeds (16,000 to 20,000 RPM for a 1-inch profile bit), and keep moving [7]. Solid surface scorches quicker than wood if you dwell in one spot.
How many passes should you make for a deep or complex profile?
One pass is almost never right for a deep profile in hardwood or thick solid surface. Take multiple shallow passes, stepping the bit down (on a router table) or the fence in (on a handheld setup) until you reach full depth.
A bullnose on a 1.5-inch butcher block counter asks way too much of a 3/4-inch roundover bit in a single pass. Run two or three instead: rough in about 60 percent of the profile on the first pass, 85 percent on the second, then a light final pass at full depth. That last pass is a cleanup pass. It gives you the smooth surface without burning.
The climb cut is worth understanding. A normal pass moves the router left to right (on the near edge of the workpiece for handheld work), which is a conventional cut. A climb cut runs right to left, so the bit's rotation feeds into the cut instead of pushing away from it. Climb cuts are risky at any real depth because the router wants to bolt away from you. But a very light climb cut on the final pass, along the trailing side of a profile, cuts tearout way down on figured wood or at the end of a grain run [6]. Use them only at light depth (1/16 inch or less) with a firm two-handed grip.
For marble countertops or any natural stone, this same multi-pass logic lives on diamond tooling and a wet grinder, not a wood router [9].
How do you handle inside corners and sink cutouts when profiling edges?
Inside corners are where handheld profiling gets fussy. A pilot-bearing bit cannot turn an inside corner. The round bearing rolls the corner off instead of following it sharp. So inside corners need a different approach entirely.
On laminate, inside corners on builtup edges usually get hand-filed or sanded to match after the router runs the straight sections. A curved profile file or a riffler shaped like your edge is the standard tool. Figure a few minutes per corner and a little patience.
On butcher block or solid hardwood, a sharp chisel and a profile-matched sanding block bring inside corners up to the routed sections. Some shops run a small oscillating multi-tool with a shaped sanding pad to move faster on cove or concave sections.
Sink cutouts are basically a rectangle of inside corners. Rout the straight runs up to within a few inches of each corner, then hand-finish the corners. If you have a template and a pattern bit, you can rout the whole perimeter (corners included) as long as the template carries generous radiused corners, at least 1/2-inch radius. Sharp 90-degree inside corners you cannot rout, period.
This is one place solid surface has a real edge. The material works easy enough that shaping inside corners with a rasp, file, and sandpaper goes quick, and you can polish it right back to match the routed sections.
What safety setup does routing countertop edges require?
Router safety is not complicated, but skip any piece of it and you invite real injury. A bit spinning at 20,000 RPM has no patience for a loose setup.
First, lock down the workpiece. For handheld routing, the counter needs to be clamped to a stable surface, more than laid across sawhorses. Any movement while the bit is engaged can cause kickback or wreck the profile. Two clamps minimum, set clear of the router path.
Second, check the collet. A loose collet is the most common cause of bit ejection accidents. Tighten it fully with the router unplugged. Use two wrenches, one on the collet nut and one holding the spindle, for real torque. A bit that can creep in the collet under load is a serious hazard [4].
Third, set depth in small steps, especially on the first pass of a new profile or a new material. A depth that felt fine on scrap can behave differently on the real piece depending on grain direction or density [6].
Fourth, eye and hearing protection are not optional. A router at 20,000 RPM runs around 95 to 100 dB, per NIOSH occupational noise data [5]. That sits well above the 85 dB level where NIOSH recommends hearing protection for extended exposure. NIOSH's guidance is blunt: "Exposures at or above this level are considered hazardous." One long counter run with bare ears adds to cumulative hearing loss.
Fifth, no gloves while routing. It feels backward, but it is standard woodworking safety guidance: gloves can snag on a bit and drag your hand into the cutter [4]. Eyes and ears, yes. Gloves, no.
How do you finish and sand a routed countertop edge?
A freshly routed edge on wood or solid surface needs sanding to clear mill marks, light tearout, and router track lines. The target is simple: bring the edge to the same finish level as the top face.
Start with 80 or 100 grit on a profile-shaped sanding block or a flexible pad that follows your profile. Work along the length of the edge, never across it. Cross-grain scratches on an edge profile show up in the finished product. On a long counter, that means long strokes parallel to the edge.
For a bullnose, a strip of sandpaper pulled shoeshine style around the curve works well on the convex section. For a cove, wrap a round dowel in sandpaper to match the concave curve.
Work up through the grits: 80 or 100, then 120, then 150 or 180 depending on your finish target. If the counter gets oiled (common for butcher block), 150 grit is usually enough before the first coat. If it gets painted or lacquered, go 180 to 220 before the first coat.
On laminate, the edge usually ends up covered with edge banding or a laminate strip rather than left as bare substrate, so sanding the routed edge is mostly about getting the bevel or roundover clean before the laminate goes down. Sharp laminate trim bits leave cuts clean enough that they need little more work.
Running a shop and tracking which profiles you cut most? Software like SlabWise ties profiling time and material cost to specific quote line items, so an edge profile never gets accidentally priced at zero.
After sanding, inspect the edge under raking light, a single source held low and along the edge. Raking light shows every track mark, flat spot, and wave that overhead lighting hides. Fix anything you find before the finish goes on.
What are the most common mistakes when routing countertop edges?
A handful of mistakes repeat over and over, in home shops and pro shops alike.
Wrong bit height on the first pass. The most common and most expensive one. Always test on a scrap of identical thickness before you touch the real counter. Adjusting after the fact bakes a shoulder or an undercut into the edge, and fixing that means removing more material than the profile ever intended.
Too fast on the first pass. Deep, fast passes in hardwood stall motors and leave rough surfaces that beg for extra sanding. Two or three clean passes beat one rough pass every time.
Skipping the scrap test. A bit that looks correct sitting in the collet does not always cut the profile you expect at that depth. Five minutes on scrap saves an expensive slab.
Inconsistent feed rate. Slowing down mid-pass to check the result or dodge a clamp burns the wood and leaves a dark line in the profile. Keep a steady pace. If you must stop, back the bit out of the cut first.
Not checking the bearing. Bearings wear. One that spins free when cool can bind under heat from a long run and start to drag, which burns the edge. Confirm bearings spin smooth, and swap them the moment they feel rough or sticky. Replacements are cheap.
Routing against the grain on a critical pass. Grain direction matters most on the final pass. Where grain reverses (common near knots or in figured wood), take an extra light climb-cut pass instead of forcing through conventional [6].
For kitchen countertops in plain sight, these details genuinely matter. A slightly scorched eased edge on a white oak counter stares back at you every single day.
When should you hire a fabricator instead of routing edges yourself?
Handheld router edge profiling is a homeowner-accessible skill for wood and laminate. It takes a few hundred dollars in tooling, careful setup, and practice on scrap. Most people comfortable with power tools can cut a clean eased edge or bullnose on a butcher block or laminate counter with no pro help.
Still, a few situations make hiring a fabricator the clear call.
Natural stone and engineered quartz. Full stop, these need professional equipment. A CNC or a hand-held wet grinder with diamond tooling is the only right answer [9]. A woodworking router chips the stone, ruins the bit, and can crack the slab. There is also a health reason: dry-cutting stone throws respirable silica, and EPA and OSHA both treat silica dust in stone fabrication as a serious hazard [10]. This is not a driveway project.
Complex multi-profile edges (full dupont, stacked profiles, waterfall miters). These take experience and setup time that is hard to nail without a reference piece. The margin for error on a $500 slab of hardwood is real.
Long continuous runs with tight tolerances. A fabricator with a CNC router table cuts a profile that stays dead consistent across twelve feet. A handheld router in skilled hands gets close. CNC gets closer.
If you are getting countertop installation done professionally anyway, ask the fabricator to run the edge profile at the same time. The added cost is usually small against the whole project, and the result beats doing it as a separate job.
Shops running estimating software like SlabWise can quote edge profiling as a line item fast, so a homeowner can compare doing it themselves against the pro option with real numbers in hand.
Frequently asked questions
Can I use a regular woodworking router on granite or quartz countertops?
No. A standard woodworking router with carbide bits chips granite or quartz on contact and will not cut a profile. Natural stone and engineered quartz need diamond-tipped profile wheels run wet on a dedicated wet grinder or CNC stone machine. Trying a wood router on stone ruins the bit, likely cracks the slab, and throws hazardous silica dust.
What is the best router bit for a standard eased edge on a countertop?
A 1/8-inch carbide roundover bit with a pilot bearing is the standard for an eased edge. It knocks off the sharp arris without creating a prominent profile. For laminate counters, a flush-trim bit followed by a 1/8-inch roundover bit is the usual two-step process. Quality carbide bits from Freud or Amana cut cleaner than budget bits and hold their edge longer.
How do I avoid burning the wood when routing countertop edges?
Three usual causes: moving too slowly, using a dull bit, or cutting too deep in one pass. Hold a steady feed without pausing mid-run. Replace or sharpen bits that have seen hard use. Break deep profiles into two or three passes instead of one. If you see smoke or a dark line, speed up the feed slightly or take less depth per pass.
What router HP do I need for a full bullnose on butcher block?
At least 2 HP (about 1,500 watts). A 3/4-inch roundover cutting a full bullnose on 1.5-inch hardwood is a big cut. A 1 HP trim router will struggle, overheat, and leave a rough surface. A 2.25 HP fixed-base router handles it comfortably in two passes. Variable speed control helps because the larger bit diameter wants a lower RPM.
Should I rout the edge before or after cutting the countertop to final size?
After cutting to final size. Profiling an edge that still needs trimming wastes the profile and can tear out at the ends. Cut to final dimensions, confirm the fit, then rout. The one exception is rough-cutting oversized material that gets final-trimmed after profiling, but that workflow is unusual for countertop work.
How do I profile the edge on an inside corner or around a sink?
A bearing-guided bit cannot turn an inside corner. Rout the straight runs up to within a few inches of each corner, then finish the corners by hand with a profile-matched file, a chisel, or an oscillating multi-tool with a shaped sanding pad. For sink cutouts, all four inside corners are hand-finished. Plan 10 to 20 minutes of hand work per sink opening.
What RPM should I set my router to for a large ogee bit on hardwood?
For an ogee bit in the 1.5 to 2-inch diameter range, set 16,000 to 18,000 RPM. Larger bits need lower RPM to keep rim speed in a safe, effective range. Running a big profile bit at a full 24,000 RPM is dangerous and cuts rough. Check the bit manufacturer's data sheet for the range that matches your exact bit size.
How do I get consistent edge profiles across multiple countertop sections?
Use the same bit, the same depth, and the same router for every section. Lock the depth setting and leave it between pieces. Mark the height on a setup block (a scrap with the profile already cut) so you can re-register the exact height after a bit change or a break. Test on scrap before each new piece if there is any doubt at all.
Can I profile laminate countertop edges with a handheld router?
Yes. Laminate edges are one of the most common handheld router jobs. A trim router (1 HP class) is plenty for laminate trimming and bevel cuts. A flush-trim bit brings the laminate sheet flush with the substrate, then a bevel or small roundover bit shapes the finished edge. The cuts run shallow and the material works easy.
How long does it take to rout and sand a standard kitchen countertop edge?
For a straightforward profile (eased, beveled, or bullnose) on a typical 10-foot run of butcher block or solid surface, plan 30 to 60 minutes including setup, scrap test cuts, routing, and sanding to 150 grit. Complex profiles or figured wood run longer. Inside corners and sink cutouts add 10 to 20 minutes each. First-time setups always take longer than repeat runs.
Do I need a router table or can I always use a handheld router for countertop edges?
A handheld router works for most edge profiling, especially long in-place runs where the counter cannot be moved. A router table is handier for smaller pieces and holds a slightly more consistent profile, because the workpiece moves against a fixed fence instead of the router walking along the workpiece. For most homeowner projects, a quality handheld router with a fixed base is enough.
What safety gear do I need when routing countertop edges?
Eye and hearing protection are essential. Router noise runs 95 to 100 dB, above NIOSH's 85 dB action level for hearing protection. Do not wear work gloves while routing, because they can catch the bit. Secure the workpiece with at least two clamps before you start. Inspect the collet and bit before each session and retire any bit that shows chipping or burn residue.
Sources
- OSHA, Hand and Power Tools (Publication 3080): General safe use requirements for portable powered tools including routers; motor rating and guarding requirements
- Freud Tools, Router Bit Speed Chart and Usage Guidelines: Recommended RPM ranges by bit diameter for carbide-tipped router bits; guidance on bit quality and profiling applications
- USDA Forest Products Laboratory, wood machining research: Relationship between bit diameter, RPM, and rim speed (surface speed at cutter tip) in router operation
- OSHA, Woodworking eTool: Portable Routers: Collet tightening requirements, no-glove guidance, and workpiece securing requirements for router operation
- NIOSH, Occupational Noise Exposure (Publication 98-126): 85 dB action level for hearing protection; router and woodworking equipment noise levels in the 95 to 100 dB range
- USDA Forest Service, Wood Handbook: Wood as an Engineering Material (FPL-GTR-282): Hardwood and softwood machining characteristics relevant to feed rate, grain direction, and tearout in routing operations
- International Surface Fabricators Association (ISFA), Solid Surface Fabrication Standards: Tooling and speed recommendations for solid surface (Corian-type) edge profiling; carbide bit use and RPM guidance
- NIOSH, Power Tools: Safety and Health Topics: General power tool safety standards applicable to routers used in countertop fabrication settings
- Natural Stone Institute, Fabrication Standards for Natural Stone: Diamond tooling and wet grinding requirements for stone edge profiling; prohibition of standard carbide bits on natural stone
- OSHA, Respirable Crystalline Silica standard and guidance: Silica exposure hazards in stone countertop fabrication; distinction between stone and wood/laminate fabrication processes
Last updated 2026-07-11