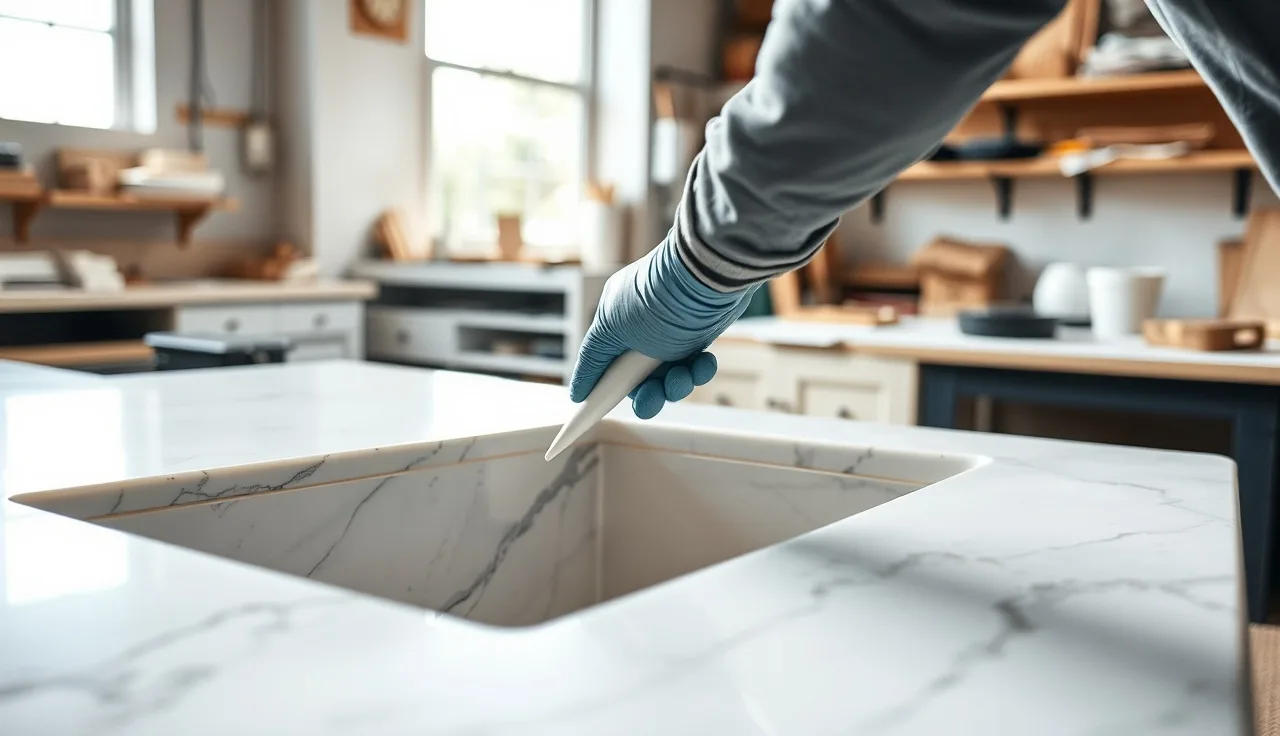
TL;DR
- Silicone bleed is the dark, oily shadow left when plasticizers migrate out of an uncured bead into porous stone.
- Stop it with three moves: seal the stone before any silicone touches it, use a neutral-cure 100% silicone rated for stone, and keep the joint dry and warm until the bead fully cures (24 to 72 hours, depending on bead size and humidity).
What is silicone bleed and why does it stain light stone?
Silicone bleed is the oily dark shadow that spreads into stone from a fresh silicone bead. The stain is not the silicone. It is the plasticizers, mineral oils, and uncured polymer chains that creep outward from the bead before the silicone crosslinks into rubber.
Light stones suffer most because oil darkens pale minerals hard. White Carrara marble, Calacatta, Kashmir White granite, quartzite like Super White, and white quartz composites all show bleed readily. One bad bead can leave a shadow three to four times the width of the joint.
The migration is fast. On unsealed marble, visible bleed can show up within two hours, and the stain sets as the stone dries around the oil. By the time a homeowner spots the shadow the next morning, it has already bonded to the calcite crystals.
Porosity drives all of it. Marble and quartzite are calcium carbonate or siliceous rocks laced with connected micro-pores. Polished Carrara marble absorbs roughly 0.2 to 0.5% water by weight under ASTM C97 testing [1]. That sounds tiny, but plasticizer molecules are smaller than water and travel even faster through the capillary network.
Quartz composites (engineered stone like Cambria or Silestone) are far denser and resist bleed, but they are not immune. Watch the saw cuts and the underpolished sink cutout edges where the resin binder runs thin.
Which silicone products cause bleed and which ones don't?
Product choice is the single biggest variable you control. Get it right and you have solved most of the problem before you touch a caulk gun.
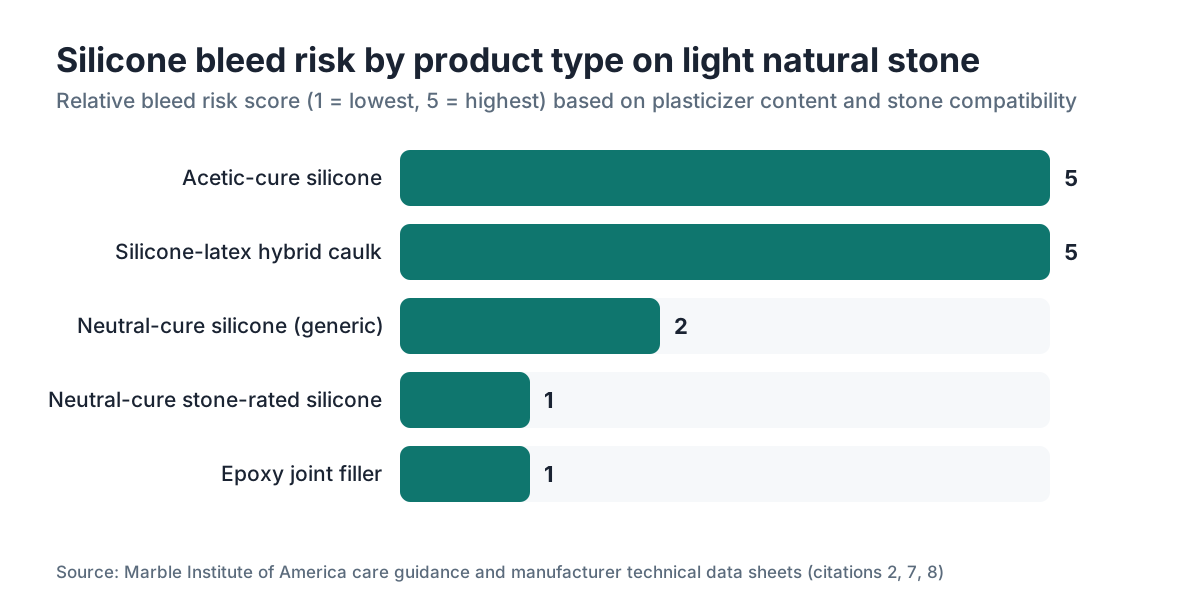
Acetic-cure silicones are the main offenders. These are the cheap, vinegar-smelling tubes at every hardware store. As they cure they release acetic acid and carry a heavier load of plasticizers. Fine for glass and some metals. On stone they attack sealers and push oils into porous substrates.
Neutral-cure silicones cure by releasing oxime, alcohol, or acetone compounds instead of acid. They cost more ($8 to $20 per 10.1 oz tube versus $4 to $8 for acetic-cure), but they don't eat sealer or drive plasticizer nearly as hard. Dow, GE Advanced, and several professional brands make neutral-cure formulas. Look for the phrase "neutral cure" or "low-modulus" on the label, and confirm it says 100% silicone, not a silicone-latex hybrid.
Silicone-latex hybrids (sometimes sold as "siliconized caulk") are worse than acetic-cure for bleed. The latex binder holds water and surfactants that drive staining into stone. Never put these on marble, quartzite, or any light natural stone.
Here is a quick comparison of the main caulk types by bleed risk:
| Product type | Acetic cure | Bleed risk on light stone | Paintable | Rough cost per tube |
|---|---|---|---|---|
| Acetic-cure silicone | Yes | High | No | $4-$8 |
| Neutral-cure silicone | No | Low | No | $8-$20 |
| Silicone-latex hybrid | No | Very high | Yes | $5-$10 |
| 100% neutral-cure stone silicone | No | Very low | No | $12-$25 |
| Epoxy-based joint filler | N/A | Near zero | Yes | $15-$35 |
For undermount sink joints on white marble or quartzite, I always reach for a dedicated stone silicone like Mapei Ultracolor Plus FA, Laticrete Latasil, or a Bostik stone product. These carry less plasticizer and often include anti-bleed additives. The extra five dollars a tube is nothing next to the cost of the slab.
How does sealing the stone first prevent silicone bleed?
A penetrating sealer fills the micro-pores with a fluoropolymer or silicone resin barrier before the joint silicone ever lands on the stone. It plugs the capillary network so the plasticizers have nowhere to go.
The sealer has to be fully cured before you apply any silicone. Most penetrating sealers are water- or solvent-based fluorocarbon or silicone formulas. The Marble Institute of America recommends a simple water-drop test to check sealer coverage: put a few drops of water on the surface near the joint. If the drops bead for at least four minutes, coverage is adequate [2]. If water soaks in fast, the stone needs another coat.
Timing matters a lot. Apply sealer, let it cure per the label (usually 24 hours for full cure, though some are touch-dry in 30 minutes), then do your silicone work. Seal and silicone the same day and the sealer is still offgassing solvents with pores that aren't fully blocked.
For undermount sinks on white marble or Calacatta quartzite, I seal the stone twice within 12 inches of the cutout. The cut edge is the weak spot. It is the stone equivalent of end grain, far more porous than the face, and that is exactly where the silicone sits.
Common sealer types for this use:
- Fluoropolymer penetrating sealers (StoneTech BulletProof, Aqua Mix Sealer's Choice Gold)
- Silicone-based penetrating sealers (good, but can themselves bleed if over-applied and uncured)
- Impregnating sealers with nano-particle carriers (newer, good for very dense stones)
Skip topical or coating sealers (wax, acrylic, or urethane surface films) near silicone joints. Silicone won't bond well to a wax film, and the film traps bleed instead of stopping it.
What surface prep steps should you do immediately before applying silicone?
Even with the right product and a cured sealer, bad prep causes bleed or adhesion failure. The prep is where most avoidable callbacks start.
Get the joint bone dry. Moisture under or beside a bead slows cure hard. Above 70% relative humidity, cure time for a 1/4-inch bead of neutral-cure silicone can stretch from 24 hours to 48 hours or more [3]. Bleed risk peaks during that uncured window, so a wetter substrate means longer exposure.
Clean the stone with isopropyl alcohol (91% or higher) right before application. Alcohol lifts residual oils, fabrication coolants, and dust that would break the sealer-to-silicone bond. Skip petroleum solvents (mineral spirits, paint thinner) near porous stone. They leave an oil residue that makes bleed worse.
Tape masking is your physical backup. Blue painter's tape run flush to both sides of the joint lets you lay a clean bead and peel the excess before it cures. Tape also shrinks the contact zone between uncured silicone and stone, which physically blocks lateral migration. Pull tape within 5 to 10 minutes of applying the silicone, before a skin forms. Wait until it skins and peeling tape tears the bead, leaving raw silicone edges on the stone.
Backing rod in wide joints gets skipped by DIYers and it matters. A polyethylene foam backer rod pushed into gaps wider than 3/8 inch controls bead depth and stops silicone from spreading too thick against the stone face. Thick beads cure slower and hold more plasticizer waiting to migrate.
Does temperature and humidity affect silicone bleed risk?
Yes, strongly. Silicone cure chemistry is temperature-sensitive. Most neutral-cure silicones are built to cure between 40°F and 100°F (4°C to 38°C), fastest around 70°F to 77°F [3]. Below 50°F, cure slows enough that the bleed window stretches from one day to three or four.
Cold stone is the trap. A granite slab sitting in a shop at 55°F has a surface temperature that drags cure chemistry to a near halt. Installers in cold climates who set slabs on an early spring day sometimes see bleed that never showed in summer. The difference is stone temperature, not the product.
Humidity actually helps silicone cure, because most silicone cure reactions are moisture-triggered. Very low humidity (below 20%) slows things down. High humidity brings a different problem: condensation on cold stone right before application, which puts water in the pores exactly when you want them dry.
Practical takeaways:
- Work at room temperature (65°F to 80°F) when you can.
- Warm the stone near the joint with a heat gun on low for 30 to 60 seconds before applying silicone. This wakes up the cure chemistry and helps the sealer do its job.
- Don't run fans over fresh silicone. Air movement barely speeds cure and pulls dust into the uncured bead.
- Doing a sink cutout in a cold shop? Let the slab warm to at least 65°F before silicone.
How do you apply silicone to minimize contact with the stone face?
Technique keeps the silicone in the joint instead of smeared across the stone. Small, controlled beads win here.
Load the caulk gun properly. Cut the tip at a 45-degree angle to match the joint width. Too big a cut forces excess out onto the stone face. For a typical undermount sink joint of 1/8 to 3/16 inch, cut a tip opening no larger than 3/16 inch.
Pull, don't push. Moving the gun away from you lets the bead fill the joint from the back forward. Pushing toward you piles material on the face.
Tool the bead within 2 minutes of laying it. Use a plastic or silicone tool, a gloved fingertip wetted with a little dish soap solution, or a dedicated caulk tool. You want to press silicone into the joint and shape a concave surface that pulls material away from the stone face. Dry tools drag silicone outward.
Wipe squeeze-out right away with a dry lint-free cloth. Hold off on water; water carries uncured silicone into pores before the bead starts to cure. After 10 minutes, wipe residue with isopropyl alcohol on a cloth.
On the sink-to-stone joint of a white marble or quartzite top, I use an epoxy setting compound (Akemi or LTP Mattstone H2O) for the structural bond rather than trusting silicone alone, then run a thin silicone bead at the visible seam only. Less total silicone against the stone, less bleed risk.
What should you do if silicone bleed already happened?
Don't panic and don't scrub. Scrubbing fresh bleed drives plasticizer deeper into the stone.
If the silicone went on within the last 2 to 6 hours, pull as much oil as you can. Pack a thick poultice of fine unscented talc or baking soda over the stain. Leave it 30 minutes, sweep it off dry, repeat. The powder wicks oil before it sets.
For bleed that dried in (24 hours or more), mix a poultice of diatomaceous earth or kaolin clay with acetone or mineral spirits (one part solvent to two parts powder) to draw out the oil. The Marble Institute of America describes this method in its stain removal guidance [2]: spread the paste about 1/4 inch thick, cover with plastic wrap, tape the edges, let it sit 24 to 48 hours, then remove and rinse. Repeat two or three times for stubborn stains.
Oil stain removers made for stone (Akemi Color Intensifier & Stain Remover, StoneTech Oil Stain Remover) clear plasticizer bleed in many cases. Follow the label, usually a 24-hour dwell.
What does not work: bleach, hydrogen peroxide (it etches marble), or household degreasers. These can lighten a bleed stain for a day but leave the oil deep in the stone.
If the stain is set and full-depth after several poultices, a stone restoration pro can sometimes lighten it further with heated poultices or micro-abrasion. Deep bleed into soft marble can be permanent. That is why prevention earns every extra step.
Does the same silicone bleed risk apply to quartz and other engineered countertops?
Engineered quartz (Cambria, Silestone, Caesarstone) is roughly 90 to 93% ground quartz bound in polyester or acrylic resin, and that resin matrix is far less porous than natural stone [4]. Bleed staining is uncommon, but not impossible at cut edges, seams, and sink cutouts where the resin layer runs thinnest.
On white or near-white quartz colors (Cambria Brittanicca, Silestone Lyra), the dense surface usually shrugs off face bleed, but a polished edge can absorb oil at a saw cut if the resin was cut aggressively without proper polishing. Use a neutral-cure silicone for quartz anyway.
Laminate countertops like Formica have no porosity problem, but silicone choice still matters for adhesion and long-term flexibility. Corian and other solid-surface materials bond best to their own solvent-based adhesives, not silicone.
For marble countertops and granite countertops, bleed prevention is not optional. Granite is generally less porous than marble (typical water absorption 0.1 to 0.4% versus 0.2 to 1.0% for marble per ASTM C97 [1]), so dark granites rarely show bleed. Light granites like Alaska White or Colonial White are porous enough to stain.
See also our guides on how to clean quartzite countertops and how to clean stone countertops for related porosity and maintenance detail.
How long should you wait after silicone application before exposing the joint to water?
This is where homeowners cause their own problems. They assume "dry to the touch" means cured. It does not.
Neutral-cure silicone is usually dry to the touch in 30 to 60 minutes but reaches full cure depth (for a 3/16-inch bead) in 24 to 72 hours depending on temperature and humidity [3]. Until then, the inside of the bead still holds uncured polymer chains and residual plasticizers. Running water across the joint, warm water especially, mobilizes those compounds straight into the stone.
On a newly installed undermount sink, keep it dry for 48 hours minimum. Cover the bowl with a towel and stick a note on the faucet. Turning on the water the day of installation is gambling with a slab that cost hundreds or thousands of dollars.
For kitchen countertop seams (stone-to-stone), the same 48-hour rule applies before water, and 24 hours before light hand pressure.
Cure time extension factors:
- Beads thicker than 1/4 inch: add 24 hours
- Temperature below 60°F: add 24 to 48 hours
- Humidity below 30%: add 12 to 24 hours
- Silicone-latex hybrids: skin fast but cure fully slow, sometimes up to 7 days
What do professional fabricators do differently to prevent silicone bleed?
Most bleed problems that come up in fabrication forums and at trade events trace to three trade habits that get skipped under time pressure: sealing before the job, product selection, and cure-time enforcement.
High-volume shops running white marble usually keep a shop standard: seal every sink edge in the shop before delivery, not on-site. The sealer gets a full 24 hours to cure in a controlled space. When the slab reaches the install, the bleed barrier is already in place.
Shops that track material costs and waste know a single bleed callback costs more in labor, remediation, and reputation than any product they saved. Software like SlabWise tracks job costs and flags material specs per job type, so sealer application becomes a required line item on white-stone jobs instead of a judgment call left to the installer.
Professional installers also run smaller beads than DIYers. A bead twice as wide as it needs to be doubles the mass of uncured material against the stone and doubles the bleed risk. Precision beats volume.
The best fabricators test products on offcuts of the actual stone before the real job. Got a scrap of the same Calacatta slab? Put a bead of your chosen silicone on an unsealed piece and a sealed piece, then check both at 24 hours. That five-minute test has saved a lot of expensive slabs.
Are there alternatives to silicone for light-colored stone joints?
Yes, and for some joints they are the better choice.
Epoxy adhesives and joint fillers (Akemi, Tenax, Integra Adhesives) bond stone to stone or stone to undermount sinks with near-zero bleed risk. They cure chemically rather than through moisture and carry no plasticizers. The trade-off is rigidity. On seams with any movement (near dishwashers, on islands that vibrate, anywhere the cabinet isn't dead rigid), a stiff epoxy joint can crack over time.
For countertop installation where the sink joint needs some flex, silicone is still the practical standard, but you can use epoxy for the structural bond and a thin silicone skin at the visible edge. This hybrid shows up a lot in high-end marble work.
Pigmented caulks in stone colors exist for seam filling, but most are silicone-latex hybrids with the highest bleed risk of any product. I would not put them on light stone.
Color-matched epoxy grouts (Laticrete Spectralock, Mapei Kerapoxy) work for thin grout joints between tiles, not slab seams. For slab applications the joint-width requirements rule them out.
Frequently asked questions
How long does it take for silicone bleed to become a permanent stain in marble?
It depends on the marble's porosity and the silicone type. On unsealed soft marble like Carrara, plasticizer can penetrate deep enough to be very hard to remove within 24 to 48 hours. On denser sealed marble, you may have a week or more before the stain locks in. Assume you have 24 hours to act before serious remediation is needed.
Can I use regular caulk from the hardware store on my white marble countertop?
Not without real risk. Most hardware-store caulks are acetic-cure silicone or silicone-latex hybrids, both high bleed risks on light stone. If you use one anyway, at minimum apply a penetrating stone sealer 24 hours ahead, run the smallest bead you can, and tape both sides of the joint. Better to buy a neutral-cure stone silicone for $15 and skip the callback.
Does sealing my countertop with a topical wax prevent silicone bleed?
No. Wax and other surface coatings sit on top of the stone and never fill the internal pore structure. A penetrating impregnating sealer is what blocks plasticizer migration. Topical wax near a silicone joint can make things worse by creating a barrier that traps oil against the stone surface instead of letting it evaporate.
What is the best neutral-cure silicone for undermount sinks in white quartzite?
Laticrete Latasil, Mapei Ultracolor Plus (neutral-cure version), and dedicated stone silicones from Bostik or GE Advanced (neutral-cure labeled) all perform well. Look for the words 'neutral cure' and '100% silicone' on the label. Confirm it is not a silicone-latex hybrid. Avoid anything that smells strongly of vinegar when applied; that is acetic cure.
Will silicone bleed come out if I use bleach or hydrogen peroxide?
Bleach does not remove oil-based stains and will not pull plasticizer from stone. Hydrogen peroxide can lighten some organic stains in marble but also etches the calcite surface, leaving a dull spot. Neither works for silicone bleed. Use an oil-drawing poultice made from diatomaceous earth or kaolin clay with acetone, as the Marble Institute of America recommends.
How do I prevent bleed at the backsplash-to-countertop joint on a white marble surface?
Seal the countertop and backsplash stone within one to two inches of the joint, let the sealer cure 24 hours, tape both sides, use a neutral-cure stone silicone, run the smallest bead that fills the joint, tool it concave, and pull tape within 5 minutes. Keep the area dry for 48 hours. This joint is lower risk than the sink joint because it sees less water, but the process is the same.
Can I remove old silicone and re-apply to fix a bleed stain?
Removing and replacing the silicone stops future bleed but does not fix an existing stain. Address the stain separately with a poultice or oil-stain remover before you re-apply. Clean the joint with isopropyl alcohol, let it dry completely, re-seal the exposed stone, and apply fresh neutral-cure silicone. Cure for 48 hours before water exposure.
Does color-matched silicone for gray or white veining reduce the appearance of bleed?
Color-matched silicone hides the bead itself but does nothing to prevent bleed. The stain spreads into the surrounding stone, not within the bead. Many color-matched options are silicone-latex hybrids, which raise bleed risk. If you want a neutral-cure option in a lighter color, some makers offer white or grey neutral-cure stone silicone; check Laticrete or Mapei product lines.
How is silicone bleed different from water staining or efflorescence on stone countertops?
Silicone bleed leaves an oily, translucent dark shadow that does not wipe off with water and has diffuse edges. Water staining or mineral deposits (efflorescence) leave white chalky rings or crusty deposits that usually wipe away with diluted acid. If your stain is dark and oily near a silicone joint, it is almost certainly bleed. Efflorescence appears white, not dark.
Is silicone bleed more of a risk on honed marble than on polished marble?
Yes, noticeably. Polishing compresses and partially closes marble's surface pores, creating a mild physical barrier. Honed or leathered finishes leave more open pore structure exposed. Honed white marble is much more vulnerable to bleed and needs extra sealer coats near joints. Two coats applied 24 hours apart is a reasonable minimum for honed Carrara near a sink.
What temperature should stone be when I apply silicone to avoid bleed?
Between 65°F and 80°F is the practical target. Below 60°F, cure slows dramatically and the bleed window stretches by days. If the slab is cold from transport or a cold shop, warm the area near the joint gently with a low-heat gun for 30 to 60 seconds before application. Don't overheat; stone can crack under rapid thermal stress.
Will applying too much sealer cause its own bleed or staining on marble?
Yes. Excess penetrating sealer that can't fully absorb leaves a residue that dries cloudy or sticky on the surface. Apply sealer in thin coats, wipe off all excess within the working window on the label (usually 5 to 15 minutes), and buff dry. One well-applied coat beats two sloppy ones.
How do fabricators quote jobs with special silicone requirements without underpricing the work?
The material cost gap between generic acetic-cure and professional neutral-cure stone silicone is a few dollars per tube, but the labor for proper sealing, taping, and cure monitoring adds real time. Quoting software that builds material and process specs into job templates captures these costs without relying on someone remembering to add them for each white-stone job.
Sources
- ASTM International, ASTM C97/C97M Standard Test Methods for Absorption and Bulk Specific Gravity of Dimension Stone: Water absorption rates for marble (roughly 0.2 to 1.0% by weight) and granite (roughly 0.1 to 0.4%) per standardized ASTM C97 dimensional stone testing
- Marble Institute of America (MIA+BSI), Care and Cleaning for Natural Stone Surfaces: Water-drop bead test for sealer adequacy; poultice method using diatomaceous earth or kaolin clay with solvent for oil stain removal from stone
- Dow, DOWSIL 795 Silicone Building Sealant Product Data Sheet: Neutral-cure silicone cure rate affected by temperature (optimal 40°F to 100°F, fastest near 77°F) and humidity; typical tack-free time 30 to 60 minutes, full cure 24 to 72 hours depending on bead size and conditions
- Natural Stone Institute (formerly MIA+BSI), Dimension Stone Design Manual: Engineered quartz surfacing is roughly 90 to 93% ground quartz bound in polyester or acrylic resin, giving a denser, less porous matrix than natural dimension stone
- Marble Institute of America (MIA+BSI), Dimension Stone Design Manual: Stone sealers and impregnators for dimension stone applications, including fluoropolymer and silicone-based penetrating sealers; sealer selection and application guidance
- Laticrete International, Latasil Technical Data Sheet: Neutral-cure 100% silicone sealant rated for natural stone applications including marble, granite, and quartzite; recommended for undermount sink joints and backsplash-to-countertop joints
- Mapei, Ultracolor Plus FA Technical Data Sheet: Neutral-cure silicone and grout products rated for natural stone; product formulations designed for reduced staining risk on light-colored porous substrates
- Natural Stone Institute (formerly MIA+BSI), Fabrication and Installation Manual: Professional fabrication standards for sealing stone prior to silicone application; sink cutout edge sealing procedures for undermount installations
- StoneTech (DuPont), BulletProof Sealer Technical Data Sheet: Fluoropolymer penetrating sealer for natural stone; application rate, cure time, and water-drop test for verifying adequate sealer coverage prior to silicone work
Last updated 2026-07-10