TL;DR
- For most stone backsplash tile, white polymer-modified thinset mortar is the right adhesive.
- It bonds to drywall, cement board, and tile backer, tolerates moisture, and won't shrink or yellow.
- Mastic works only in dry areas and is a bad idea for natural stone.
- Epoxy handles problem surfaces but costs more and sets fast.
- Budget $0.50 to $2 per square foot for adhesive alone.
What adhesive do professionals actually use for stone backsplash?
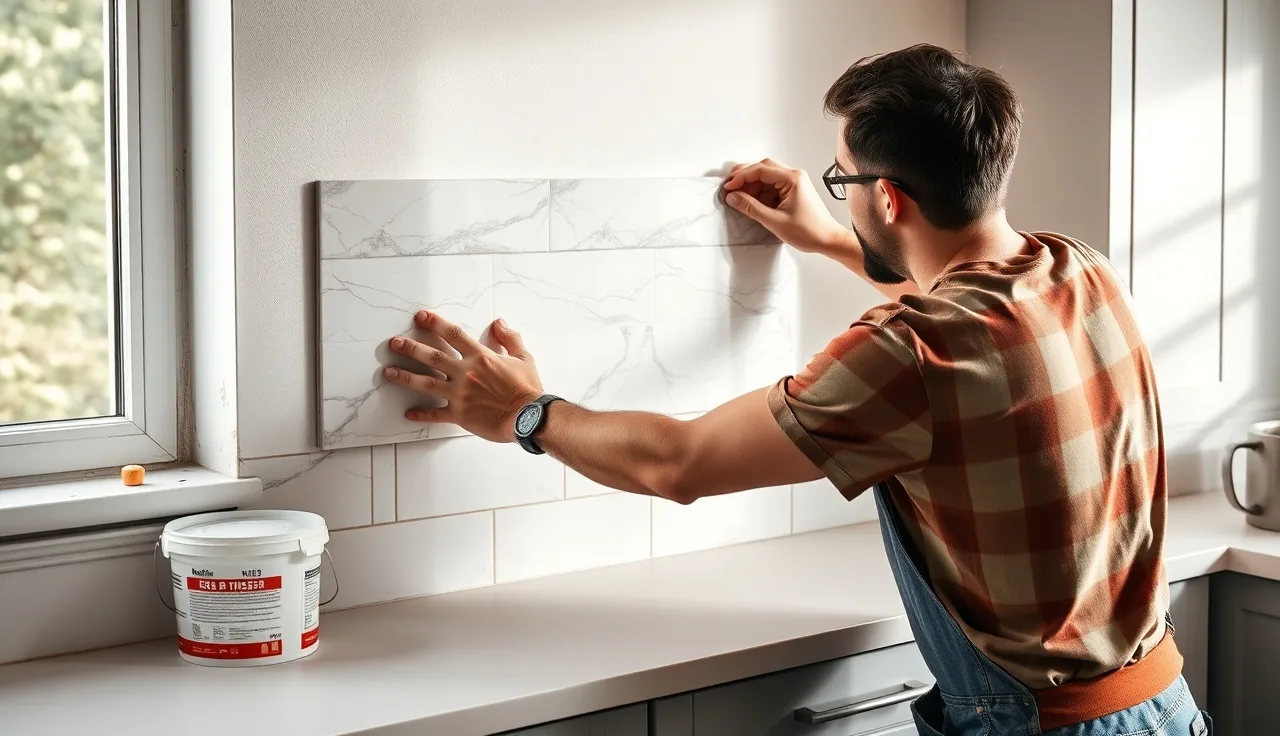
Polymer-modified thinset mortar. That's the answer nine times out of ten, and the reasons are practical. It bonds to cement board, drywall, and tile backer, it cures without shrinking, and it shrugs off the humidity a kitchen wall lives with every day. Most tile setters mix a white thinset (not gray, because gray bleeds through translucent stones like marble and onyx) to a peanut-butter consistency and go.
The trade recognizes three adhesive families for backsplash work: Portland cement-based thinset, organic mastic, and two-part epoxy. Each has a real use. Picking the wrong one is the most common mistake on a DIY install. When a tile pops off the wall six months later, the culprit is almost always mastic used somewhere it never belonged.
The ANSI A108/A118 standards published by the Tile Council of North America are the reference everyone points to. TCNA's Handbook for Ceramic, Glass, and Stone Tile Installation spells out which adhesive matches which substrate and exposure. [1] These standards aren't building code in most places, but professional installers treat them as gospel, and your tile warranty usually demands compliance.
What is thinset and why is it the standard for natural stone?
Thinset is Portland cement, sand, and a polymer additive, either dry-blended into the bag or added as a liquid latex admix. The polymer makes the cured bond flexible, which matters because stone and substrate expand and contract at slightly different rates as temperatures shift. A brittle bond cracks. A flexible one gives a little and holds.
For natural stone, TCNA recommends a large-format or medium-bed white thinset when the stone is translucent or light-colored. [1] The white cement base keeps gray from telegraphing through marble, quartzite, or lighter travertine. Installing dark granite or slate? Gray thinset is fine and usually cheaper.
Mixing ratio matters more than most DIYers expect. Too wet and the thinset sags. Too dry and it won't grab. Follow the manufacturer's slake time, usually 5 to 10 minutes of rest after the first mix before you remix and use it. Mapei, Laticrete, and Custom Building Products all print exact water-to-powder ratios on the bag. [2][3]
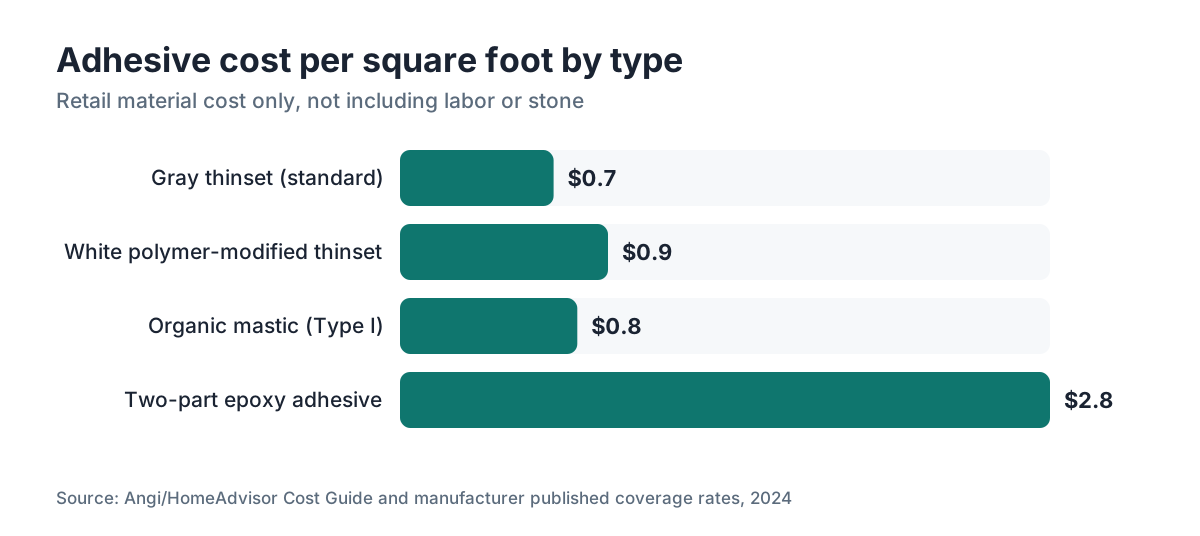
A 50-pound bag of quality polymer-modified white thinset runs $25 to $50 and covers roughly 40 to 60 square feet at a standard 3/16-inch notch depth. Call it $0.50 to $1.25 per square foot for the adhesive alone. [4]
Can you use mastic adhesive on a stone backsplash?
You can, with real restrictions. Mastic is a premixed organic adhesive that comes in a bucket, needs no mixing, and grabs fast, which is exactly why DIY installers reach for it. The catch: mastic stays water-soluble until fully cured, and it never completely loses its sensitivity to prolonged moisture. TCNA says organic adhesive (Type I mastic) is not suitable for wet or consistently damp areas. [1]
In a kitchen, the wall behind and above a sink counts as a damp area. Cooking steam hits a backsplash daily. Put mastic there and the bond can soften, letting tiles pop over 12 to 24 months. This isn't hypothetical. It's one of the most common backsplash callbacks tile contractors see.
Mastic also has a bond-line thickness limit. It can't fill voids behind uneven stone, so a wall that isn't flat or stone that varies in thickness leaves you with hollow spots. Hollow spots crack and pop.
A strictly dry backsplash (a butler's pantry, a wine room, a stretch of wall far from any water) on a flat substrate is the one place mastic works acceptably. No professional would specify it for a kitchen backsplash, and it fails the ANSI A108.4 standard for wet areas outright. [1]
When should you use epoxy adhesive for a stone backsplash?
Epoxy is the right call in a few specific spots: a substrate that's hard to bond to (old ceramic tile, metal, glass), a job that needs maximum chemical resistance (a lab or commercial kitchen), or a schedule that needs faster return-to-service than thinset gives you.
Two-part epoxy tile adhesive reaches very high bond strength, often 2,000 PSI or more in shear, against roughly 200 to 300 PSI for standard thinset. [5] A vertical kitchen backsplash puts almost no load on the adhesive once it's up, so that extra strength is mostly wasted. The higher cost and the short working time (some epoxies give you 20 to 30 minutes before they start to set) aren't worth it unless you've got a genuine problem surface.
For a standard stone backsplash on a clean substrate, epoxy is overkill. When a fabricator installs a single slab section of stone (say a full-height panel behind a range), construction-grade or neutral-cure silicone often beats epoxy because it allows more differential movement. That's a different animal from tile-based backsplash, and the next section covers it.
What about installing a full stone slab as a backsplash, not tile?
A full stone slab backsplash, cut by a fabricator from the same material as the countertop so everything matches, doesn't go up with thinset the way tile does. The panels are large, heavy, and usually thicker than tile (3/4 inch versus 3/8 inch), and that changes everything about how they're set.
Fabricators typically combine two adhesives here. Construction-grade or neutral-cure silicone goes on the panel back in vertical ribbons or dabs (not a full spread, so the panel can move a hair), and a color-matched two-part epoxy handles the joints and edges where panels meet each other or the countertop. Silicone stays flexible for good. That matters, because a heavy stone panel locked rigidly to drywall can crack the wall or the stone when either one moves.
Some shops use a medium-bed thinset for thinner slab panels, but they add mechanical support (small shelf brackets, temporary wedges, or ledger boards) while it sets, because thinset takes 24 hours to build real strength and a heavy panel will slide long before then.
Getting a fabricator quote on a full slab backsplash? Ask exactly what adhesive system they use and how they handle the joint at the countertop. A good shop answers without blinking. Fabrication software like SlabWise helps shops track material yield and quote backsplash panels cut from the same remnant slab, which is usually where the savings hide.
Does the type of stone change which adhesive you need?
Yes. Stone isn't one material. Porosity, thickness variation, and color all steer the adhesive choice.
Marble and limestone are porous and light, so gray thinset bleeds through. White polymer-modified thinset is the requirement. Marble also needs a non-staining adhesive, so skip formulations with high sulfur content, which can yellow the stone over time. [6]
Granite is denser and usually darker, so gray thinset works fine. Same for slate and most dark quartzites. See our guide to granite countertops for more on how granite behaves in a kitchen.
Travertine carries natural voids (the holes are part of the look). Unfilled travertine needs a thinset that won't squeeze up through those holes. A non-slumping large-format thinset applied with a smaller notch trowel cuts that risk. Filled travertine installs more like standard tile.
Quartzite runs denser than marble but goes translucent in its lighter varieties. White thinset is the safer bet. For upkeep after installation, see how to clean quartzite countertops.
Engineered stone (Cambria and other quartz-based products) is non-porous and dimensionally consistent, which makes it the easiest to bond. Standard gray thinset works, though check whether the manufacturer specifies otherwise. See our Cambria countertops guide for material-specific guidance.
What substrate does the stone backsplash go on, and why does that matter?
The substrate is the wall behind the stone, and it decides whether any adhesive holds for years or months. Thinset bonds best to cementitious surfaces: cement board, glass mat gypsum tile backer (like DensShield), or a mud-set scratch coat. These share a chemistry with Portland cement thinset, so the bond is strong and lasts.
Painted drywall is the substrate you'll meet in most existing kitchens. Standard thinset bonds to it, but the paint layer is the weak link. If that paint wasn't primed and stuck well to the drywall paper, the tile can peel the paint clean off the wall instead of failing at the thinset. Many installers skim painted drywall with a bonding primer (Mapei's ECO Prim Grip or Laticrete's 254 Platinum) before tiling. [2][3]
Existing tile is another common one. You can tile over tile when it's flat, fully bonded, and out of a chronic wet area. Use polymer-modified thinset, or epoxy for the difficult surfaces. TCNA's handbook covers tile-over-tile in method B415. [1]
Glass mosaic or metal backsplash sheets want epoxy or a white non-sag thinset with a very fine notch trowel (a 3/16-inch V-notch is typical). Gaps behind mesh-mounted mosaics fill fast, so work in small sections.
How much adhesive do you need for a backsplash, and what does it cost?
A standard kitchen backsplash runs 15 to 30 square feet, the strip between countertop and upper cabinets on one wall, usually 18 inches tall. A full kitchen runs 30 to 60 square feet depending on layout.
Here's a rough cost breakdown by adhesive type at retail pricing:
| Adhesive Type | Approx. Retail Cost | Coverage per Unit | Cost per Sq Ft |
|---|---|---|---|
| Polymer-modified white thinset | $25-$50 per 50-lb bag | 40-60 sq ft | $0.50-$1.25 |
| Gray thinset (standard) | $18-$35 per 50-lb bag | 40-60 sq ft | $0.40-$0.90 |
| Organic mastic (Type I) | $20-$40 per gallon | 40-50 sq ft | $0.50-$1.00 |
| Two-part epoxy tile adhesive | $40-$90 per unit | 20-40 sq ft | $1.50-$4.00 |
| Neutral-cure silicone (slab panels) | $8-$15 per 10-oz tube | 10-15 lin ft | varies |
Those are material costs only. Professional installation of a stone backsplash runs $10 to $25 per square foot for labor, on top of the stone itself, which swings widely by type. [4]
On a full countertop installation that includes a matching backsplash, ask for a line-item quote on adhesive and setting materials. Shops using digital quoting tools can break it out. The ones that don't tend to bury it in a vague "installation" line.
What is the right way to apply thinset for a stone backsplash?
Technique matters as much as product. The target is what the trade calls 95% mortar coverage: pull a freshly set tile back off the wall and 95% of its back face should show thinset contact. Voids behind the tile mean cracks, hollow sounds, and eventual failure.
Here's the process. Apply thinset to the wall with the flat face of the trowel first, pressing hard to key it into the substrate. Comb through with the notched edge held at a steady 45-degree angle. Press the tile into the ridges and shift it slightly back and forth (a quarter-inch or so, not a full slide) to collapse the ridges and spread the coverage. For stone tiles 12 inches or bigger, back-butter the tile too: spread a thin coat on the back before pressing it to the wall.
Notch trowel size controls how much adhesive lands. For 4x4 or subway-style backsplash tile, a 3/16-inch V-notch or square-notch works. For 12-inch-plus stone, step up to a 1/4x1/4 or 3/16x5/32-inch square notch. Bigger tile, more coverage, and back-buttering matters more.
Work time for thinset runs 30 to 45 minutes once it's on the wall before it skins over. In a hot, dry kitchen that can drop to 20. If a skin forms, scrape it off and lay fresh material. Bonding to skinned thinset is one of the leading causes of tile failure. [7]
What can go wrong, and how do you fix a stone tile that pops off?
Stone tiles pop off for a handful of reasons you can name: wrong adhesive for the substrate or moisture level, thin coverage (bonded on two corners and nothing else), tiling over a dusty or oily surface, or differential movement against a substrate that wasn't rigid enough.
One tile down? The fix is simple. Scrape every bit of old adhesive off the wall and the back of the tile. Clean both surfaces. If the original was mastic and you're near a sink, switch to thinset for the repair. Butter on fresh thinset, reset the tile, and prop or tape it while it cures. Give it 24 hours minimum before grouting, 48 for heavier stone.
Multiple tiles failing points to a systemic problem: an inadequate substrate, like painted drywall that wasn't primed, or greenboard that got wet and lost its integrity. Now you're removing the run, repairing or replacing the substrate, and re-tiling. It's expensive and disruptive, which is the whole argument for getting adhesive and substrate right the first time.
For how stone behaves once it's up, our guide on how to clean stone countertops covers the porosity and surface chemistry that apply to backsplash maintenance too.
Are there any VOC or safety concerns with these adhesives?
Real question, especially for a DIYer working in an occupied kitchen. The answer depends on the product.
Thinset mortar is low-VOC and releases minimal organic compounds. The hazard is the Portland cement itself: dry powder is an irritant, and prolonged skin contact with wet thinset can cause cement burns. Wear gloves, a dust mask when dry-mixing, and wash any skin contact promptly. OSHA's Silica Standard (29 CFR 1926.1153) covers any work that kicks up respirable crystalline silica dust, including cutting stone or mixing large batches of cement-based product. [8]
Some organic mastic formulations contain solvents. Water-based mastics run lower on VOCs, but solvent-based versions (less common now) can off-gas hard in a closed room. Read the product's safety data sheet, which manufacturers must supply under OSHA's Hazard Communication Standard (29 CFR 1910.1200). [9]
Two-part epoxy carries the biggest VOC and skin-sensitization concerns. The hardener (usually an amine) is a known sensitizer, so repeated exposure can trigger allergic reactions that worsen with each contact. Glove up, ventilate, and follow the SDS to the letter.
California's South Coast Air Quality Management District Rule 1168 sets VOC limits for adhesives and sealants, tile adhesives included. [10] Other states with strong air programs have similar rules. Buy tile adhesive in California and it should already comply, but check the label anyway.
Can a homeowner do this themselves, or should you hire a pro?
Honest take: a subway tile or small-format stone backsplash is a fair DIY project for someone who's done basic home improvement and will do the prep right. The core skills (mixing thinset, back-buttering, cutting around outlets) are learnable in an afternoon of practice on a sheet of cardboard.
Where it gets hard: large-format stone tile, 18 inches or bigger, is unforgiving about flatness. If your wall isn't within 1/8 inch of plumb over 10 feet, the joints look off and big tiles rock before the thinset sets. This is where a professional earns the fee.
Full slab backsplash panels are not a DIY job. Moving, cutting, and bonding a 3/4-inch stone panel that weighs 15 to 25 pounds per square foot takes specialized tools, real experience with how stone behaves, and often a two-person crew. Drop a slab panel and it can take out a countertop. Doing a slab-to-slab countertop-plus-backsplash install? Hire a fabricator. SlabWise's fabricator network connects you with shops that quote both together.
On any stone backsplash, prep is where DIYers underinvest. Cleaning the wall, checking flatness, and choosing the right backer (cement board versus drywall) adds an afternoon and prevents a callback. Don't skip it.
Frequently asked questions
Can I use Liquid Nails or construction adhesive for a stone backsplash?
Construction adhesive like Liquid Nails is built for structural bonding, not tile setting. It bonds inconsistently to wet or humid surfaces, doesn't allow for grout joint alignment, and isn't approved under tile installation standards (ANSI A108). Use polymer-modified thinset instead. Construction adhesive is acceptable only as a supplemental dab for temporary support during slab panel installation, never as the primary bond.
How long does thinset take to dry before I can grout a stone backsplash?
Standard polymer-modified thinset needs a minimum of 24 hours before grouting under typical conditions (70 degrees F, moderate humidity). For heavier stone or large-format panels, 48 hours is safer. High humidity or cold temperatures stretch cure time considerably. The tile should be immovable and produce no hollow sound when tapped before you grout. Grouting too early is a common cause of tile shift and grout cracking.
What thinset should I use for marble backsplash tile?
Use white polymer-modified thinset, not gray. Gray thinset carries dark pigments that bleed through lighter, translucent marble and leave visible discoloration. White thinset also runs lower in sulfur, which prevents the yellowing reaction some marbles develop over time with conventional cement mortars. Mapei Ultraflex LFT White and Laticrete 254 Platinum White are commonly specified for marble.
Is mastic adhesive OK for a backsplash behind a stove?
No. The wall directly behind and above a stove takes heat and steam daily. Mastic softens under sustained heat and degrades with repeated moisture. TCNA excludes organic mastic from wet and heat-exposed installations. Use a polymer-modified thinset rated for the temperature range, and confirm your stone can handle radiant heat from the range without thermal cracking.
Do I need cement board behind a stone backsplash, or is drywall OK?
Cement board is the better substrate for stone, especially near a sink or stove. It's dimensionally stable, moisture-resistant, and bonds well with thinset. Standard drywall can work in dry areas if the paint is primed with a tile bonding primer, but the paper facing is the weak link. Moisture-resistant drywall (greenboard) is not a substitute for cement board in wet areas, despite the name.
Can I install stone backsplash directly over existing tile?
Yes, if the existing tile is fully bonded (no hollow or loose tiles), flat, and out of a chronic wet area. Grind down any high grout joints for a flat surface. Use polymer-modified thinset, or a two-part epoxy for the most reliable bond. The added thickness (typically 1/4 to 3/8 inch) will slightly recess your electrical outlets, which may require outlet extender boxes to meet code.
What adhesive is used for a full stone slab backsplash versus tile?
Fabricators typically run neutral-cure silicone in ribbons on the panel back, with color-matched two-part epoxy at the joints where panels meet. This bonds the heavy panel securely while still allowing slight movement. Many shops add temporary ledger boards or clips to hold the panel while the silicone cures, since silicone builds strength more slowly than thinset mortar.
How do I remove a stone backsplash tile without damaging the wall?
Score the grout lines first with an oscillating multi-tool and a grout blade. Then use a stiff putty knife or tile chisel with a rubber mallet, working from a grout joint. Apply gentle prying pressure rather than direct blows. If the tile was set with mastic, a heat gun softens the adhesive and eases removal without wall damage. Thinset-set tiles on drywall will often pull the paper facing, so plan to patch before re-tiling.
What size notch trowel should I use for stone backsplash tile?
For backsplash tile up to 6 inches, a 3/16-inch V-notch or 3/16x5/32-inch square-notch gives adequate coverage. For 12-inch stone tile, use a 1/4x1/4-inch square-notch. For large-format stone 15 inches or bigger, a 1/4x3/8-inch square-notch plus back-buttering is typically needed to hit the 95% mortar coverage TCNA standards call for.
Does sealing a stone backsplash affect the adhesive bond?
Seal after installation and grouting, never before. A penetrating stone sealer applied before tiling contaminates the back face of the tile and cuts thinset adhesion sharply. Once the backsplash is installed and the grout has cured (typically 72 hours minimum), apply a penetrating impregnating sealer suited to your stone. For more on stone surface care, see our guide on how to clean stone countertops.
Are there VOC limits on tile adhesives I should know about?
Yes. California's SCAQMD Rule 1168 sets VOC limits for adhesives and sealants, tile adhesives included. Other states with air quality programs have similar rules. For indoor residential use, water-based polymer-modified thinsets are very low VOC. Solvent-based mastics and two-part epoxies run higher and require ventilation. Check the product's safety data sheet before buying, especially for epoxy hardeners, which are skin sensitizers.
Can I use silicone caulk instead of adhesive for a small stone backsplash repair?
Neutral-cure silicone can hold a small or lightweight stone tile in place, but it's no substitute for thinset in a full install. Silicone doesn't grip porous surfaces the way thinset does, it stays permanently flexible (a problem under rigid stone that needs stable support), and it can't bridge voids. For a single replacement tile, use fresh thinset and tape the tile to the wall while it cures.
What is the difference between modified and unmodified thinset for stone?
Unmodified thinset is Portland cement, sand, and water, nothing else. It cures hard but brittle and needs a wet or humid environment to cure right. Polymer-modified thinset adds a latex or acrylic polymer that improves flexibility, adhesion, and shear resistance. For stone tile on a backsplash, modified thinset wins in nearly every case. Unmodified thinset is used mainly in wet-set mud beds or under membranes that require it.
Sources
- Tile Council of North America (TCNA), Handbook for Ceramic, Glass, and Stone Tile Installation: TCNA ANSI A108/A118 standards define adhesive types, substrate requirements, and wet-area restrictions including the exclusion of organic mastic from wet installations
- Mapei Corporation, Technical Data Sheets: Mapei publishes water-to-powder ratios, slake times, and application guidance for polymer-modified thinset mortars including white formulations for marble and light stone
- Laticrete International, Product Technical Datasheets: Laticrete 254 Platinum and related products specify coverage rates, notch trowel recommendations, and bonding primer use for difficult substrates
- Angi (formerly HomeAdvisor), Backsplash Installation Cost Guide: Professional backsplash installation labor ranges from $10 to $25 per square foot; material costs for adhesive run $0.40 to $1.25 per square foot for thinset
- ASTM International, ASTM C482 Standard Test Method for Bond Strength of Ceramic Tile to Portland Cement Paste: Two-part epoxy tile adhesives achieve shear bond strengths of 2,000 PSI or more compared to roughly 200-300 PSI for standard Portland cement thinset
- Natural Stone Institute, Care and Cleaning of Natural Stone: White non-staining thinset is required for light and translucent marble installations to prevent gray bleed-through and yellowing reactions from sulfur compounds
- Custom Building Products, Technical Bulletins: Working time for polymer-modified thinset is typically 30 to 45 minutes; bonding to a skinned thinset surface is a leading cause of tile bond failure
- U.S. Occupational Safety and Health Administration, Silica Standard for Construction 29 CFR 1926.1153: OSHA's Silica Standard applies to construction work generating respirable crystalline silica dust, including cutting stone and mixing cement-based products
- U.S. Occupational Safety and Health Administration, Hazard Communication Standard 29 CFR 1910.1200: Manufacturers are required to provide Safety Data Sheets (SDS) for adhesives and chemical products including tile mastics and epoxy formulations
- South Coast Air Quality Management District, Rule 1168: Adhesive and Sealant Applications: SCAQMD Rule 1168 sets VOC content limits for adhesives and sealants including tile adhesives used in California
- National Tile Contractors Association (NTCA), Reference Manual: NTCA reference manual covers installation methods for large-format stone tile, back-buttering requirements, and proper notch trowel selection by tile size
Last updated 2026-07-11