TL;DR
- Grout a stone backsplash by cleaning joints, mixing unsanded or epoxy grout to peanut-butter consistency, pressing it in at a 45-degree angle, wiping haze within 20-30 minutes, and replacing the countertop-to-backsplash joint with flexible silicone caulk instead of grout.
- Seal porous stone before grouting and again after.
- Budget 2-3 hours for a standard kitchen run.
What makes grouting a stone backsplash different from grouting ceramic tile?
Stone drinks. Glazed ceramic does not. Skip the pre-seal on porous stone and the pigment in your grout soaks straight into the face of the tile, leaving a stain you cannot wash out. That one step, sealing before you grout, separates a clean job from a ruined one.
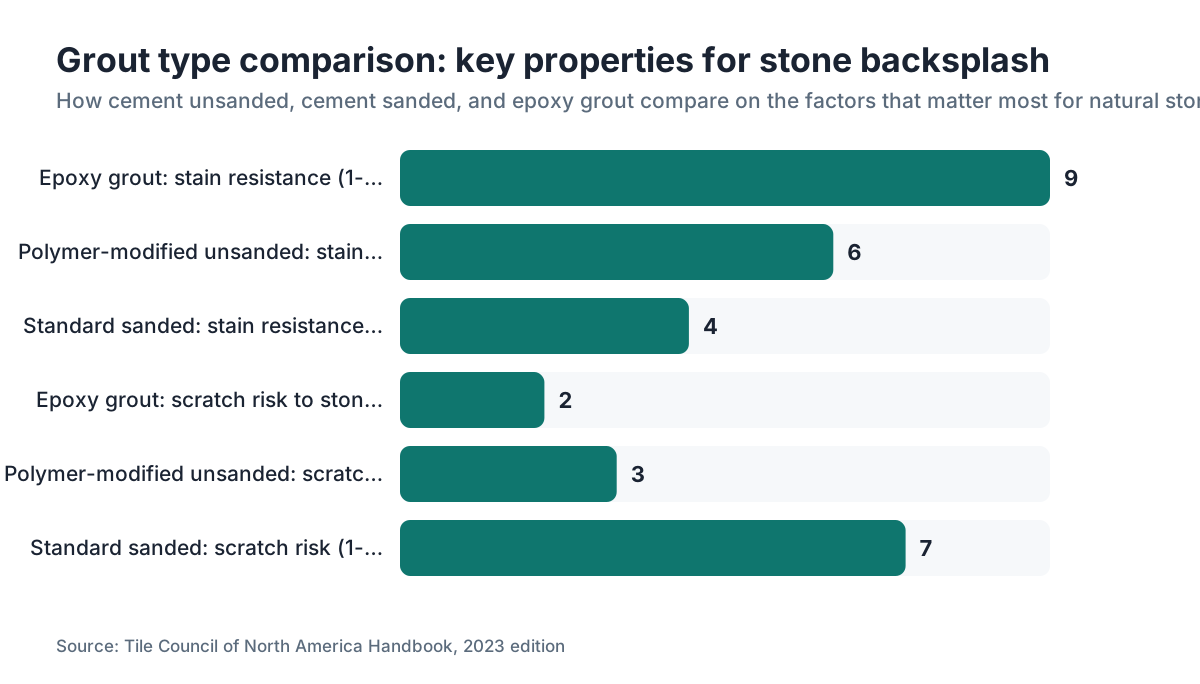
The joint width also matters more with stone. Natural stone tiles are rarely uniform in thickness, so the joints often vary slightly. Unsanded grout is the standard choice for joints up to 1/8 inch. For wider joints, you use sanded grout, but sanded grout can scratch soft stones like marble, travertine, and limestone. For those materials, many fabricators use unsanded grout even at 1/8-inch joints, or they specify polymer-modified unsanded to get a little more body.
Epoxy grout is a third option and the most stain-resistant of all. It costs more, it sets fast, and it needs good ventilation and a clean wipe-down every few minutes, but in a heavy-use kitchen it holds up far better than cement-based grout over a five-to-ten-year span. The Tile Council of North America's Handbook for Ceramic, Glass, and Stone Tile Installation is the industry reference for these decisions; the 2023 edition specifies epoxy grout wherever chemical resistance is required [1].
Here is the part people get wrong. The joint where the backsplash meets the countertop is not a grout joint. It is a change-of-plane joint, and those get silicone caulk, not grout. Grout cracks there within months because the countertop and the wall move at different rates. ANSI A108.01 requires flexible sealant at all changes of plane and changes of substrate [2]. That caulked seam is arguably the most important line in the whole project.
What tools and materials do you need before you start?
Get everything on the counter before you begin. Grout does not wait while you dig through a box, and a half-dried batch is wasted money. Here is what the job needs:
For grouting:
- Unsanded grout (joints under 1/8 inch) or sanded grout (joints 1/8 to 1/2 inch)
- Grout float with rubber face
- Two buckets of clean water
- Large cellulose sponges, at least two
- Clean dry cloths or cheesecloth for haze
- Margin trowel for mixing
- Mixing container (plastic bucket or old bowl)
For the countertop caulk joint:
- 100% silicone caulk, color-matched to your grout
- Painter's tape
- Caulk gun
- Damp rag and denatured alcohol for cleanup
For stone protection:
- Penetrating stone sealer (impregnator type, not topical coating)
- Clean lint-free cloths
- Nitrile gloves
People underestimate the sponge count. You need sponges that are barely damp, almost dry, or you drag wet grout out of the joints and thin the fill. Keep at least two large cellulose sponges going. Wring them until almost nothing drips. The water in the bucket clouds fast; change it often.
For a typical 15-square-foot kitchen backsplash with 3/16-inch joints, you will use somewhere between one and two pounds of grout powder. Most bags run 10 or 25 pounds, so buy the smallest bag available unless you have a large area. Leftover grout can harden in the bag if the seal is imperfect, and dried lumps make the next mix inconsistent.
Do you need to seal stone tiles before grouting?
Yes, and for porous stone it is not optional. Marble, travertine, limestone, slate, and most quartzite tiles should be sealed before the grout goes on. Porcelain and ceramic do not need it because the glaze blocks absorption. Natural stone is a different animal.
A penetrating impregnating sealer soaks below the surface and leaves no visible film. Apply it to the face of the tiles per the manufacturer's instructions, which usually call for letting it soak 5-15 minutes, then wiping off the excess before it dries. Most sealers need 1-2 hours before grouting, though some ask for 24. Read the label and follow it. The Natural Stone Institute recommends penetrating impregnating sealers for porous stone tile both before and after grouting [6].
Granite is denser than marble or travertine, but it still benefits from sealing before grouting. Our granite countertops guide covers maintenance in more detail. For quartzite, the pre-grout seal matters even more because quartzite varies widely in porosity depending on how much silica recrystallization happened; our guide on how to clean quartzite countertops breaks down those porosity differences.
Some fabricators tape the edge of each tile and leave only the joint exposed. That works. It is also slow. The impregnating sealer approach is faster and leaves no residue if you wipe it right. On a very porous stone like tumbled travertine, plan on two coats before grouting and one coat after.
How do you mix grout to the right consistency?
This is where most DIY grout jobs go sideways. Too much water makes grout weak and prone to cracking; the TCNA Handbook notes that excess mixing water reduces compressive strength and increases shrinkage [1]. Too little water and you cannot work it into the joints.
The target is thick peanut butter. It should hold its shape on the trowel without slumping, cling to a vertical surface for a few seconds without sliding, and feel slightly stiff when you press it with a finger.
Mix this way:
- Pour the dry grout into the bucket first.
- Add clean water in small amounts, mixing with a margin trowel between each addition.
- Aim for the ratio on the bag label; most cement-based grouts call for roughly 1 part water to 4-5 parts powder by weight, but follow the specific product.
- Once mixed, let it slake (rest) for 5-10 minutes without touching it. This lets the polymer modifiers fully hydrate.
- Stir once more. Do not add water after slaking, even if it looks thick. It loosens up as you work it.
Epoxy grout mixes differently. It comes in two or three parts you combine entirely before use. Work time is short, often 20-45 minutes at 70°F, and shorter in warm rooms. Mix only what you can spread and clean in that window.
Small batches almost always win on a backsplash. Mix enough for one section, finish that section, then mix the next. Grout that sits past its working time stiffens and turns stringy, and you cannot bring it back with water without hurting the final result.
What is the right technique for applying grout to a stone backsplash?
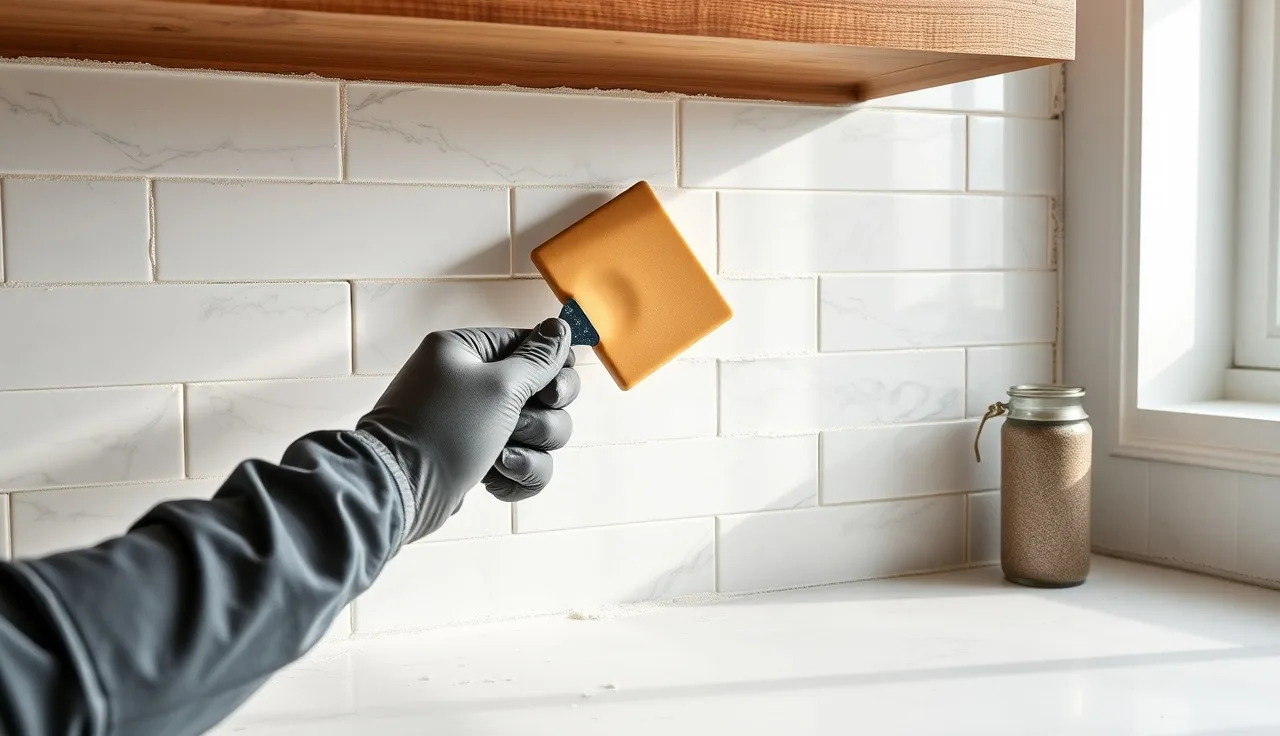
Hold the float at roughly 45 degrees to the tile, press firmly, and sweep grout diagonally across the joints. The diagonal is the trick. Sweep parallel to a joint and the leading edge of the float digs the grout right back out. Diagonal strokes pack the material in from both sides.
Work in sections of 4-6 square feet at a time for cement grout, smaller (2-3 square feet) for epoxy. Press hard enough to feel the grout pack into the joint, but not so hard you gouge soft stone. On textured stone like tumbled slate or split-face travertine, you may need to work grout in with a gloved finger to fill irregular voids.
Once a section is packed, tip the float to a steeper angle, nearly 90 degrees, and scrape off the excess. Pull as much surface grout as you can before it starts to set. Every bit you remove now is cleanup you skip later.
The first wipe matters most. Use a barely damp cellulose sponge and wipe in a circular motion, rinsing and wringing the sponge often. You want the grout film off the tile face without pulling material out of the joints. If the joints look concave after you wipe, the grout is too wet or you wiped too hard. Let it stiffen another 5 minutes and try again.
A haze will stay on the tile face after the first pass. That is normal. Let the grout firm up for 15-30 minutes, then buff the haze off with a dry cloth or cheesecloth. If the haze has hardened too much, a diluted phosphoric acid cleaner (sold as grout haze remover) takes it off, but test it on a scrap of stone first because some acids etch marble and limestone.
Why should you never grout the joint between the backsplash and the countertop?
This is one of the most common installation mistakes, and it fails the same way every time. The countertop and the wall substrate are different materials fastened to different structural members. The countertop may be stone, quartz, laminate, or wood. The wall behind the tile is backer board or drywall. They expand, contract, and settle at different rates.
Grout is rigid when cured. Silicone caulk is flexible. When those two surfaces move relative to each other, which they do from temperature changes, humidity swings, and normal building movement, rigid grout cracks and separates. A cracked joint at the counter-wall line lets water in, which damages the substrate and can grow mold behind the tile. EPA guidance points to water infiltration through failed joints as a primary pathway for mold growth in wall assemblies [9]. ANSI A108.01, the standard governing ceramic tile installation that the industry applies to stone as well, requires a soft joint filled with flexible sealant at all changes in plane and changes in substrate [2].
The fix is simple: leave a 1/8-inch gap at that joint, or if grout got pushed in there by accident, rake it out with a utility knife or oscillating tool before you finish. Tape both sides with painter's tape, run a bead of 100% silicone caulk color-matched to your grout, tool it smooth with a wet finger, and pull the tape while it is still wet. Let it cure 24 hours before it sees water.
For how this joint gets set up from the start, our countertop installation guide covers substrate prep and setting.
How long does grout take to dry and cure, and when can you use the kitchen?
Cement-based grout feels dry to the touch within 1-4 hours depending on humidity and temperature. Dry and cured are not the same thing. Most cement grouts reach initial cure in 24-72 hours and full cure at 28 days, the same curve as concrete. The Portland Cement Association documents that cement-based products reach initial cure in 24-72 hours and full cure at 28 days [8]. The TCNA recommends at least 24 hours before light use and 72 hours before full use in wet or heavy-traffic areas [1].
Epoxy grout cures faster chemically but runs its own schedule. Most epoxy grouts hit functional cure in 24 hours and full chemical resistance in 7 days. Check the product data sheet.
What this means at the counter: you can cook and use the surfaces 24 hours after grouting, but keep the backsplash dry for 72 hours. No running water directly against it, no steam-cleaning nearby, for the first week.
Temperature and humidity swing cure time hard. Below 50°F, cement grout hydration slows dramatically and can stall; the Portland Cement Association documents that same slowdown below 50°F [8]. The TCNA Handbook recommends holding ambient temperature above 50°F for 72 hours after installation [1]. Above 90°F with low humidity, the surface can dry too fast and crack; misting lightly and covering with plastic sheeting helps in hot, dry conditions.
Do you need to seal the grout after it cures, and how do you seal the stone again?
Yes to both, with some nuance.
For cement-based grout on a stone backsplash, a penetrating grout sealer earns its cost. It does not make grout waterproof, but it slows the absorption of oils, wine, sauce, and soap scum dramatically. Apply it after full cure, typically at the 72-hour mark, following the manufacturer's instructions. Most grout sealers are silicone- or fluoropolymer-based and last 1-3 years in a kitchen before they need reapplication.
Epoxy grout does not need sealing. Its density resists staining on its own, which is a big part of why professionals reach for it in commercial kitchens.
The stone tiles themselves should also get a finish coat of sealer after grouting, because the cleaning process may have stripped part of the pre-grout seal. Use the same penetrating impregnating sealer you used before, apply it in thin coats, and wipe off the excess completely. Do not let it pool on the surface or it dries into a cloudy haze that is genuinely hard to remove.
For ongoing care of the stone, our how to clean stone countertops guide covers daily maintenance and resealing intervals that apply just as well to backsplash tile. For marble specifically, our marble countertops guide covers the etching and acid sensitivity that also drive your grout-cleaning product choices.
What are common grout failures on stone backsplashes and how do you fix them?
Cracking is the most common failure. Hairline cracks in grout joints usually trace to one of three causes: the grout was mixed too wet, the joints were too wide for the grout type (sanded versus unsanded), or the substrate is moving. Small cracks can be filled by pressing new grout into the joint with a gloved finger, misting with water, and letting it cure. Larger cracks often signal a structural issue and need the tile inspected to confirm it is still bonded.
Discoloration shows up as dark staining in the grout. Grease staining responds to an alkaline degreaser; food-dye staining is trickier and sometimes needs a poultice. If the grout keeps drinking stains fast, resealing is overdue.
Efflorescence is a white powdery deposit that forms when soluble salts migrate to the surface as moisture evaporates through grout. It is more common outdoors but can show up indoors near leaks. A diluted acid wash (phosphoric or sulfuric acid-based, sold specifically for efflorescence) removes it, but again, test on a hidden area before using acid near marble or limestone.
Grout pulling away at the countertop joint is not a grout failure. It is a sign the joint should have been caulked in the first place. Rake it out, clean with denatured alcohol, and apply silicone caulk. Do not re-grout it.
Here is one spot where fabricators add real value. If your backsplash stone is the same material as your countertop, the quoting and cutting process decides how the two surfaces line up. Software like SlabWise helps fabricators plan slab layouts so the grain and veining of a stone backsplash flows from the counter face upward, which also trims the leftover material that would otherwise be waste.
How do you handle grout around outlets, fixtures, and stone edges?
Outlet boxes in a backsplash are tight quarters. Most electricians set the box flush with the drywall, but once backer board and tile go on, the box face ends up recessed 3/4 to 1 inch. That is a code problem in the US. The National Electrical Code (NEC) Section 314.20 requires that boxes in finished walls have no gap greater than 1/8 inch between the box and the finished surface [3]. If your boxes end up recessed after tiling, you need box extenders before finishing the tile around them.
When you grout near outlets, press grout carefully up to the tile edge around the box opening, but keep it out of the box and off the wiring. A small foam brush beats a float in those tight corners. Let the grout set, then reinstall the cover plates. Use jumbo cover plates (sold as oversized or jumbo) if any tile edge shows.
At stone trim edges and pencil liners, switch to a smaller tool, even a gloved finger, to pack grout neatly. The joint between a decorative liner and the field tile is often only 1/16 inch wide, and the float is too blunt for that.
Inside corners, where two backsplash walls meet at 90 degrees, follow the same rule as the counter-to-wall joint: caulk, not grout. An inside corner is another change-of-plane location where rigid grout cracks. Match the caulk color to the grout and the joint nearly disappears.
What does professional grouting cost versus doing it yourself?
For a typical kitchen backsplash of 15-30 square feet, the material cost for cement-based grout, sealer, and caulk runs $30-80 depending on grout brand and sealer quality. Epoxy grout adds roughly $20-40. Tools, if you do not own them, add another $40-80 for a float, sponges, buckets, and a caulk gun.
Professional grouting as a standalone service is rarely quoted separately. It is almost always folded into a tile installation quote. When it is broken out, labor rates for a tile setter in the US run $40-75 per hour depending on region, based on Bureau of Labor Statistics wage data [4]. A 20-square-foot backsplash typically takes a professional 2-4 hours to grout, haze-clean, and caulk, putting labor at $80-300.
Total installed cost for a stone backsplash (tile, setting materials, grout, and labor) varies widely. The National Kitchen and Bath Association reports that backsplash installation as a budget line averages $800-1,500 for a standard kitchen, though complex stone or large-format tile pushes that higher [5].
DIY grouting is realistic for a careful first-timer on a rectangular, straightforward backsplash. Where it gets hard: tumbled or irregular stone, very small grout joints (under 1/16 inch), and epoxy grout, which demands speed and precise cleanup. If your backsplash stone is expensive, like honed marble or book-matched quartzite, paying a pro to protect that investment beats the labor savings.
How does the type of stone affect your grouting approach?
Different stones want different handling, and getting it wrong is expensive.
Marble is soft and acid-sensitive. Use unsanded grout (sanded scratches the polished face) and skip any acid-based haze remover. Clean grout haze with a pH-neutral cleaner. Seal before and after. The finish on honed marble is especially prone to staining from grout pigment.
Travertine has natural voids that complicate grouting. Filled travertine (pre-grouted at the factory) is simpler; unfilled travertine means you grout those voids as part of the job. Use the same grout for joints and voids for a consistent look, though many designers prefer a grout color that blends with the stone's natural tones rather than fighting them.
Slate and quartzite are generally harder and more acid-tolerant than marble, but their textured, split-face surfaces trap grout in ways that are tough to clean. A grout release product applied before grouting helps a lot. It lays a temporary barrier on the stone face that makes cleanup easier without hurting joint adhesion.
Limestone is close to marble in sensitivity. Dense polished limestone handles grouting reasonably well. Soft, porous limestone is the hardest material to grout cleanly and is probably the strongest case for epoxy grout, which does not leave pigment residue the way cement grout does.
Glass tile mixed into a stone mosaic needs unsanded grout regardless of joint width because glass scratches. In a mixed-material mosaic, the most delicate material in the mix governs your grout and cleaning choices.
Frequently asked questions
Can I use sanded grout on marble or limestone backsplash tile?
You can, but it risks scratching the polished or honed surface. Most tile setters use unsanded grout on marble and limestone regardless of joint width, or a polymer-modified unsanded product for joints up to 3/16 inch. If joints are wider, test sanded grout on a hidden piece first. For tumbled or matte-finish stone the scratch risk is lower, but unsanded is still the safer default.
How long should I wait after setting tiles before grouting a stone backsplash?
Wait at least 24 hours after setting tile before grouting, and longer with large-format tile or a thick mortar bed. The setting mortar or mastic needs to firm up enough that grouting pressure does not shift the tiles. For polymer-modified thinset, 24 hours at room temperature is usually enough. In cold or humid conditions, wait 48 hours. Confirm tiles do not move when pressed before you start.
What color grout should I choose for a natural stone backsplash?
There is no single right answer, but most designers pick a grout color that matches one of the mid-tones in the stone rather than the lightest or darkest shade. Matching the grout closely creates a more continuous, flowing look and hides future staining better than bright white. Contrasting grout emphasizes the tile grid, which can look busy with veined stone. Test a sample before committing to a full batch.
Can I grout a backsplash installed over an existing countertop without removing the countertop?
Yes, and this is the standard situation. The backsplash is tiled above and behind the countertop, and you grout the tile joints in the field normally. The joint where the tile meets the countertop should be caulked with silicone, not grouted. You do not need to remove or disturb the countertop at all to grout and caulk the backsplash above it correctly.
What is the best grout for a kitchen backsplash near the stove?
Epoxy grout is the best performer near a stove. It resists heat, grease, and the steam that collects above a cooktop better than cement-based grout, and it does not need sealing. The tradeoff is cost and working time: epoxy sets fast and must be cleaned off the tile face immediately. If budget limits you to cement grout, use a polymer-modified formula and seal it annually, or more often if you cook heavily.
Why is my grout cracking between the backsplash and the countertop?
That joint should not have grout in it at all. The counter-to-wall joint is a change-of-plane joint where two different substrates meet. Grout is rigid and cracks there because the countertop and wall move at different rates from temperature and humidity. The correct fix is to rake out the cracked grout, clean the joint, and fill it with 100% silicone caulk color-matched to the grout. This is not structural; it is the wrong material in the wrong joint.
How do I remove dried grout haze from natural stone tile?
For most stone, a pH-neutral grout haze remover and a clean dry cloth within 24 hours works well. For stubborn haze on acid-tolerant stone like slate or quartzite, a diluted phosphoric acid haze remover cleans it effectively. Never use acid-based cleaners on marble, travertine, or limestone: acid etches those permanently. For those stones, a non-acid grout haze remover is the only safe option. Test any product on a hidden tile piece first.
Do I need to seal grout on an epoxy grout backsplash?
No. Epoxy grout is inherently non-porous when cured. It does not absorb water, grease, or food dyes the way cement grout does. Applying a grout sealer over epoxy accomplishes nothing and can leave a filmy residue. Save the sealer for the stone tiles themselves if they are porous. Cement-based grout, on the other hand, does benefit from a penetrating sealer applied after full cure.
Can I regrout a stone backsplash without removing the old grout completely?
You can apply new grout over old in shallow, stable joints, but it is not ideal. New grout over old tends to be thin, may not bond well, and can crack or pop out. If the existing grout is cracked, crumbling, or deeply stained, remove it with an oscillating tool and a grout removal blade to roughly 2/3 of the tile thickness. Then clean the joint thoroughly before applying fresh grout. Full removal gives a far more durable, better-looking result.
How much grout do I need for a 20-square-foot stone backsplash?
For a 20-square-foot backsplash with 3-by-6-inch subway-style stone tile and 1/8-inch joints, you need roughly 1.5 to 2 pounds of grout. Smaller tiles with more joints, or wider joints, raise that amount. Most grout manufacturers publish a coverage calculator on their product pages. Buy a 10-pound bag if available, which gives you plenty with material for touch-ups and future repairs, and seal the remainder tightly for storage.
Should the grout joint at the inside corner where two backsplash walls meet be grouted or caulked?
Caulked. Inside corners are change-of-plane joints, the same as the counter-to-wall joint. Grout in an inside corner almost always cracks because the two walls flex slightly relative to each other. Use silicone caulk color-matched to your grout. Tape both sides, run a smooth bead, tool it with a wet finger, and pull the tape while wet. The joint will look nearly identical to a grouted joint but flexes rather than cracks.
How do I keep grout from staining my stone backsplash during installation?
Apply a penetrating impregnating sealer to the tile faces before grouting and let it cure per the manufacturer's schedule, typically 1-24 hours. For very porous stone, two coats help. Work in small sections, wipe grout off the tile face promptly with a barely damp sponge, and never let grout sit on the surface for more than 20-30 minutes. A grout release product applied before installation is a further safeguard on textured or very absorbent stone.
Is unsanded or sanded grout better for a mosaic stone backsplash?
Most mosaic backsplashes have joints under 1/8 inch, which calls for unsanded grout. Unsanded is also required if any tiles in the mosaic are glass or polished stone that sanded grout could scratch. If the mosaic includes wider grout lines by design, polymer-modified unsanded grout with added body handles joints up to about 3/16 inch. Check the specific grout product's joint width range on the bag before mixing.
Sources
- Tile Council of North America, Handbook for Ceramic, Glass, and Stone Tile Installation (2023 edition): TCNA specifies epoxy grout where chemical resistance is required, recommends maintaining ambient temperature above 50°F for 72 hours after installation, and notes that excess mixing water reduces compressive strength and increases shrinkage in cement-based grout.
- American National Standards Institute, ANSI A108.01, General Requirements for Interior Installation of Ceramic Tile: ANSI A108.01 requires flexible sealant at all changes in plane and changes in substrate, prohibiting rigid grout at those joints.
- National Fire Protection Association, NFPA 70 National Electrical Code (NEC), Section 314.20: NEC Section 314.20 requires that electrical boxes in finished walls have no gap greater than 1/8 inch between the box and the finished surface.
- U.S. Bureau of Labor Statistics, Occupational Employment and Wage Statistics, Tile and Stone Setters (47-2044): BLS data shows tile and stone setter hourly wage rates ranging approximately $40-75 per hour including benefits, varying by region.
- National Kitchen and Bath Association, Kitchen and Bath Market Index: NKBA reports that backsplash installation as a budget line averages $800-1,500 for a standard kitchen.
- Marble Institute of America (now Natural Stone Institute), Natural Stone Reference Manual: Natural Stone Institute guidance recommends penetrating impregnating sealers for porous stone tile before and after grouting, and specifies unsanded grout for polished marble to avoid surface scratching.
- Portland Cement Association, Design and Control of Concrete Mixtures: Portland Cement Association documents that cement-based products reach initial cure in 24-72 hours and full cure at 28 days, with temperature below 50°F significantly slowing hydration.
- U.S. Environmental Protection Agency, Mold and Moisture in Buildings: EPA guidance identifies water infiltration through failed joints as a primary pathway for mold growth behind tile walls, supporting the need for properly sealed change-of-plane joints.
- International Code Council, International Residential Code (IRC), Chapter 8 Wall Construction: IRC requires moisture-resistant backer board or equivalent behind tile in wet areas, relevant to proper substrate preparation before backsplash tile installation.
Last updated 2026-07-11