
TL;DR
- Templating an apron front sink countertop starts with the sink's front face.
- Capture that position first, then work backward to lay out the deck, the cutout, and any corbel support.
- The sink face sets every downstream number.
- Miss it and the stone cracks at the cutout, or the sink sits proud of the cabinet face.
What makes apron front sinks different to template?
A standard undermount sink is a hole in a slab. An apron front sink, sometimes called a farmhouse sink, is a different animal. Its front face replaces part of the cabinet face frame, so the countertop has to be cut back to let that sink face push forward or sit flush with the frame. That one geometric fact changes almost every dimension you capture on the visit.
With a typical undermount, the deck overhangs the cabinet box and the sink drops in from the top. With an apron front sink, the cabinet is cut to accept the sink body, and the countertop sits on the sink's deck rails or ledges. The stone gets notched at the front edge so it lands flush with, or just behind, the sink's top lip. Some sinks have a flat deck ledge. Others have a curved or angled reveal. You need the actual sink on hand, or at least the manufacturer's rough-in drawing with dimensional tolerances, before you show up to template.
Weight is the other big difference. A standard undermount cutout spans dead air, and the deck carries itself across the opening. An apron front sink holds the stone from below at the deck ledge, but the front lip of the stone can hang unsupported over the sink face if nobody built a support ledge or set corbels. Skip that and you get a callback when the front edge cracks along the relief cut months later.
What tools do you need before you start templating?
You can template with cardboard and a hot-glue gun. Most production shops use 1/4-inch luan plywood strips or a digital system. Either way the tool list is short.
For analog templating: luan strips or stiff cardboard roughly 3 inches wide, a hot-glue gun with plenty of sticks, a sharp pencil and a fine marker, a good tape measure (lock the blade against the hook), a combination square, a scribing compass, and a level. Bring both a torpedo level and a 4-foot level.
For digital templating: a laser system like a Proliner or LT-55 plus your usual reference sticks. Digital cuts transcription error, but it still needs an operator who understands apron sink geometry. The machine captures what you tell it to capture, nothing more.
Beyond the templating gear, bring a printed copy of the sink manufacturer's rough-in spec sheet, a ruler marked in both inches and millimeters, and a phone that shoots sharp photos. Shoot every measurement setup so you have a record if a dispute comes up later.
One thing most guides skip: bring a straight stick or a pair of winding sticks to check whether the cabinet top is coplanar. Apron front sink cabinets are often custom or modified stock, and the top rails may not sit flat to each other. A countertop that leaves the shop dead flat will rock on a cabinet that isn't. Catch it at templating and you save a second trip.
How do you find the sink's correct front-face position?
This is the measurement that controls everything else. Spend the extra time here.
Set the sink in the opening dry, no adhesive or clips. Confirm it sits level side to side and front to back. Shim if the cabinet floor isn't flat. Then measure from the finished face of the sink's front apron to the finished face of the cabinet face frame or door edge. Most designers spec the sink face flush with the frame or 1/16 inch proud, but read the job drawings before you assume anything.
With the sink positioned, mark its exact front-face location on the inside walls of the opening. Sharp pencil, top of both side panels, left and right. Those marks are your datum. Everything else references back to them.
Next, measure from the front of the cabinet top rail (or wherever the countertop front edge lands) to the back of the sink's deck ledge rail. That gives you the deck setback: how far back from the countertop front edge the stone cutout begins. Record it in inches and millimeters, because some sink specs are metric.
For stone, the number that matters most is the distance from the countertop front edge to the front edge of the cutout opening. If the top overhangs past the cabinet face, add that overhang to your measurement off the cabinet rail. A classic screwup: measuring from the face frame when there's a 3/4-inch overhang, then cutting the stone 3/4 inch short of where it belongs.
Write down four numbers before you leave. Front overhang. Front edge of countertop to front edge of cutout. Cutout width (sink deck width plus clearance). Cutout depth, front to back. Cross-check all four against the manufacturer's rough-in sheet on site.
How do you lay out the sink cutout on the template?
With the sink still in place, transfer the cutout dimensions to your template material. Using luan strips, build the perimeter of the countertop first, then bridge the sink area with cross-members.
Most fabricators cut the template to represent the actual stone edge at the cutout, not the centerline of the opening. Mark the reveal. If the sink deck rail is 7/8 inch wide and you want the stone to overhang it by 3/16 inch, the cutout edge in the stone sits 3/16 inch inside the rail edge. Some shops run a zero reveal where the stone edge lines up exactly with the inside of the rail. Check what the installer and designer expect.
Draw the cutout shape right on the template. Apron front sinks are almost always rectangular at the deck cutout, single or double bowl. Mark corners with a compass or small square. Some sinks carry a small radius at the inside corners of the deck ledge. Mark that radius if it's there. Cut a square inside corner where the sink has a 1/4-inch radius and you'll chip stone on the first test fit.
Label every edge of the cutout: FRONT, BACK, LEFT, RIGHT. Label the reveal dimension on each edge too. Thirty extra seconds. It stops a shop error when someone else reads your template cold.
How do you account for the apron face notch at the countertop front edge?
Here's where apron front templating splits hard from standard work.
The front edge of the stone has to step back to clear the sink face. Fabricators call this the apron notch, or the front relief. It runs only across the width of the sink, not the full length of the countertop. On either side of the sink, the counter returns to its normal front edge profile.
To template the notch, measure the exact width of the sink's front apron face, left to right. Add 1/16 inch to each side for a clearance gap so the stone doesn't bind on the sink face if the sink shifts a hair. Mark those points on the front edge of your template.
Now measure how deep the notch goes. Notch depth equals the front overhang of the countertop minus the distance from the cabinet face to the front face of the sink apron. Top overhangs 1-1/2 inches, sink sits flush with the cabinet face: notch is 1-1/2 inches deep. Sink protrudes 1/16 inch proud: notch is 1-9/16 inches deep.
Show this on the template by physically cutting the notch out of the front edge of the template material. The template should read like the finished stone from above: full width across the back, full profile on both sides of the sink, and a rectangular chunk missing at the front center where the sink face lives.
If the countertop gets an edge profile (ogee, bullnose, eased), the profile stops at each edge of the notch and usually wraps the inside corners with a simple eased or pencil edge. Mark the profile limits. Some fabricators use two colors: black for the cut line, red for the profile limit.
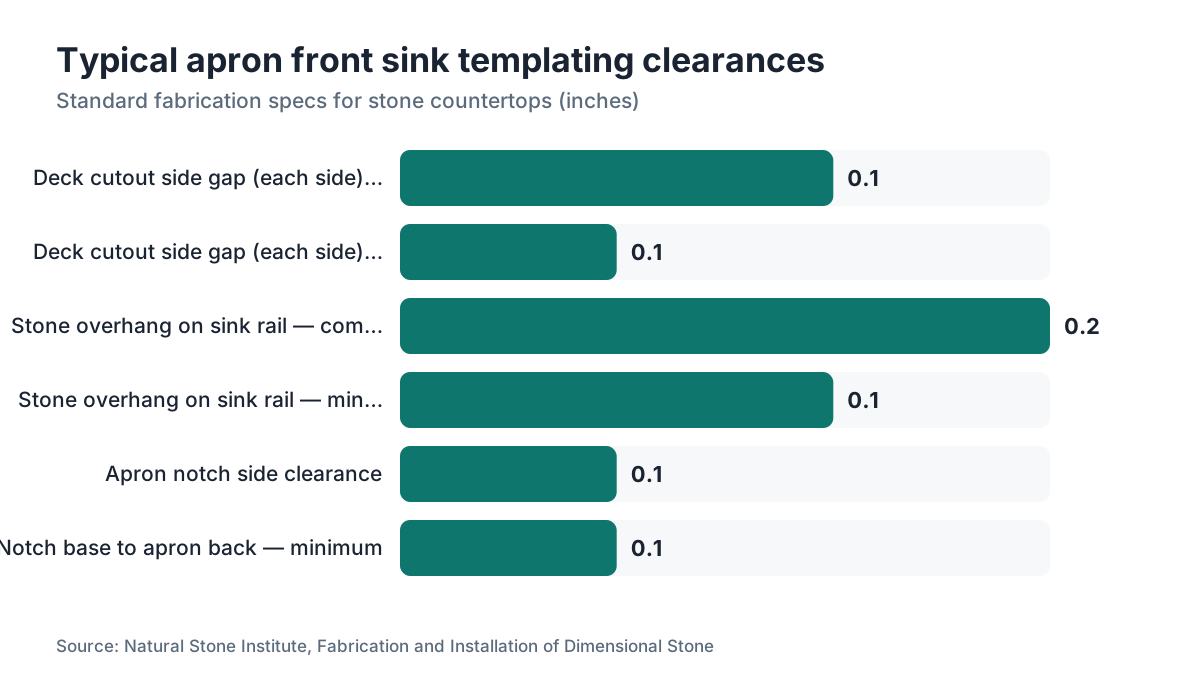
What clearances and reveals should you specify?
Clearances are small numbers with large consequences. Here are the values most stone shops run, and where they come from.
Sink-to-stone side gap at the deck cutout: 1/16 to 1/8 inch per side. That leaves room for caulk and minor movement. Too tight and the stone touches the sink rail. Too loose and the caulk bridge looks sloppy or fails.
Stone overhang on the sink deck rail: 3/16 inch is the common default. Some installers prefer 1/4 inch for a heavier look. The minimum overhang that gives you a reliable caulk bead is about 1/8 inch.
Apron notch side clearance: 1/16 inch per side. Bump it to 1/8 inch for cast iron, since cast iron moves more with temperature than fireclay or stainless.
Front edge of stone to back of sink apron, at the notch base: the stone should not touch the back of the apron. Leave at least 1/16 inch. That gap gets caulked after install.
Corner radii at the deck cutout: match the sink's inside radius or add 1/16 inch. Undershoot the radius and the stone contacts the corner, then chips under install torque.
Reveal at the front edge, between stone deck and sink deck rail: most designers want zero visible gap, stone overlapping the rail. If the rail isn't visible, the reveal spec doesn't matter, but the overlap still has to be enough to carry the stone.
| Dimension | Common spec | Minimum | Note |
|---|---|---|---|
| Deck cutout side gap (each side) | 1/8 in | 1/16 in | Allows caulk, minor movement |
| Stone overhang on sink rail | 3/16 in | 1/8 in | More = better caulk bed |
| Apron notch side clearance | 1/16 in | 1/16 in | More for cast iron |
| Notch base-to-apron back | 1/16 in | 1/16 in | Caulked after install |
| Inside corner radius at cutout | Match sink or +1/16 in | Match sink | No undershoot |
How do you template around corbels or support ledgers?
Apron front sink countertops often need under-counter support, because the stone front edge hangs in space where the cabinet face frame used to be. Your options are wood corbels, steel brackets, or a continuous wood ledger screwed to the inside of the cabinet box.
The template job is to document the support geometry so the shop knows where support lands relative to the cutout. Measure and mark where each corbel sits: distance from the left end, corbel width, corbel depth front to back. For a continuous ledger, note its width and confirm it clears the sink basin below.
If corbels are exposed and decorative, their tops have to be coplanar with the rest of the cabinet top rails. Check with winding sticks before templating. A corbel sitting 1/16 inch high becomes a stress riser under the stone. The shop can grind the stone a touch for fit, but fixing the corbel before the stone arrives beats that every time.
For wide apron sinks (36 inches or more) in natural stone, some fabricators spec a steel angle bracket spanning the full sink width inside the cabinet. Suggest it to the client when the front edge span runs over 30 inches in material thinner than 3 cm. Quartzite and marble crack at cantilevered front edges more readily than granite. Material drives the support spec, which is why you review the stone choice before you finalize the template. Softer stones on kitchen countertops need more care here.
If your shop runs a digital quoting and nesting workflow, annotate any unusual support configuration clearly so the programmer or shop lead doesn't misread the file. Software like SlabWise lets you attach a note or photo to a specific piece in the job, so the support spec stays tied to the right template piece instead of floating on a separate paper trail.
How do you handle wall scribing and backsplash on an apron front sink template?
Wall scribing for an apron front sink is the same as any other countertop. Set a compass to the widest gap between the template back edge and the wall, scribe the template to capture the wall's irregularity, then transfer that line to the stone in the shop.
The wrinkle with apron front sinks: the back edge near the sink is often where the heaviest cabinet mods happened. Contractors sometimes fur out the sink cabinet differently from the neighbors to make room for the sink depth, and that can shift the counter run depth by 1/4 inch or more over 6 inches of run. Check run depth at three points across the sink section: left, center, right. If they vary by more than 1/16 inch, you have a scribing situation.
For backsplashes behind an apron front sink, measure splash height from the sink deck surface, not the countertop deck. Many apron front sinks sit with their deck 1/4 to 1/2 inch above or below the adjacent countertop, depending on how the cabinet was built. A backsplash that lines up on the left but misses on the back of the sink reads as a defect. Capture both deck heights and note the delta on the template.
If wall tile is already up behind the sink and the new countertop has to meet it, capture the tile face as a separate reference line on the template. Stone-to-tile transitions are almost always caulked, not mitered, so build the caulk gap into the back dimension.
What are the most common templating mistakes that lead to cracked or misfit stone?
Every experienced fabricator carries a mental list of the mistakes they've made or fixed for someone else. Here are the ones that hit apron front jobs most.
No sink in hand. Templating off a spec sheet with no sink present is the single biggest source of apron front callbacks. Fireclay sink tolerances can run plus or minus 1/4 inch on overall dimensions. That's enough to shove the apron notch out of position or squeeze the deck cutout too tight.
Wrong reference for the notch depth. Measure notch depth from the countertop front edge, never from the cabinet face frame. If there's any overhang and you forget to add it, the notch comes out too shallow and the stone won't clear the sink face.
Ignoring the front-edge free span. The stone cantilevers over the front of the sink. Spans over 24 inches in 3 cm stone, or over 18 inches in 2 cm, need front-edge support. Leave that off the template and the shop never knows to flag it.
Square inside corners on a radiused sink. If the sink has a 1/4-inch inside radius at the deck ledge corners and the fabricator cuts them square, the stone contacts the sink at those corners. Stress piles up there, and the stone can crack on install or days later. Measure and mark the corner radius, always.
Skipping the coplanarity check. A template built on a twisted cabinet produces a stone that rocks. Even 1/16 inch of twist across a 36-inch span can crack stone under the load of install clips or daily use.
No photos in situ. When a question comes up later about whether the template was right, photos of the template on the cabinet with the sink in place are the only evidence you'll have.
How does stone type affect your templating decisions?
Material choice changes a few things you document on the template.
Granite at 3 cm is forgiving. It handles the front edge cantilever reasonably well up to about 30 inches, and its internal consistency is high, so a clean template usually yields a clean fit. For granite countertops, the templating demands match any undermount job, with the apron notch added on top.
Marble and quartzite are stronger in compression than tension, the standard caveat for cantilevered stone edges. On a marble countertops job with an apron front sink, document the front edge span in millimeters, not a note that reads 'needs support.' Give the shop a number. If the free span runs over 450 mm (roughly 18 inches), the shop can decide between kerf-and-rod reinforcement, a steel bracket, or a thicker material spec.
Engineered quartz, including Cambria countertops, generally flexes well, but each brand publishes maximum unsupported spans. Cambria's installation guide specifies maximum unsupported spans and calls for support within 6 inches of a sink cutout [1]. Capture the support plan on the template file.
Butcher block is an odd choice for an apron front surround, but it shows up in renovation work. If you're templating butcher block countertops for an apron front sink, add an expansion gap note, because wood moves across the grain with humidity. A wood top pinned tight against a fireclay sink face will cup or crack in winter when the heat kicks on.
For any material, note the finished thickness on the template. A deck ledge built for 3 cm stone won't carry 2 cm stone at the right height. The top surface ends up sitting 1 cm low against the adjacent counters.
How do fabricators transfer the template to the slab accurately?
Once the template is back in the shop, the transfer is where a good template can still go wrong.
For luan templates, lay the template on the slab and trace it with a fine marker. Check that the template sits flat. A luan template that bowed in transport gives you a distorted trace, so weight it flat or clamp it before you trace.
Mark orientation on both the template and the slab: which edge is the front, which is the wall side. The cutout labels should read correctly when the slab is oriented the way it installs. Get this backwards and you cut a mirror-image piece that doesn't fit.
For the apron notch, use a square to carry the notch lines exactly perpendicular to the front edge. The notch is almost always meant to be square, and a freehand trace drifts. An 1/8-inch drift on notch width means a visible gap on one side of the sink face, or the stone binds on the other side.
For CNC shops, the template data goes into programming software either as a traced file from a digital templater or as a hand-digitized drawing. Either way, the programmer needs the reveal dimensions, corner radii, and edge profile limits called out plainly. A dimension penciled on a luan template doesn't always survive the trip from field to shop floor, so photograph or scan every luan template before it gets cut.
Installing an apron front piece takes two or three people minimum, because the notch kills the usual front-to-back slide-in. Document the install sequence on the shop ticket so the crew knows what's coming. Countertop installation for apron fronts almost always means lowering the stone in from above instead of sliding it forward.
What should homeowners know before the templater arrives?
If you're a homeowner waiting on a templating visit, a few things you handle before the templater shows up will directly change how well the job goes.
Have the sink on site. Not ordered. Not 'en route.' On site, uncrated, and sitting in the cabinet opening. If the sink isn't there, a good templater either reschedules or templates to the spec sheet and notes the tolerance risk. Both cost you time or money.
Confirm the cabinet is done. The sink cabinet should be fully installed, shimmed level, and fastened to the cabinets next to it. A cabinet that's out of square or out of level at templating will still be out of square when the stone shows up, and the stone won't fit right.
Know the edge profile you want before the templater arrives. The profile drives how the shop handles the inside corners of the apron notch and whether any mitered returns are needed. Change the profile after templating and you're usually looking at a change order.
Ask the templater to walk you through every measurement they capture. You don't need to follow all of it, but you should hear the front edge reveal spec and the apron notch clearance read back out loud. If a number sounds wrong, say so. Templaters are human. A fresh set of ears has caught plenty of mistakes.
If your shop uses SlabWise or similar quoting software, the template data feeds straight into the job quote and the cut file. When your fabricator shows you the digital layout before cutting, spend a few minutes on it. Confirm the notch and cutout on screen match what you pictured.
Frequently asked questions
Do I need the actual sink on site before templating, or can you template from specs?
You need the sink on site. Fireclay and cast iron sinks carry manufacturing tolerances up to plus or minus 1/4 inch on overall dimensions. Templating off a spec sheet alone risks an apron notch in the wrong position or a deck cutout that's too tight or too loose. Most fabricators will either reschedule or note a tolerance disclaimer if the sink isn't present.
How long does it take to template an apron front sink countertop?
An experienced templater takes 45 to 90 minutes for a typical kitchen with an apron front sink, versus 30 to 60 minutes for a standard undermount. The extra time goes into capturing the front-face datum, laying out the apron notch, checking cabinet coplanarity, and verifying the support plan. A digital templating system saves maybe 15 minutes over analog luan strips on this type of job.
What is the standard reveal between the stone and the sink deck rail?
Most fabricators spec a 3/16-inch stone overhang on the sink deck rail, with 1/8 inch as the minimum for a reliable caulk bead. The goal is for the stone to cover the rail completely so none of it shows from above, which also gives the caulk line something solid to bed against.
How deep should the apron notch cut be in the stone's front edge?
Notch depth equals the countertop front overhang past the cabinet face plus how far the sink face sits proud of that face (or minus how far it sits recessed). Top overhangs 1-1/2 inches and the sink is flush with the frame: notch is 1-1/2 inches deep. Add at least 1/16 inch clearance so the stone doesn't bind on the sink face.
Does an apron front sink countertop need corbels or extra support?
For front edge free spans over about 24 inches in 3 cm stone, or over 18 inches in 2 cm, extra support is strongly recommended. Options include wood corbels, steel angle brackets, or a continuous ledger inside the cabinet. Quartzite and marble need support at smaller spans than granite, because they crack more readily under tension at cantilevered edges.
What corner radius should the sink cutout have?
Match the inside corner radius of the sink's deck ledge, or add 1/16 inch. Never undercut the radius, meaning never cut a smaller radius than the sink has. If the stone's inside corner is sharper than the sink's corner, the stone contacts the sink at that point, stress concentrates there, and the stone can crack on install or under daily use.
Can you template an apron front sink on an already-tiled backsplash?
Yes, but capture the tile face position as a separate reference line on the template. Measure backsplash height from the sink deck surface, not from the adjacent countertop deck, because the two heights may differ. The stone-to-tile joint is typically caulked, so build a caulk gap into the back dimension instead of assuming a tight fit.
What happens if the cabinet top isn't level or coplanar when you template?
A stone piece templated to a twisted or out-of-level cabinet will rock or stress crack after install. Check coplanarity with winding sticks across the cabinet top rails before you capture any dimensions. If the rails are off by more than 1/16 inch, document it and ask the installer or carpenter to correct the cabinet before the stone arrives.
How do you handle the edge profile at the inside corners of the apron notch?
The decorative edge profile (ogee, bullnose, eased) stops at the notch corners and wraps the inside face of the notch with a simpler profile, usually eased or pencil. Mark the profile-limit points on the template in a different color than the cut line. Tell the edge polisher directly, because it's easy to run the profile wheel past the limit by accident.
What's the difference between templating for a fireclay sink versus a stainless steel apron front sink?
Fireclay sinks have larger manufacturing tolerances (up to 1/4 inch) and more weight, so you confirm cabinet support and the actual sink has to be on site at templating. Stainless steel apron sinks are dimensionally tighter and lighter. For cast iron, add 1/8 inch clearance at the apron notch sides instead of the standard 1/16 inch to allow for greater thermal expansion.
How do you template when there are two sinks in one apron (double-basin farmhouse sink)?
The approach is identical. The apron notch and deck cutout are sized to the full outside dimensions of the sink's deck rails. The divider between the two basins is internal to the sink and doesn't affect the stone cutout. Confirm the total deck cutout width from the manufacturer's rough-in drawing and double-check against the actual sink, since double-basin apron sinks vary widely by brand.
Can a homeowner template their own apron front sink countertop?
A careful homeowner can produce a usable cardboard template for a laminate or butcher block top. For stone, most fabricators require a professional template, because the cost of a mis-cut granite or quartz slab, typically $400 to over $1,000 in material alone, dwarfs the templating fee. If you do template yourself, photograph every measurement and have the fabricator verify before cutting.
How much extra does it cost to template an apron front sink compared to a standard undermount?
Most fabricators charge $50 to $150 more for an apron front sink template than a standard undermount, reflecting the extra site time and the risk of a costly error. Some shops fold the upcharge into the overall job price rather than breaking it out. Ask for the itemized quote so you know what you're paying for.
Sources
- Cambria, Installation Guide for Stone Surfaces: Cambria's published installation guide specifies maximum unsupported spans and requires support within 6 inches of a sink cutout.
- National Kitchen and Bath Association (NKBA), Kitchen Planning Guidelines: NKBA planning guidelines address sink placement relative to cabinet face frames and countertop overhang standards in kitchen design.
- Natural Stone Institute, Dimension Stone Design Manual: Natural Stone Institute design manual addresses maximum unsupported spans for countertop stone and fabrication tolerances for cutouts.
- OSHA, Crystalline Silica standard for construction and general industry: OSHA silica rule applies to stone fabrication shops; relevant to shop operations context for stone cutting and template-to-slab transfer.
- U.S. Consumer Product Safety Commission: CPSC standards relevant to sink and countertop installation safety requirements referenced in fabrication context.
- American National Standards Institute (ANSI), ANSI A112.19.2, Vitreous China Plumbing Fixtures: ANSI A112.19.2 sets dimensional tolerance standards for vitreous china and fireclay sink fixtures, relevant to the manufacturing tolerance discussion.
- Natural Stone Institute, Fabrication and Installation of Dimensional Stone: Industry standard reference for stone cutout tolerances, edge profiles, and support requirements in countertop fabrication.
- University of Minnesota Extension, Kitchen Planning and Design Principles: Extension resource on kitchen countertop design principles including sink placement and surface planning.
- International Code Council (ICC), International Residential Code: IRC structural requirements inform load-bearing considerations relevant to countertop support corbels and cabinet modifications for apron front sinks.
Last updated 2026-07-10